Disclaimer: This article is for educational and informational purposes only. It does not constitute financial or investment advice. Trading forex and CFDs carries significant risk of loss. Past performance of any strategy — including backtests — does not guarantee future results. Never trade with money you cannot afford to lose.
What Is This Strategy?
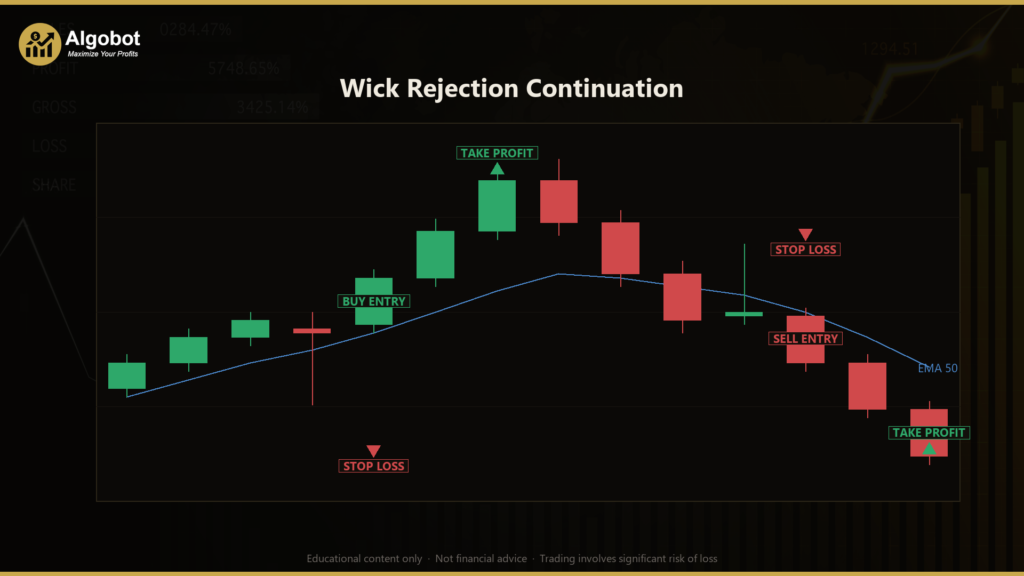
The Wick Rejection Continuation strategy is a trend-following approach built around an Exponential Moving Average (EMA) — a type of moving average that gives more weight to recent prices — combined with candlestick wick analysis. Rather than trying to call market tops and bottoms, it waits for an established trend and then looks to join that trend after a temporary pullback fails. In short, it is a "buy the dip in an uptrend, sell the rally in a downtrend" concept, executed with strict, rule-based conditions.
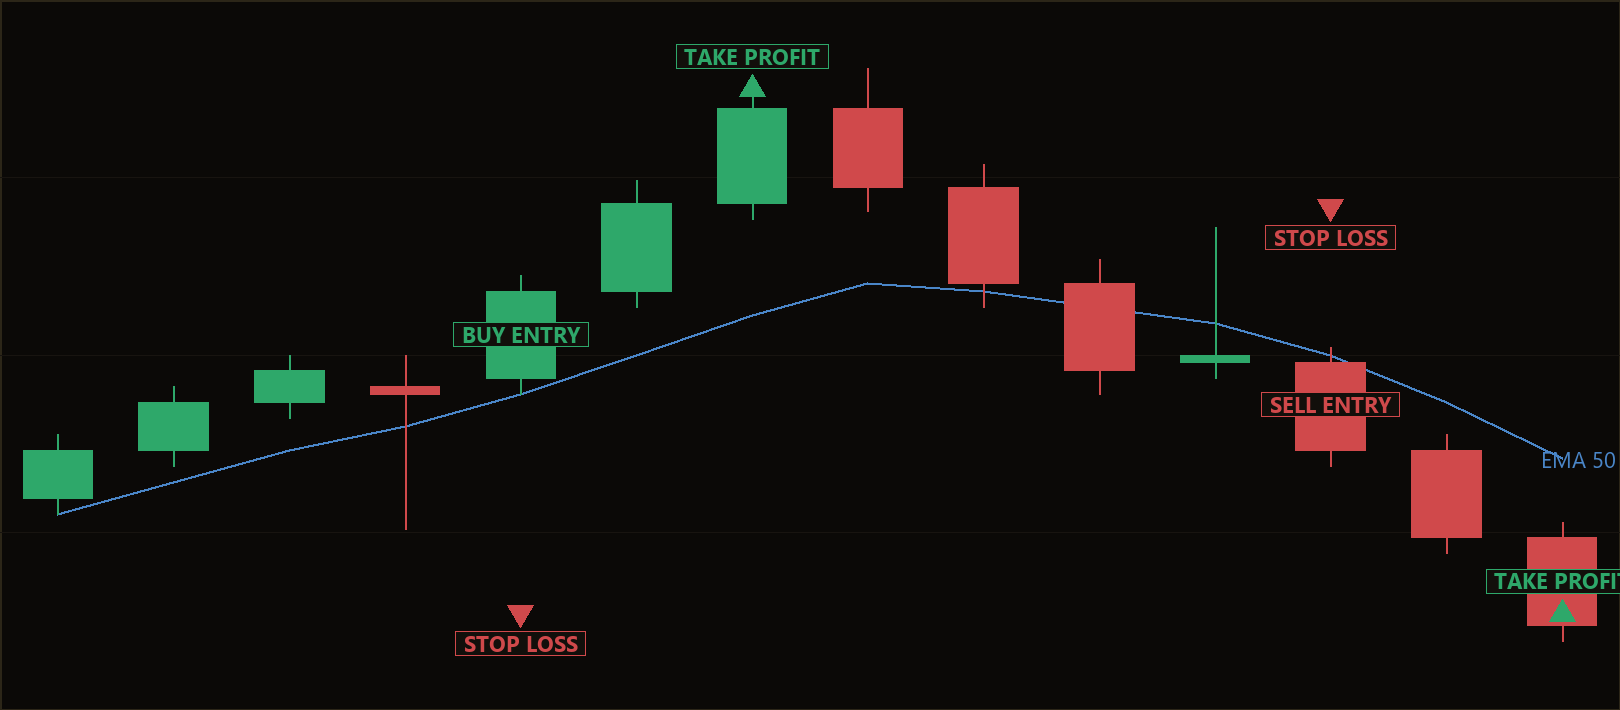
The core observation behind the strategy is simple: in a healthy trend, price does not move in a straight line. It periodically drifts back toward its moving average before the dominant direction reasserts itself. When a pullback candle dips to (or slightly through) the EMA but is firmly rejected — leaving a long tail or "wick" and closing back on the trend side — that pullback has arguably failed. The strategy interprets this rejection as a sign that the prevailing trend may be resuming, and it enters a position in the direction of that trend.
This makes the strategy most suitable as a learning tool for traders who want to study trend-continuation logic, candlestick rejection patterns, and structured trade management. It is important to understand that entries are always aligned with the existing EMA trend — this is not a reversal or counter-trend play. If you are studying how automated systems filter for trend direction and combine that filter with a price-action trigger, this strategy is a clean, readable example.
How It Works
The strategy evaluates its rules on each newly completed bar and manages open trades on every tick. Here is the logic in plain English.
Trend filter (the context):
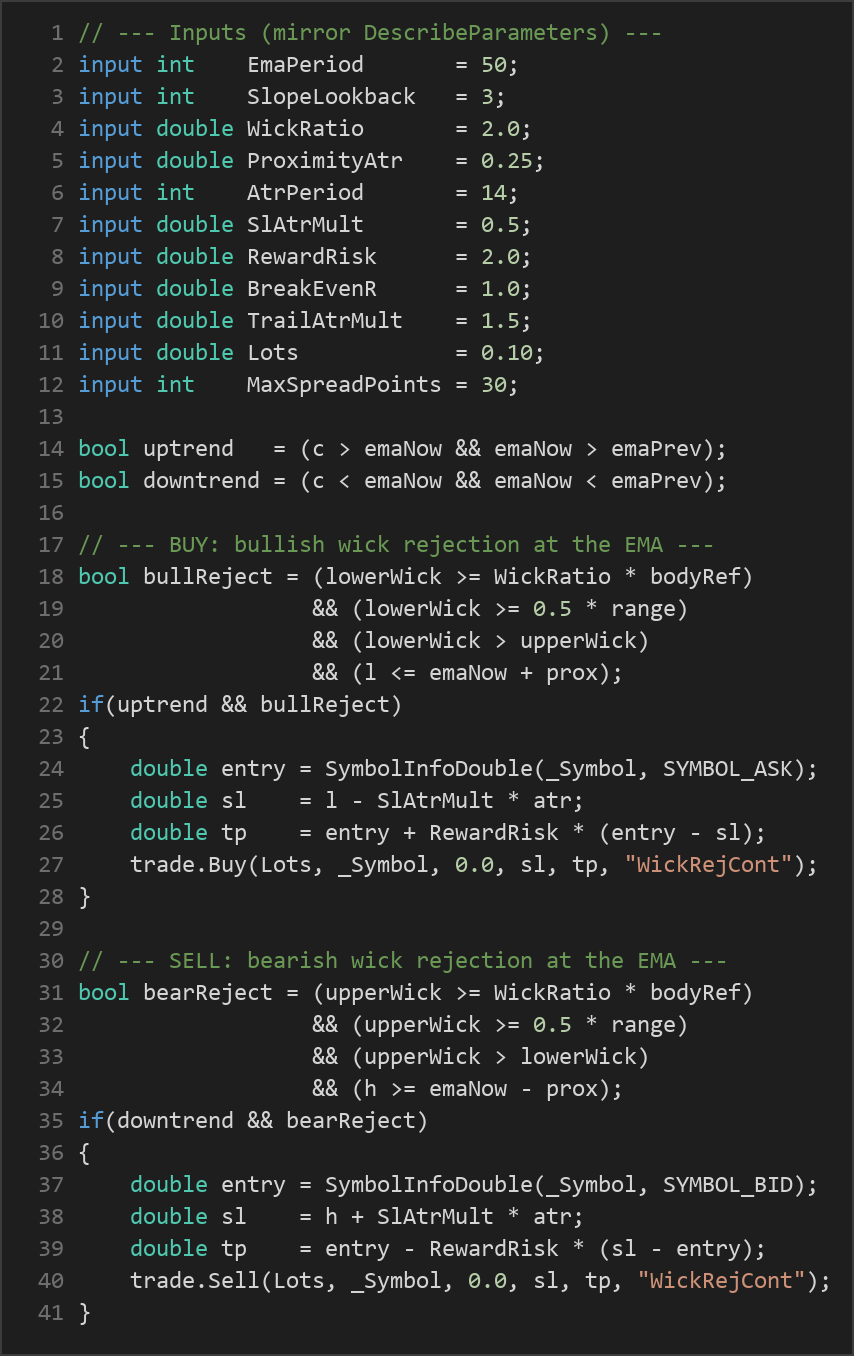
- An uptrend is confirmed when the signal bar closes above the EMA, and the EMA itself is rising (its current value is above its value from a few bars ago).
- A downtrend is confirmed when the signal bar closes below the EMA, and the EMA is falling.
- If neither condition is met, no trade is considered.
Entry trigger — bullish rejection (for longs):
- The bar's lower wick (the tail below the candle body) must be at least
WickRatiotimes the size of the candle body — signalling strong buying pressure that pushed price back up. - The lower wick must also be at least half of the candle's total range.
- The lower wick must be larger than the upper wick, confirming the rejection came from below.
- The bar's low must have reached near or into the EMA, within a proximity buffer measured in ATR (Average True Range, a common measure of volatility).
Entry trigger — bearish rejection (for shorts): The mirror image — a dominant upper wick that rejects price near the EMA while the trend is down.
Stop-loss logic:
- For a long trade, the stop-loss is placed just below the signal bar's low, padded by
SlAtrMultmultiplied by the current ATR. This positions the stop beyond the rejecting wick, where the trade idea would be invalidated. - For a short trade, the stop is placed just above the signal bar's high, padded the same way.
Take-profit logic:
- The distance from entry to stop is defined as the "risk." The take-profit is set at a fixed multiple of that risk, controlled by
RewardRisk. With the default of 2.0, the strategy targets twice the amount it is risking.
Trade management:
- Break-even lock: Once price moves in the trade's favour by
BreakEvenRmultiples of the initial risk, the stop-loss is moved to the entry price, reducing exposure on that position. - ATR trailing stop: After the break-even move, a trailing stop follows price at a distance of
TrailAtrMulttimes ATR, and only ever tightens — it never loosens. - One position at a time: The strategy holds a single position per symbol and skips new entries while a trade is open. A spread filter also blocks entries when the spread exceeds
MaxSpreadPoints.
Strategy Parameters
| Parameter | Default | Min | Max | Description |
|---|---|---|---|---|
| EmaPeriod | 50 | 10 | 200 | Number of bars used to calculate the trend EMA. |
| SlopeLookback | 3 | 1 | 20 | How many bars back to measure EMA slope for confirming trend direction. |
| WickRatio | 2.0 | 1.0 | 5.0 | Minimum size of the rejecting wick relative to the candle body. |
| ProximityAtr | 0.25 | 0.0 | 1.5 | How close (in ATR) the wick must reach toward the EMA to qualify. |
| AtrPeriod | 14 | 5 | 50 | Number of bars used to calculate the ATR volatility measure. |
| SlAtrMult | 0.5 | 0.0 | 3.0 | Extra stop-loss padding beyond the wick, measured in ATR. |
| RewardRisk | 2.0 | 0.5 | 5.0 | Take-profit multiple of the initial risk distance. |
| BreakEvenR | 1.0 | 0.25 | 3.0 | Profit (in R multiples) required before moving the stop to break-even. |
| TrailAtrMult | 1.5 | 0.5 | 5.0 | Trailing-stop distance from price, measured in ATR. |
| Lots | 0.10 | 0.01 | 1.0 | Fixed trade volume in lots. |
| MaxSpreadPoints | 30 | 0 | 200 | Maximum allowed spread (in points) before an entry is skipped. |
Recommended Chart Settings
The Wick Rejection Continuation strategy is designed to run on a single timeframe — whichever timeframe you attach it to becomes its working chart. Trend-continuation logic of this style is commonly studied on intraday charts such as the M15, M30, or H1 timeframes, and on liquid instruments with tight spreads such as major forex pairs (for example EUR/USD or GBP/USD). The spread filter and ATR-based stops make it best suited to markets where volatility is reasonably consistent.
That said, no timeframe or symbol is inherently "correct." The default EMA period of 50 and ATR period of 14 are starting points, not optimised values. Results will vary considerably across different instruments, sessions, and market conditions, and any settings should be studied on a demo account before drawing conclusions.
How to Install on MetaTrader 5
- Download the .ex5 file from the link below
- Copy it to your MT5
MQL5\Expertsfolder - Restart MetaTrader 5 or refresh the Navigator panel
- Drag the EA onto a chart matching the recommended symbol and timeframe
- Configure the input parameters and enable Algo Trading
What to Consider Before Using This EA
Strengths of the approach. The strategy has a clear, logical structure: it only trades with the prevailing trend, it requires a specific price-action trigger rather than entering blindly, and it defines risk before every trade with an objective stop-loss. The break-even lock and ATR trailing stop introduce a disciplined exit framework that many discretionary traders struggle to apply consistently. As an educational example, it demonstrates how a trend filter, an entry trigger, and trade management can be combined into a single ruleset.
Known limitations. Like all trend-continuation systems, this strategy depends on trends actually continuing. In choppy, range-bound, or sideways markets, the EMA slope may flip back and forth, producing entries that are quickly stopped out — a common failure mode known as "whipsaw." Because it requires a specific wick pattern near the EMA, valid trends may also pass without ever generating a qualifying signal, meaning the strategy can sit idle for long stretches. The fixed reward-to-risk target can cut winning trades short when a trend runs much further than expected, while the ATR trailing stop may exit prematurely during volatile pullbacks.
Conditions where it may underperform. News-driven spikes, low-liquidity sessions, and instruments with wide or unstable spreads can all degrade the pattern's reliability. The strategy uses a fixed lot size, so it does not automatically scale risk to account equity or to the distance of the stop. Anyone studying it should treat it as a framework to understand and test, not a finished system to deploy unexamined.
Risk Management Tips
Sound risk management matters far more than any single entry signal. Consider the following general principles as you study this or any strategy:
- Risk a small, fixed percentage per trade. Many educational sources suggest risking no more than 1–2% of account equity on any single position, so that a string of losing trades does not cause severe damage.
- Size positions deliberately. The default fixed lot size does not adjust to your account or stop distance. Learning to calculate position size from your intended risk percentage and stop-loss distance is a foundational skill.
- Test on a demo account first. Run the strategy in a simulated environment across different market conditions before considering any live use. This helps you understand its behaviour, its drawdowns, and its quiet periods.
- Understand drawdown. Every strategy experiences losing streaks. Knowing the historical depth and duration of drawdown helps set realistic expectations and prevents abandoning a system at the worst possible moment.
- Keep leverage modest. Leverage magnifies both gains and losses. Conservative leverage gives your account room to survive normal volatility.
Treat these tips as education, not instruction — your own circumstances, risk tolerance, and jurisdiction should shape how you approach trading.
Risk Warning
Trading foreign exchange, CFDs, and other leveraged financial instruments involves substantial risk of loss and is not suitable for all investors. The strategies and tools discussed on this page are provided for educational purposes only and do not constitute financial advice, investment recommendations, or solicitation to trade. Always consult a qualified financial adviser before making trading decisions. Past backtest performance is not indicative of future results.
Downloads
- Expert Advisor: WickRejectionContinuation.ex5 (64 downloads)
- Source Code: WickRejectionContinuation.mq5 (65 downloads)
- Documentation: WickRejectionContinuation.pdf (70 downloads)