Disclaimer: This article is for educational and informational purposes only. It does not constitute financial or investment advice. Trading forex and CFDs carries significant risk of loss. Past performance of any strategy — including backtests — does not guarantee future results. Never trade with money you cannot afford to lose.
What Is This Strategy?
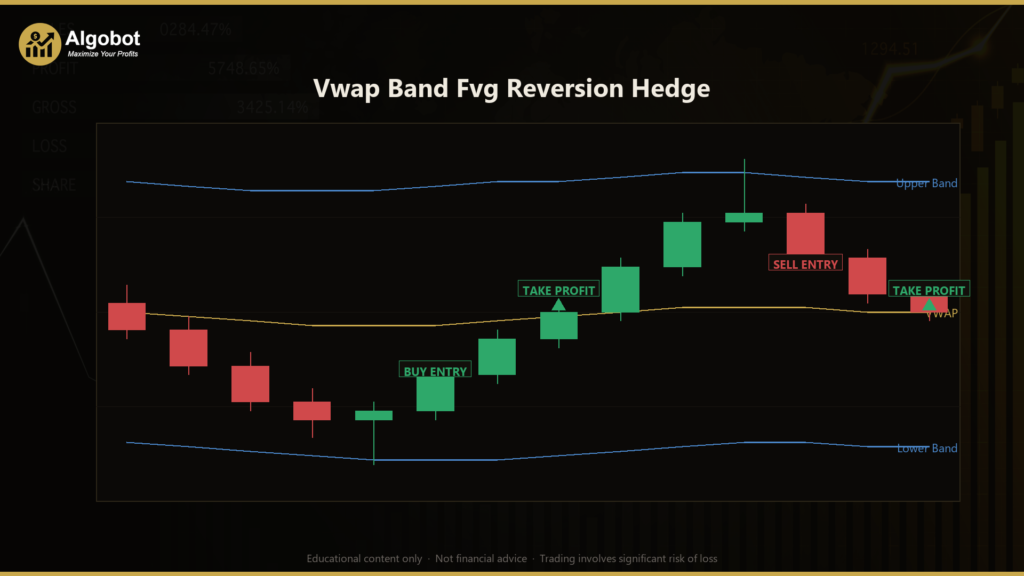
The Vwap Band Fvg Reversion Hedge is a pure price-action expert advisor (EA) for MetaTrader 5 built around a session-anchored VWAP (Volume-Weighted Average Price) core with volume-weighted standard-deviation bands, a mean-reversion trading style, and a protective breakout hedge. VWAP is the average price a market has traded at over a session, weighted by volume, and it is widely treated as a "fair value" reference line that price tends to rotate around during balanced, range-bound conditions.
Unlike many EAs that lean on packaged indicators, this strategy computes everything from raw price and tick volume. It re-anchors VWAP at the start of each UTC calendar day, builds dynamic upper and lower bands from a volume-weighted deviation, and then waits for price to stretch to a band and snap back. Confirmation is drawn from classic candlestick patterns (bullish/bearish engulfing and pin-bar rejections), Fair Value Gaps (FVGs) — three-bar price imbalances often associated with institutional order flow — and swept support/resistance levels. Only when these elements line up in confluence does the strategy signal a fade back toward VWAP.
This EA is best understood as a learning tool for traders studying mean reversion, VWAP-based fair-value analysis, and structured risk recovery. It is well suited to those who want to see how candlestick confirmation, FVGs, and statistical bands can be combined in code, and how a strategy can attempt to manage a failed reversion with an opposite hedge rather than simply absorbing a stop-out. It is not a "set and forget" product and should be studied, tested, and understood before any live consideration.
How It Works
The strategy acts once per completed bar on a single timeframe. Each new bar updates the VWAP accumulators and re-evaluates the market context. Here is the logic in plain English:
- VWAP and bands: A volume-weighted average price is accumulated across the session and re-anchored every UTC day. A volume-weighted variance produces a standard deviation, and the bands are placed at
VWAP ± (BandSigma × standard deviation). The default of 2.0 standard deviations marks a statistically stretched level. - Session warm-up: The strategy waits until at least
SessionMinBarsbars have formed in the current session and until enough history exists for the lookback window before evaluating any signals. This avoids acting on an immature VWAP. - Average range: A manual ATR-style average candle range over the
RangeLookbackwindow is used to scale momentum, stop-loss buffers, and targets to current volatility.
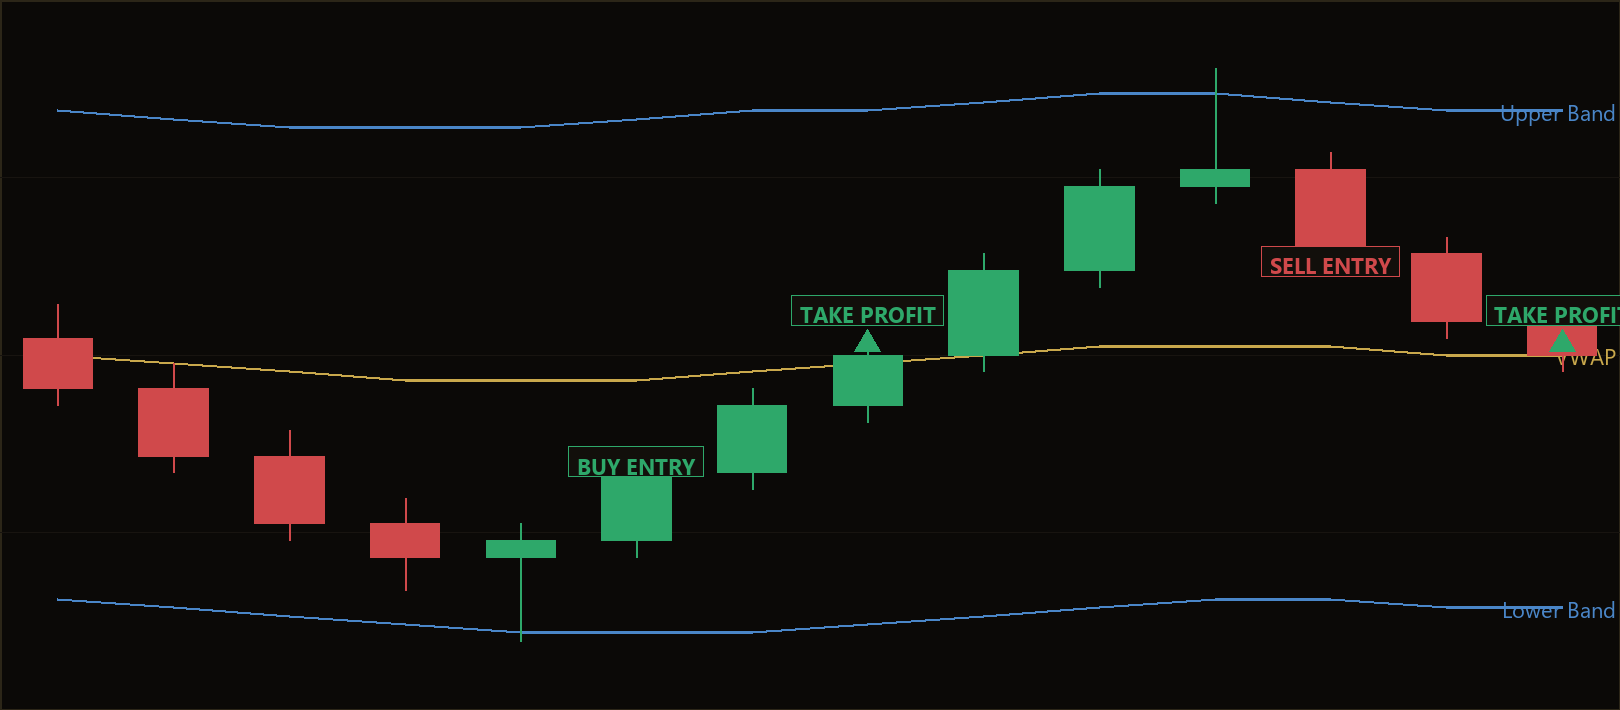
Long (BUY) fade signal — the strategy signals a buy when all of these align:
- Price stretches to or below the lower band.
- A bullish reversal candle appears: either a bullish engulfing pattern with a body large enough to count as momentum, or a bullish pin bar (long lower wick rejecting lower prices).
- There is confluence with either a bullish Fair Value Gap (a three-bar upward imbalance) or price tagging the prior support level from the lookback window.
- The signal candle closes back above the lower band, indicating the snap-back has begun.
Short (SELL) fade signal — the mirror image:
- Price stretches to or above the upper band.
- A bearish reversal candle appears: a bearish engulfing with momentum, or a bearish pin bar (long upper wick).
- Confluence with a bearish Fair Value Gap or a tagged resistance level.
- The candle closes back below the upper band.
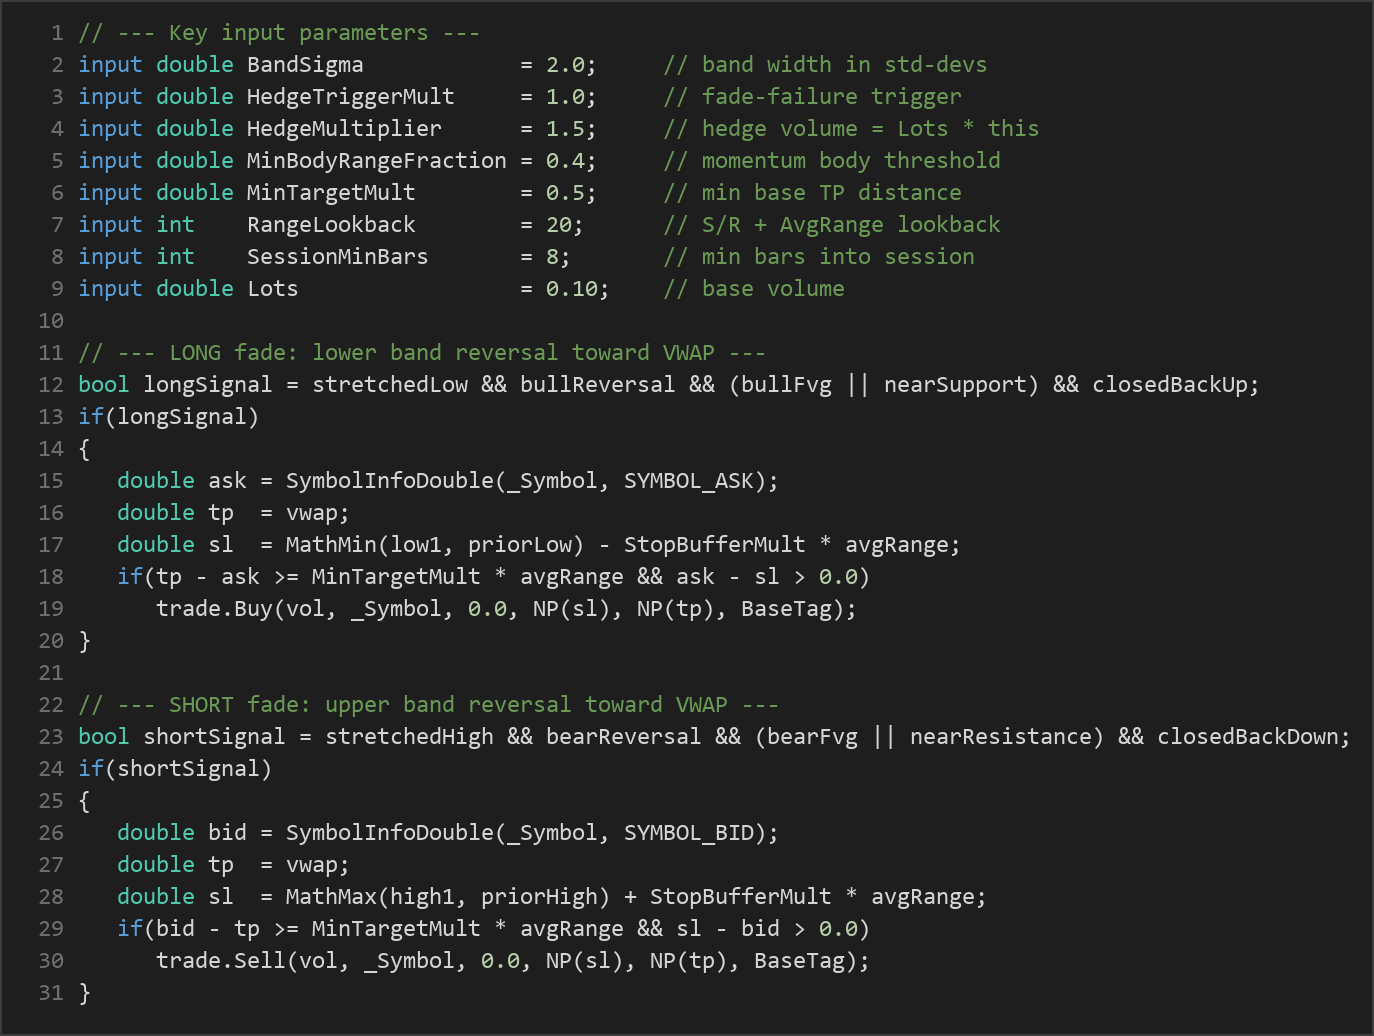
Take-profit (base trade): The target for the fade is VWAP itself — the statistical mean the strategy expects price to rotate toward. A trade is only taken if the distance from entry to VWAP is at least MinTargetMult × average range, filtering out setups with too little room to the mean.
Stop-loss (base trade): For a long, the stop is placed below the lower of the signal candle's low and the prior support, minus a StopBufferMult × average range cushion. For a short, it sits above the higher of the signal candle's high and prior resistance, plus the same buffer.
The hedge logic: If the fade fails — meaning price closes well beyond the entry band (further than HedgeTriggerMult × average range), suggesting a trend day rather than a rotation — the strategy opens an opposite hedge position sized at Lots × HedgeMultiplier. The hedge targets a continuation move of HedgeTargetMult × average range in the breakout direction, while its stop is set back at the original VWAP reference as a recovery level. The base trade is allowed to take its small loss while the hedge attempts to ride the breakout. A new base trade is only opened when the account is completely flat on this magic number, so only one cycle runs at a time.
Strategy Parameters
| Parameter | Default | Min | Max | Description |
|---|---|---|---|---|
| BandSigma | 2.0 | 1.0 | 3.0 | Band width in standard deviations from VWAP. Higher values demand a more extreme stretch before a fade is considered. |
| HedgeTriggerMult | 1.0 | 0.25 | 2.5 | How far beyond the entry band (in average ranges) price must close before the fade is judged to have failed and a hedge is opened. |
| HedgeMultiplier | 1.5 | 1.0 | 3.0 | Hedge volume as a multiple of the base lot size. |
| HedgeTargetMult | 2.0 | 0.5 | 4.0 | Hedge take-profit distance, in average ranges, in the continuation direction. |
| StopBufferMult | 0.5 | 0.1 | 2.0 | Extra stop-loss buffer (in average ranges) beyond the signal candle and S/R level. |
| MinBodyRangeFraction | 0.4 | 0.1 | 1.0 | Minimum candle body, as a fraction of average range, for a candle to count as a momentum reversal. |
| MinTargetMult | 0.5 | 0.1 | 2.0 | Minimum distance from entry to VWAP (in average ranges) required to take a base trade. |
| RangeLookback | 20 | 5 | 60 | Number of bars used for support/resistance detection and the average-range calculation. |
| SessionMinBars | 8 | 3 | 40 | Minimum bars into the session before any trade is allowed, letting VWAP mature. |
| Lots | 0.10 | 0.01 | 1.0 | Base trade volume in lots. |
A Magic number input (default 540231) is also used internally to identify and group the EA's own positions; leave it unique per chart if you run multiple EAs.
Recommended Chart Settings
This strategy is session-anchored to the UTC trading day, which makes it most coherent on intraday timeframes such as M15 or M30, where a meaningful number of bars form within a single session and VWAP has time to develop. It was designed around liquid instruments with reliable tick volume — major forex pairs (for example EUR/USD or GBP/USD) and similar high-liquidity markets are natural candidates for study.
Because VWAP, the bands, and the average-range scaling all adapt to the instrument's volatility and volume profile, behavior will differ noticeably between symbols and across changing market conditions. Treat any chosen symbol and timeframe as a starting point for your own testing rather than a fixed recommendation, and always validate on the exact instrument and broker feed you intend to use.
How to Install on MetaTrader 5
- Download the
.ex5file from the link below. - Copy it to your MT5
MQL5\Expertsfolder. - Restart MetaTrader 5 or refresh the Navigator panel.
- Drag the EA onto a chart matching the recommended symbol and timeframe.
- Configure the input parameters and enable Algo Trading.
What to Consider Before Using This EA
Mean-reversion strategies like the Vwap Band Fvg Reversion Hedge have clear strengths and equally clear limitations, and an honest assessment of both helps you study it well.
Strengths of this approach:
- It is grounded in a widely respected reference (VWAP) and only acts on confluence — a stretched band, a confirming candle, and either an FVG or a swept S/R level — which filters out many low-quality setups.
- Targets, stops, and momentum thresholds are all scaled to current volatility via the average range, so the logic adapts rather than using fixed pip distances.
- The hedge module is an attempt to address a real weakness of fading: what happens when the market trends instead of rotating.
Known limitations:
- Mean reversion fails in strong trends. On a directional "trend day," price can keep pushing beyond the bands. The hedge is designed for exactly this case, but hedging adds complexity and is not a guarantee of recovery — both the base and the hedge can end at a loss if the market whipsaws.
- Hedging is restricted or treated differently by some brokers and jurisdictions. Confirm that opposite positions on the same symbol are permitted on your account before testing this logic live.
- VWAP needs maturity. Early in a session, or on illiquid instruments with poor tick-volume data, the bands can be unreliable. The session warm-up filter mitigates but does not eliminate this.
- Single timeframe, single cycle. The EA runs one base-and-hedge cycle at a time, so it may sit idle through opportunities while a cycle resolves.
It may underperform during low-volatility chop where bands rarely get tagged, and during sustained trends where fades are repeatedly stopped. None of this makes it unusable as a study piece — it simply means realistic expectations matter.
Risk Management Tips
Sound risk management is the foundation of any trading education, and it matters even more with a strategy that can stack a hedge on top of a base position:
- Risk a small, fixed fraction per trade. A common educational guideline is to risk no more than 1–2% of account equity on any single position. Remember that the hedge here is larger than the base by default (
HedgeMultiplier), so size accordingly. - Account for the combined exposure. When the hedge is active you may briefly hold both positions; plan your position sizing around that worst-case exposure, not just the base lot.
- Use a demo account first. Run the EA on a demo or in the Strategy Tester across varied market conditions before risking real capital, so you can observe how the fade-and-hedge cycle behaves.
- Understand drawdown. Study the depth and duration of losing streaks the strategy can produce, and ask whether you could tolerate them psychologically and financially.
- Keep records and review. Treat each trade as a data point for learning rather than an outcome to chase, and never add capital you cannot afford to lose.
Risk Warning
Trading foreign exchange, CFDs, and other leveraged financial instruments involves substantial risk of loss and is not suitable for all investors. The strategies and tools discussed on this page are provided for educational purposes only and do not constitute financial advice, investment recommendations, or solicitation to trade. Always consult a qualified financial adviser before making trading decisions. Past backtest performance is not indicative of future results.
Downloads
- Expert Advisor: VwapBandFvgReversionHedge.ex5 (58 downloads)
- Source Code: VwapBandFvgReversionHedge.mq5 (62 downloads)
- Documentation: VwapBandFvgReversionHedge.pdf (57 downloads)