Disclaimer: This article is for educational and informational purposes only. It does not constitute financial or investment advice. Trading forex and CFDs carries significant risk of loss. Past performance of any strategy — including backtests — does not guarantee future results. Never trade with money you cannot afford to lose.
What Is This Strategy?
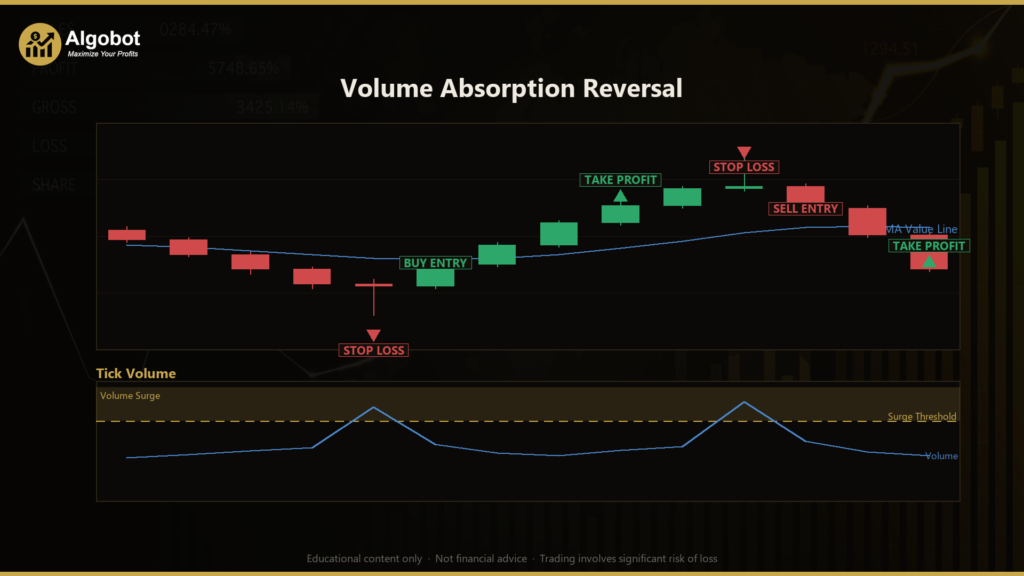
The Volume Absorption Reversal strategy is a mean-reversion (exhaustion-fade) system that combines tick volume analysis, an EMA (Exponential Moving Average) "value" line, and the ATR (Average True Range) volatility measure to identify moments when an aggressive push in price runs out of fuel. It is built on the classic Wyckoff "effort versus result" principle: when a large surge of participation (the effort) fails to produce a matching move in price (the result), the dominant side is likely being absorbed by opposing orders, and price often snaps back toward a fairer value.
Unlike a breakout system that trades with momentum, this strategy deliberately trades against the closing thrust — but only inside a narrow, high-quality window where several independent conditions agree. The idea is to fade a climax move only when it is a genuine local extreme, backed by a volume spike, showing a clear rejection wick, and already stretched far from value. By requiring all of these to line up, the strategy aims to filter out the common "catching a falling knife" failure mode that plagues naive reversal trading.
As a learning tool, Volume Absorption Reversal is well suited to traders who want to study order-flow-style reversal logic, volume-confirmed exhaustion patterns, and structured risk management. It is designed for ranging or mean-reverting conditions on instruments such as FX majors, gold, or an index on intraday-to-swing timeframes (roughly M5 to H1). This article is a strategy analysis meant to help you understand how the logic works — not a promise of any particular outcome.
How It Works
The strategy evaluates signals only on closed bars — the bar that was forming becomes the "trigger" bar the moment it closes, so a signal level never sees itself. The long side is described below; the short side is the exact mirror image.
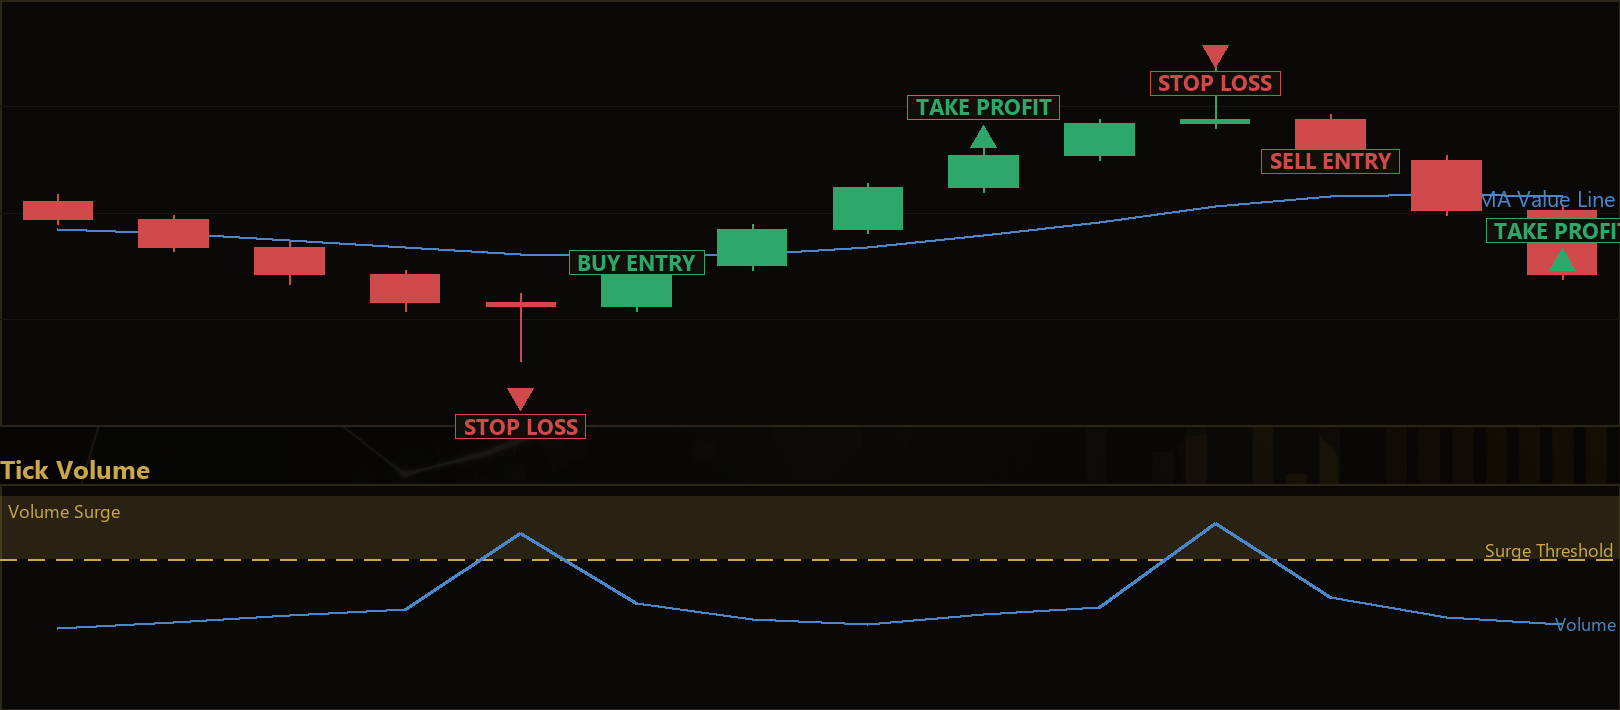
Entry conditions (long example — a selling climax being absorbed):
- Fresh extreme: The just-closed trigger bar prints the lowest low of the last
SwingBarscompleted bars. This confirms there is a genuine down-thrust to fade, rather than mid-range noise. - Climax effort: That bar's tick volume is at least
VolSurgeMulttimes the average volume of the priorVolLookbackbars. This signals that real participation stepped in — a volume spike, not a quiet drift. - Failed result: Despite making a new low, the bar closes in the upper portion of its own range (at or above the
CloseLocthreshold), leaving a long lower wick. The selling effort produced no lasting downward result — it was rejected and price closed back up. - Over-extension: The new low pierces at least
StretchMult× ATR below the EMA value line. The strategy only fades moves that are already stretched from value, where reversion has room to travel; balanced, fairly-priced markets are skipped.
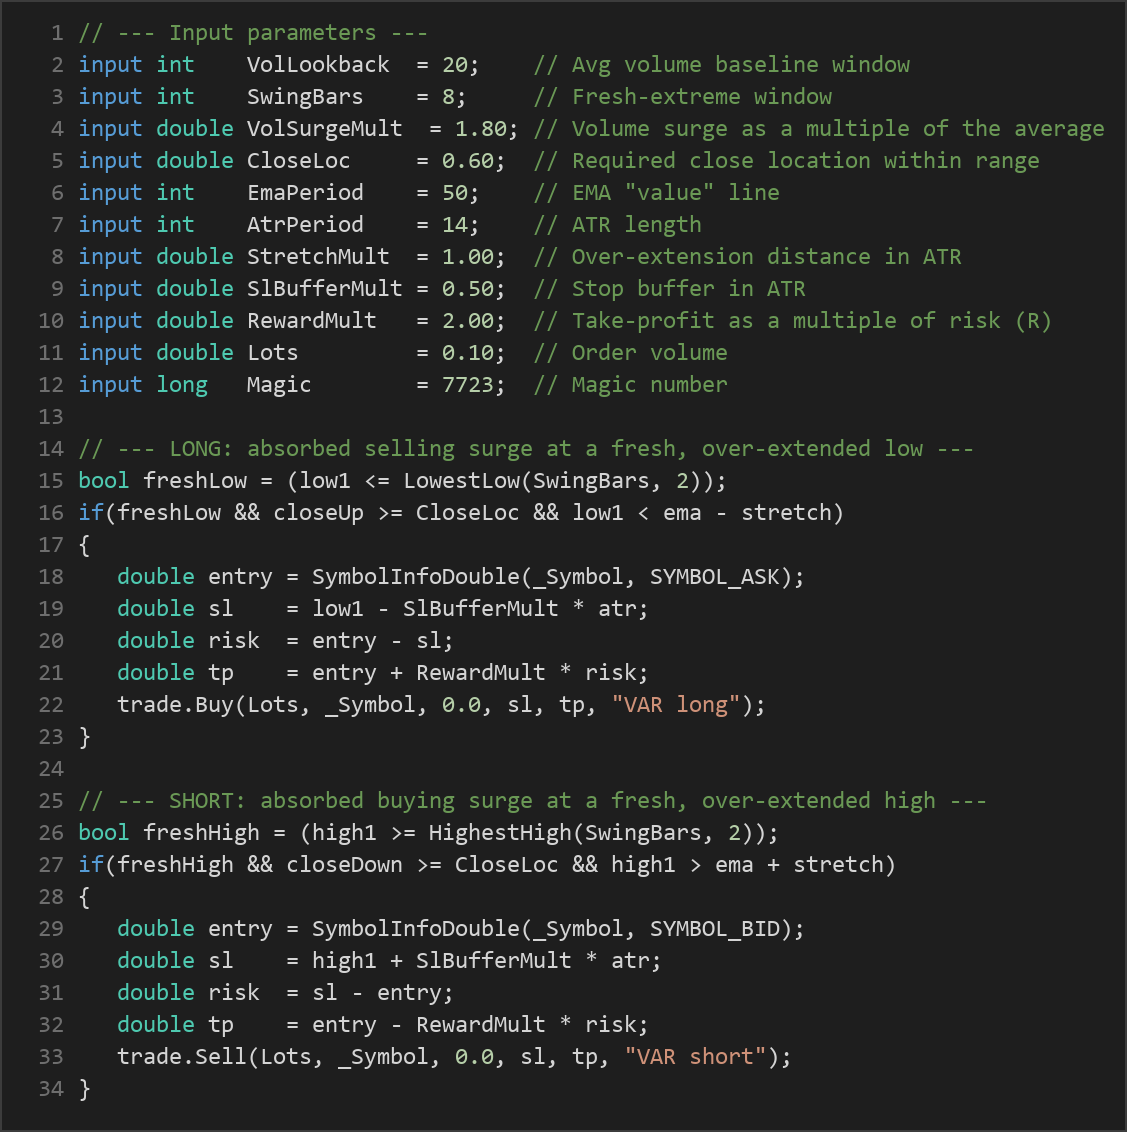
When all four conditions align, the strategy signals a buy at the current ask price. The short side mirrors this exactly: a fresh highest high, a volume climax, a close in the lower portion of the range, and a high stretched above the EMA all signal a sell at the bid.
Stop-loss logic:
- The stop is structural, placed just beyond the climax bar's extreme by
SlBufferMult× ATR. For a long, that is below the trigger bar's low; for a short, above its high. If the extreme is genuinely broken, the trade is likely wrong, so the position is closed quickly and cheaply.
Take-profit logic:
- The target is a fixed multiple of the initial risk (R), set by
RewardMult. If the stop distance is one unit of risk, aRewardMultof 2.00 places the target two units away — an objective, pre-defined exit rather than a discretionary one.
Trade management:
- A break-even ratchet moves the stop to the entry price once open profit reaches 1R (one unit of initial risk). After this, a setup that starts working cannot easily turn into a full loss.
- The strategy holds one position per Magic number at a time, so it never stacks overlapping trades.
Strategy Parameters
| Parameter | Default | Min | Max | Description |
|---|---|---|---|---|
| VolLookback | 20 | 10 | 60 | Number of prior bars used to build the average-volume baseline (the "effort" reference). |
| SwingBars | 8 | 3 | 25 | Window over which the trigger bar must be a fresh local extreme (lowest low / highest high). |
| VolSurgeMult | 1.80 | 1.20 | 4.00 | How large the climax volume must be, as a multiple of the average volume. |
| CloseLoc | 0.60 | 0.50 | 0.90 | Required close location within the bar's range (0 = low, 1 = high). Higher values demand a stronger rejection wick. |
| EmaPeriod | 50 | 20 | 200 | Period of the EMA "value" line the trigger bar must be stretched away from. |
| AtrPeriod | 14 | 7 | 30 | ATR length used for the over-extension filter and the structural stop buffer. |
| StretchMult | 1.00 | 0.00 | 4.00 | How far (in ATR multiples) the extreme must pierce beyond the EMA to count as over-extended. |
| SlBufferMult | 0.50 | 0.10 | 2.00 | ATR buffer placed beyond the climax extreme for the protective stop. |
| RewardMult | 2.00 | 0.50 | 5.00 | Take-profit distance as a multiple of the initial risk (R). |
| Lots | 0.10 | 0.01 | 1.00 | Order volume (position size) in lots. |
| Magic | 7723 | 0 | 9,999,999 | Unique identifier so the EA only manages its own trades. |
Recommended Chart Settings
Because every threshold is expressed in ATR, bar structure, and tick volume, the logic is point-size and timeframe agnostic — it adapts to whatever single primary timeframe you run it on. It was designed for ranging or mean-reverting markets: FX majors, gold, or an index on the M5 to H1 timeframes tends to suit the effort-versus-result premise best.
Keep in mind that results will vary considerably across different symbols, sessions, and market regimes. A strongly trending market can repeatedly break "fresh extremes" without reversing, which is exactly the condition a fade strategy finds most difficult. Always test any configuration on your own broker's data before drawing conclusions.
How to Install on MetaTrader 5
- Download the
VolumeAbsorptionReversal.ex5file from the link below. - Copy it to your MT5
MQL5\Expertsfolder. - Restart MetaTrader 5 or refresh the Navigator panel.
- Drag the EA onto a chart matching the recommended symbol and timeframe.
- Configure the input parameters and enable Algo Trading.
What to Consider Before Using This EA
Every trading approach has trade-offs, and understanding them is part of learning.
Strengths of this approach:
- It requires multiple independent confirmations (fresh extreme, volume climax, rejection close, and over-extension) before acting, which historically reduces the number of low-quality reversal signals.
- The structural, ATR-based stop adapts to current volatility instead of using a fixed pip distance.
- The break-even ratchet and single-position rule impose discipline on trade management.
Known limitations:
- Reversal (fade) systems struggle in strong trends. When a market trends persistently, price can keep printing fresh extremes on high volume without reverting, producing a cluster of stop-outs. This is the classic weakness of counter-trend logic.
- Tick volume is not real exchange volume in decentralized forex. It approximates activity by counting price changes, so the "climax" signal is a proxy, not a true measure of traded size.
- Parameter sensitivity: aggressive settings (for example, a very high
CloseLocorVolSurgeMult) may filter out most signals, while loose settings may admit noise. The defaults are a starting point for study, not an optimized configuration. - Signals fire only once per closed bar, so on higher timeframes opportunities are relatively infrequent.
The goal here is balanced understanding: the strategy encodes a coherent, well-known market principle, but no filter combination removes the underlying uncertainty of markets.
Risk Management Tips
Sound risk management matters more than any single entry signal. As general educational principles:
- Risk only a small fraction of your account per trade — many educators suggest no more than 1–2%. Set the
Lotsvalue so that the distance from entry to stop equals that fraction of your balance, rather than choosing a lot size arbitrarily. - Practice on a demo account first. Run the EA in a simulated environment until you understand how it behaves across different conditions.
- Understand drawdown. Even a well-designed strategy can experience losing streaks; know how much consecutive loss you are prepared to tolerate before you commit capital.
- Account for spread, slippage, and commissions, which affect fade strategies that enter against short-term momentum.
- Never over-leverage, and avoid adding capital to recover losses. Position sizing, not prediction, is what keeps you in the game long enough to learn.
Risk Warning
Trading foreign exchange, CFDs, and other leveraged financial instruments involves substantial risk of loss and is not suitable for all investors. The strategies and tools discussed on this page are provided for educational purposes only and do not constitute financial advice, investment recommendations, or solicitation to trade. Always consult a qualified financial adviser before making trading decisions. Past backtest performance is not indicative of future results.
Downloads
- Expert Advisor: VolumeAbsorptionReversal.ex5 (50 downloads)
- Source Code: VolumeAbsorptionReversal.mq5 (52 downloads)
- Documentation: VolumeAbsorptionReversal.pdf (47 downloads)