Disclaimer: This article is for educational and informational purposes only. It does not constitute financial or investment advice. Trading forex and CFDs carries significant risk of loss. Past performance of any strategy — including backtests — does not guarantee future results. Never trade with money you cannot afford to lose.
What Is This Strategy?
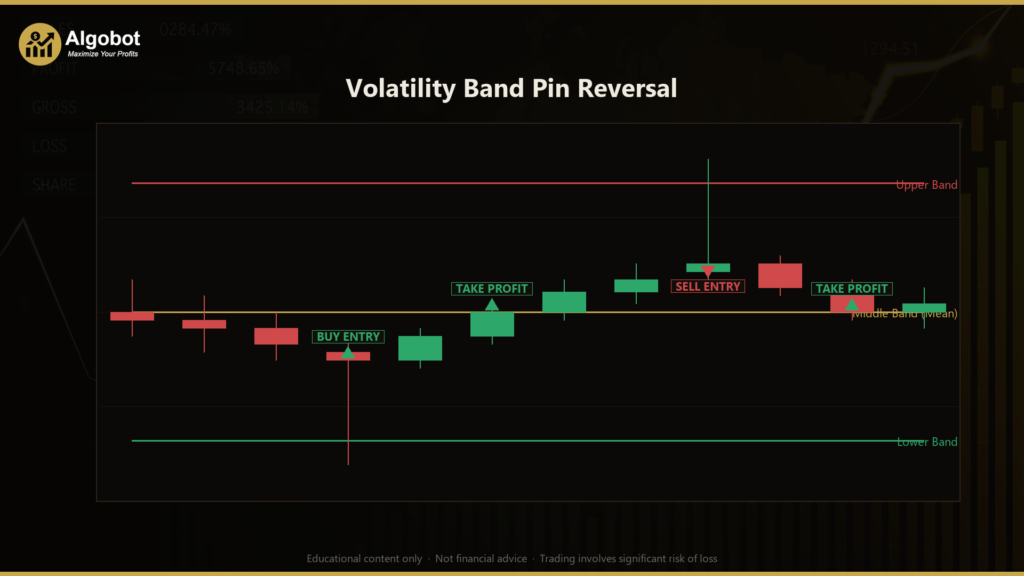
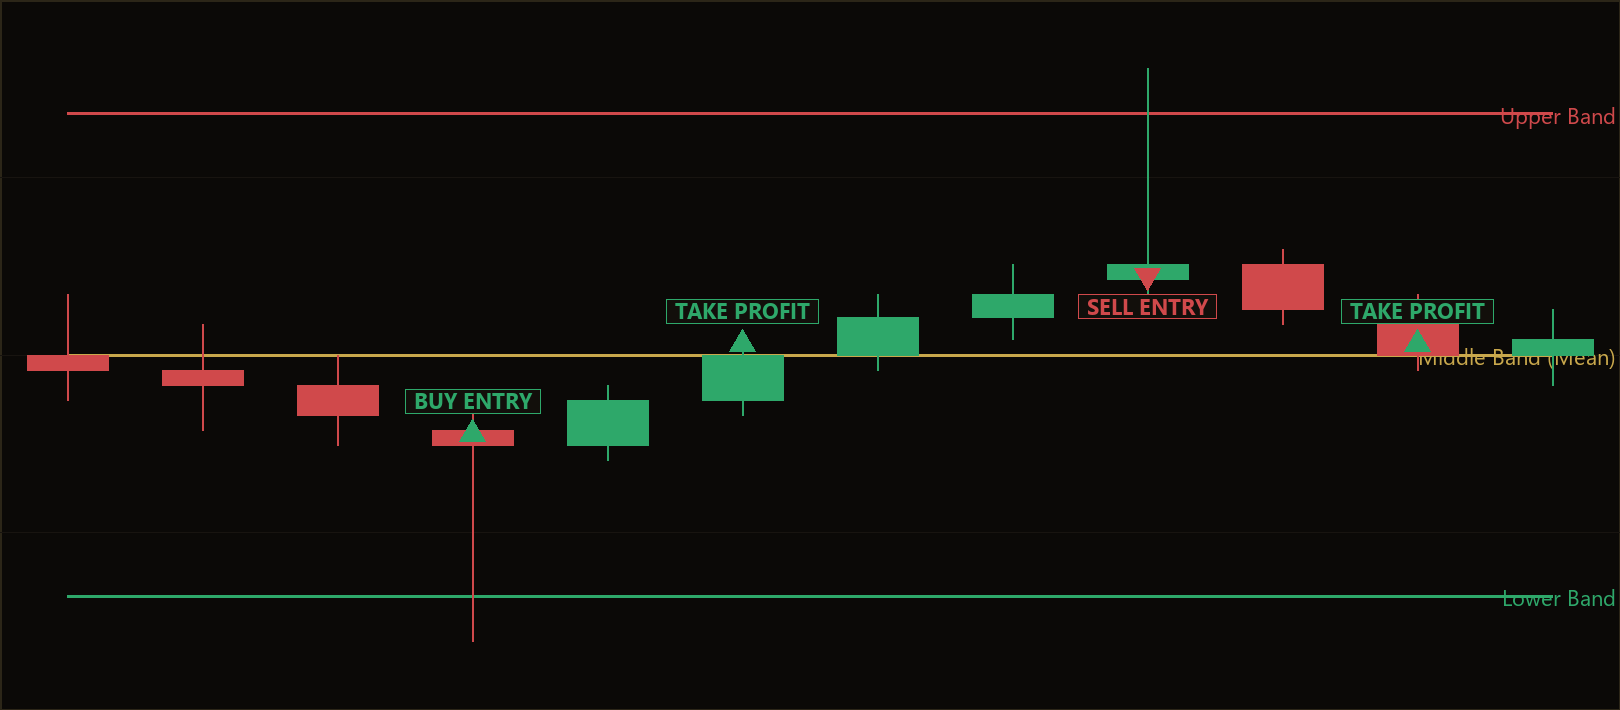
The Volatility Band Pin Reversal is a mean-reversion trading strategy that combines a volatility band (a moving-average envelope built from standard deviation, conceptually similar to Bollinger Bands) with a pin-bar rejection candle pattern. In plain terms, it watches for a moment when price stretches too far from its recent average, spikes through the outer edge of a volatility band, and then snaps back — leaving behind a long "rejection wick." That wick is the market's way of refusing a price extreme, and this strategy is built to study and act on that refusal.
The approach is deliberately conservative. Rather than fading (trading against) every touch of the outer band — a habit that gets many reversion traders "run over" when a genuine breakout occurs — it requires three separate conditions to align on a single freshly-closed bar before it signals a trade. It also includes a regime filter that only permits trades when the underlying average is essentially flat. This means the strategy is designed for balanced, ranging markets where price oscillates around a stable mean, and it intentionally stands aside during strong, one-directional trends.
As a learning tool, this strategy is well suited to traders who want to understand how volatility envelopes, candlestick geometry, and regime filtering can be combined into a single rules-based system. It illustrates a core idea in quantitative trading: that a high hit-rate reversion approach depends less on the entry pattern itself and more on the filters that decide when not to trade. Treat it as a study of disciplined mean reversion, not as a shortcut to results.
How It Works
The strategy evaluates one signal per closed bar (it never acts on the still-forming candle). On each newly-closed bar it rebuilds the volatility band, checks the market regime, and then inspects the candle's shape. A trade is only signalled when everything lines up.
The volatility band (the reference structure):
- A middle band is the simple moving average (SMA) of the last
BandPeriodclosing prices — this is the "mean" the strategy expects price to revert to. - An upper rail and lower rail sit
BandMultpopulation standard deviations above and below the middle band. These rails expand and contract as volatility changes.
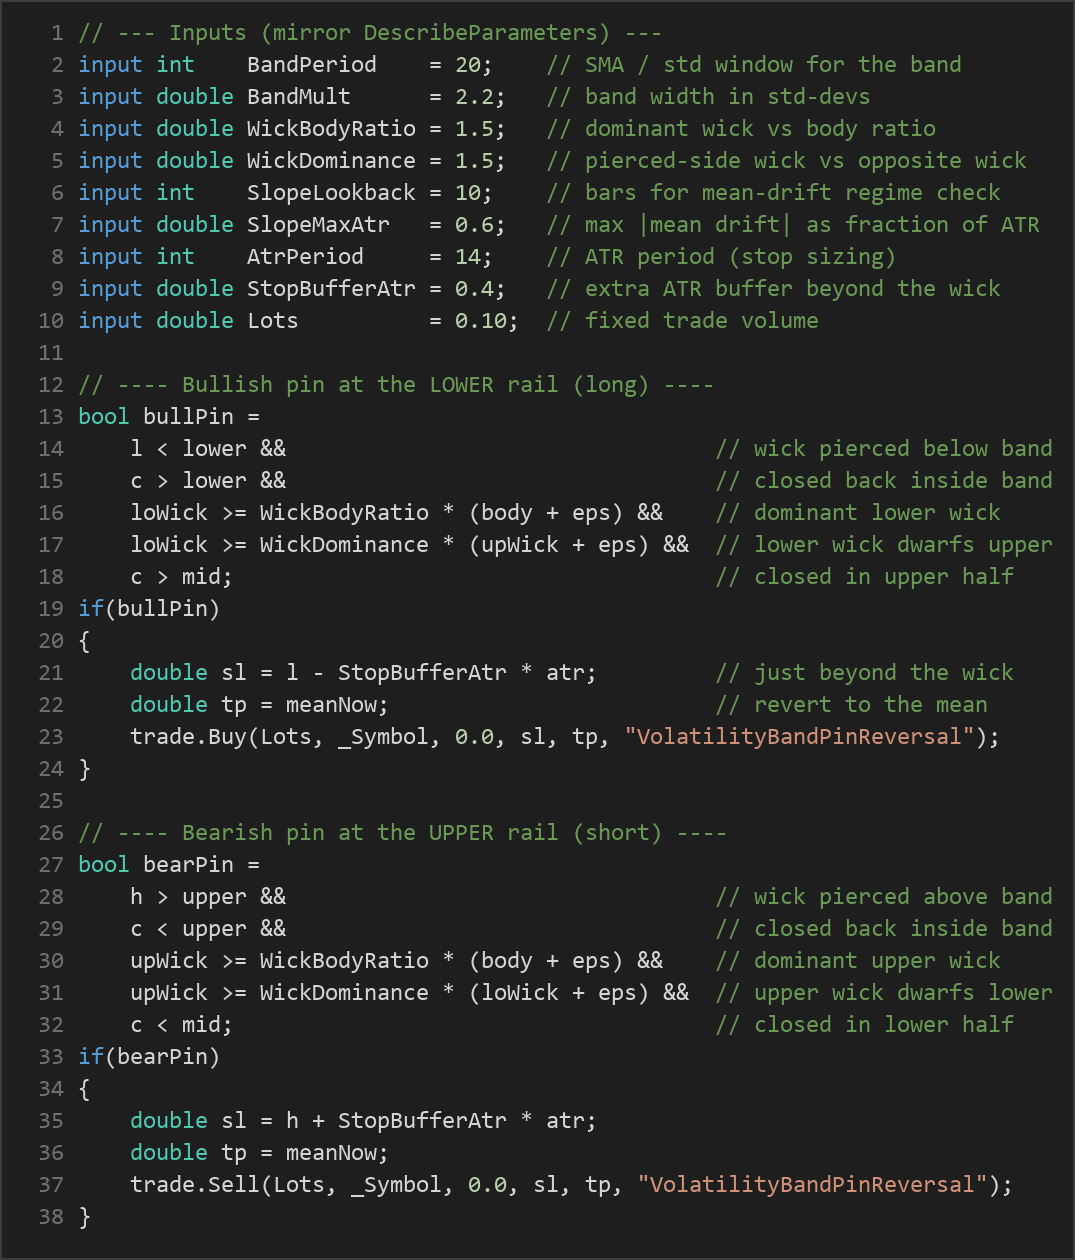
Entry conditions — the strategy signals a long (buy) when:
- The bar's low pierces below the lower rail — price became over-extended to the downside.
- The bar closes back above the lower rail — the extreme was refused and price returned inside the band.
- The lower wick is dominant versus the body, at least
WickBodyRatiotimes the candle body — confirming a rejection candle rather than a strong directional close. - The lower wick dwarfs the upper wick by at least the
WickDominanceratio — the rejection is clearly on the pierced side. - The candle closes in the upper half of its own range (above its midpoint) — buyers regained control by the close.
The strategy signals a short (sell) under the exact mirror image: the high pierces the upper rail, price closes back below it, the upper wick is dominant versus the body and dwarfs the lower wick, and the candle closes in the lower half of its range.
The balanced-regime filter (the key discipline):
- Before any trade, the strategy compares the band's mean now with the band's mean
SlopeLookbackbars earlier. - If that drift is larger than
SlopeMaxAtrmultiplied by the current ATR (Average True Range, a measure of typical volatility), the mean is considered to be trending and no trade is taken. - Only when the mean is essentially flat does the strategy permit a reversion trade. This filter exists because the failure mode of any reversion system is a real breakout, so trending conditions are excluded on purpose.
Exit logic — stop-loss and take-profit:
- Take-profit is placed at the middle band (the mean). Balanced markets tend to revisit their average frequently, which is why the mean is chosen as a repeatable, modest target.
- Stop-loss is placed just beyond the rejection wick — below the bar's low for longs, above the bar's high for shorts — plus a small buffer of
StopBufferAtrtimes ATR. This keeps a losing trade cut quickly if the "rejection" turns out to be the start of a genuine move. - Only one position per magic number is held at a time; the stop-loss and take-profit manage the exit rather than any discretionary intervention.
Strategy Parameters
| Parameter | Default | Min | Max | Description |
|---|---|---|---|---|
| BandPeriod | 20 | 10 | 60 | Number of closing prices used for the SMA and standard-deviation band window. |
| BandMult | 2.2 | 1.5 | 3.5 | Band width in population standard deviations (distance of the rails from the mean). |
| WickBodyRatio | 1.5 | 0.5 | 4.0 | Minimum ratio of the dominant (pierced-side) wick to the candle body. |
| WickDominance | 1.5 | 1.0 | 4.0 | Minimum ratio of the pierced-side wick to the opposite wick. |
| SlopeLookback | 10 | 3 | 30 | Number of bars back used to measure mean drift for the regime filter. |
| SlopeMaxAtr | 0.6 | 0.1 | 2.0 | Maximum allowed mean drift, as a fraction of ATR, for the market to count as "flat." |
| AtrPeriod | 14 | 5 | 30 | ATR period used for stop sizing and the regime scale. |
| StopBufferAtr | 0.4 | 0.0 | 1.5 | Extra ATR buffer added beyond the rejection wick when placing the stop-loss. |
| Lots | 0.10 | 0.01 | 1.0 | Fixed trade volume in lots per signal. |
Recommended Chart Settings
This strategy is single-timeframe and indicator-based, and it reads whatever symbol and timeframe the chart is set to at runtime. Because it is a mean-reversion system that depends on price oscillating around a stable average, it is generally best studied on liquid instruments that spend meaningful time ranging — major forex pairs such as EUR/USD or GBP/USD are common choices for this style of analysis.
For timeframe, intraday charts such as M15, M30, or H1 offer a reasonable balance between signal frequency and noise for a band-plus-pin-bar setup, while H4 produces fewer but structurally cleaner signals. There is no single "correct" setting: the volatility band, ATR, and regime filter all adapt to the chart's own volatility, so behaviour will differ across symbols and timeframes. Always test any configuration on historical data first, and remember that results will vary across different market conditions.
How to Install on MetaTrader 5
- Download the .ex5 file from the link below
- Copy it to your MT5
MQL5\Expertsfolder - Restart MetaTrader 5 or refresh the Navigator panel
- Drag the EA onto a chart matching the recommended symbol and timeframe
- Configure the input parameters and enable Algo Trading
What to Consider Before Using This EA
Strengths of this approach. The strategy's main educational value is its layered filtering. Requiring a band pierce, a genuine rejection wick, and a flat-mean regime all at once removes many of the low-quality "fade the band" signals that plague simpler reversion systems. The structural stop just beyond the wick means each trade has a defined, small risk, and targeting the mean is a logical, repeatable objective in a balanced market. The one-position-at-a-time rule keeps behaviour simple and easy to study.
Known limitations. Mean reversion has an inherent weakness: when a real breakout arrives, the "rejection" you were trading against becomes the first bar of a trend, and reversion trades are stopped out. The regime filter is designed to reduce this, but no filter is perfect — a mean can look flat right up until it isn't. Because the target is the mean and the stop is near the wick, the reward-to-risk on individual trades can be modest, so the strategy relies on a high proportion of trades reaching target rather than large individual wins. In strongly trending or news-driven markets, signals may be filtered out entirely (few trades) or, worse, taken just before a breakout.
Where it may underperform. Expect weaker behaviour during sustained trends, low-volatility periods where the bands rarely get pierced, and around high-impact news when wicks and gaps can blow through structural stops. This is a tool for studying disciplined range trading, not an all-weather system.
Risk Management Tips
Sound risk management matters more than any single entry rule. Consider these general principles as you study this strategy:
- Risk a small, fixed fraction per trade. Many educational sources suggest never risking more than 1–2% of account equity on any single position. Size your lots so the distance to the stop-loss reflects that limit, rather than trading a fixed lot size blindly.
- Use a demo account first. Test the strategy on a demo or historical backtest across different symbols, timeframes, and market conditions before considering any live use.
- Understand drawdown. Even a high-hit-rate reversion system will string together losing trades. Know the historical maximum drawdown of any configuration and be honest about whether you could tolerate it.
- Account for costs. Spreads, commissions, and slippage can meaningfully erode a strategy that targets modest moves like the middle band. Factor realistic trading costs into any evaluation.
- Never over-leverage. Leverage magnifies both gains and losses; conservative position sizing is the simplest protection against a single bad sequence of trades.
Risk Warning
Trading foreign exchange, CFDs, and other leveraged financial instruments involves substantial risk of loss and is not suitable for all investors. The strategies and tools discussed on this page are provided for educational purposes only and do not constitute financial advice, investment recommendations, or solicitation to trade. Always consult a qualified financial adviser before making trading decisions. Past backtest performance is not indicative of future results.
Downloads
- Expert Advisor: VolatilityBandPinReversal.ex5 (35 downloads)
- Source Code: VolatilityBandPinReversal.mq5 (38 downloads)
- Documentation: VolatilityBandPinReversal.pdf (45 downloads)