Disclaimer: This article is for educational and informational purposes only. It does not constitute financial or investment advice. Trading forex and CFDs carries significant risk of loss. Past performance of any strategy — including backtests — does not guarantee future results. Never trade with money you cannot afford to lose.
What Is This Strategy?
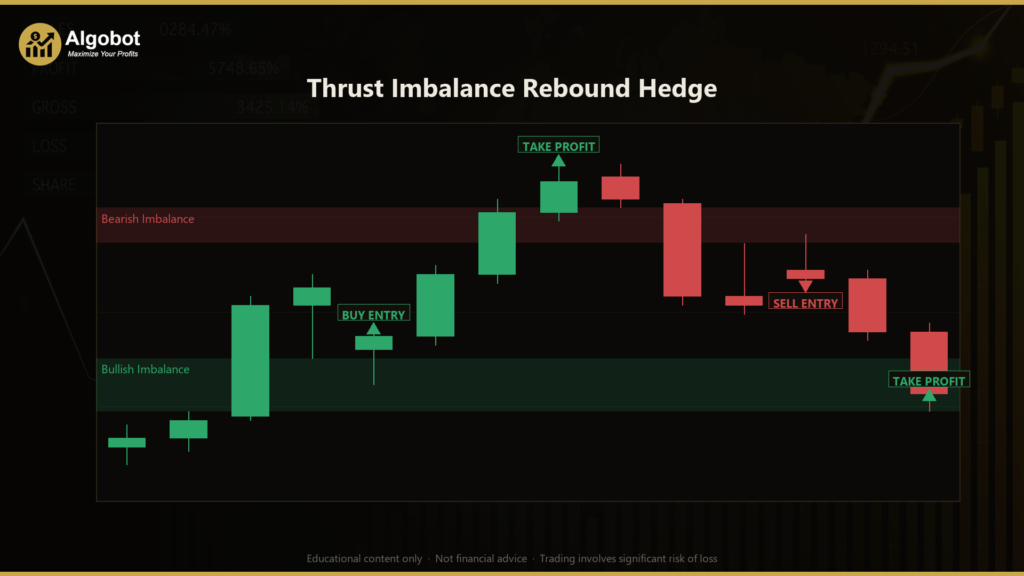
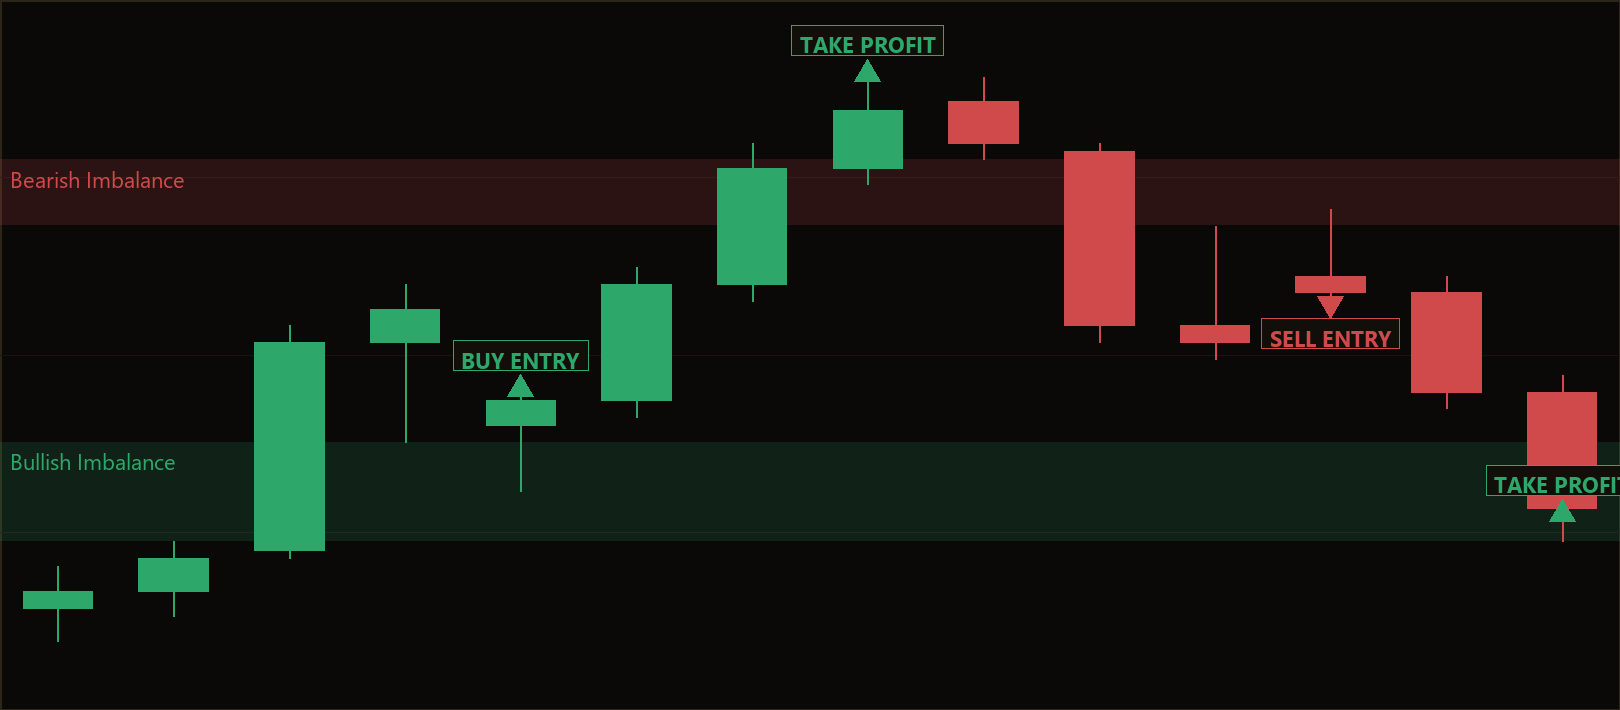
The Thrust Imbalance Rebound Hedge is a pure price-action strategy for MetaTrader 5 that trades the Fair Value Gap (FVG) — a three-candle imbalance left behind when a strong momentum candle moves price so quickly that it skips over a zone, leaving an untraded "gap" between the first and third candles. Rather than relying on moving averages, oscillators, or any external technical indicator, this strategy reads the market directly from raw candle highs, lows, opens, and closes. That makes it a useful teaching example of how institutional price-action and Smart Money Concepts (SMC) ideas can be expressed in code without a single indicator on the chart.
The strategy is designed for trending or impulsive market conditions where a decisive "thrust" candle signals genuine momentum. A thrust is a candle whose real body dominates its own high-to-low range, indicating conviction rather than indecision. When that thrust carves out a clean gap, the strategy treats the gap as a magnet that price often revisits before continuing — a behavior commonly described as a rebound or continuation entry. It then waits for price to dip back into the fresh gap and close in the thrust's direction before entering.
This system is best suited to intermediate learners who already understand basic candlestick anatomy and want to study how imbalance trading, structure-based stops, and an automated hedging mechanism fit together. It is framed here as a strategy analysis — a way to learn how the logic behaves — not as a profit opportunity. As with any approach, the Thrust Imbalance Rebound Hedge has conditions where it reads price well and conditions where it struggles, both of which we cover below.
How It Works
The strategy evaluates one fully-closed bar at a time and tracks a single imbalance at any given moment. Here is the logic in plain English:
- Measuring the average range first. Before anything else, the strategy calculates the mean high-to-low range over the last
RangeLookbackbars. This average becomes the yardstick for deciding whether a gap is meaningful or just micro-noise in choppy conditions.
- Detecting the thrust. It examines a trio of consecutive closed candles. The middle candle is the potential thrust: its body must be at least
ThrustBodyFractionof its own total range. A high fraction means the candle closed near its extreme with little wick — a decisive impulse rather than a hesitant one.
- Confirming the imbalance (gap). For a bullish setup, the first candle's high must sit below the third candle's low, leaving an untraded gap. For a bearish setup, the mirror is required (first candle's low above the third candle's high). The gap height must be at least
MinGapFactor× the average range, which filters out insignificant gaps formed during sideways drift.
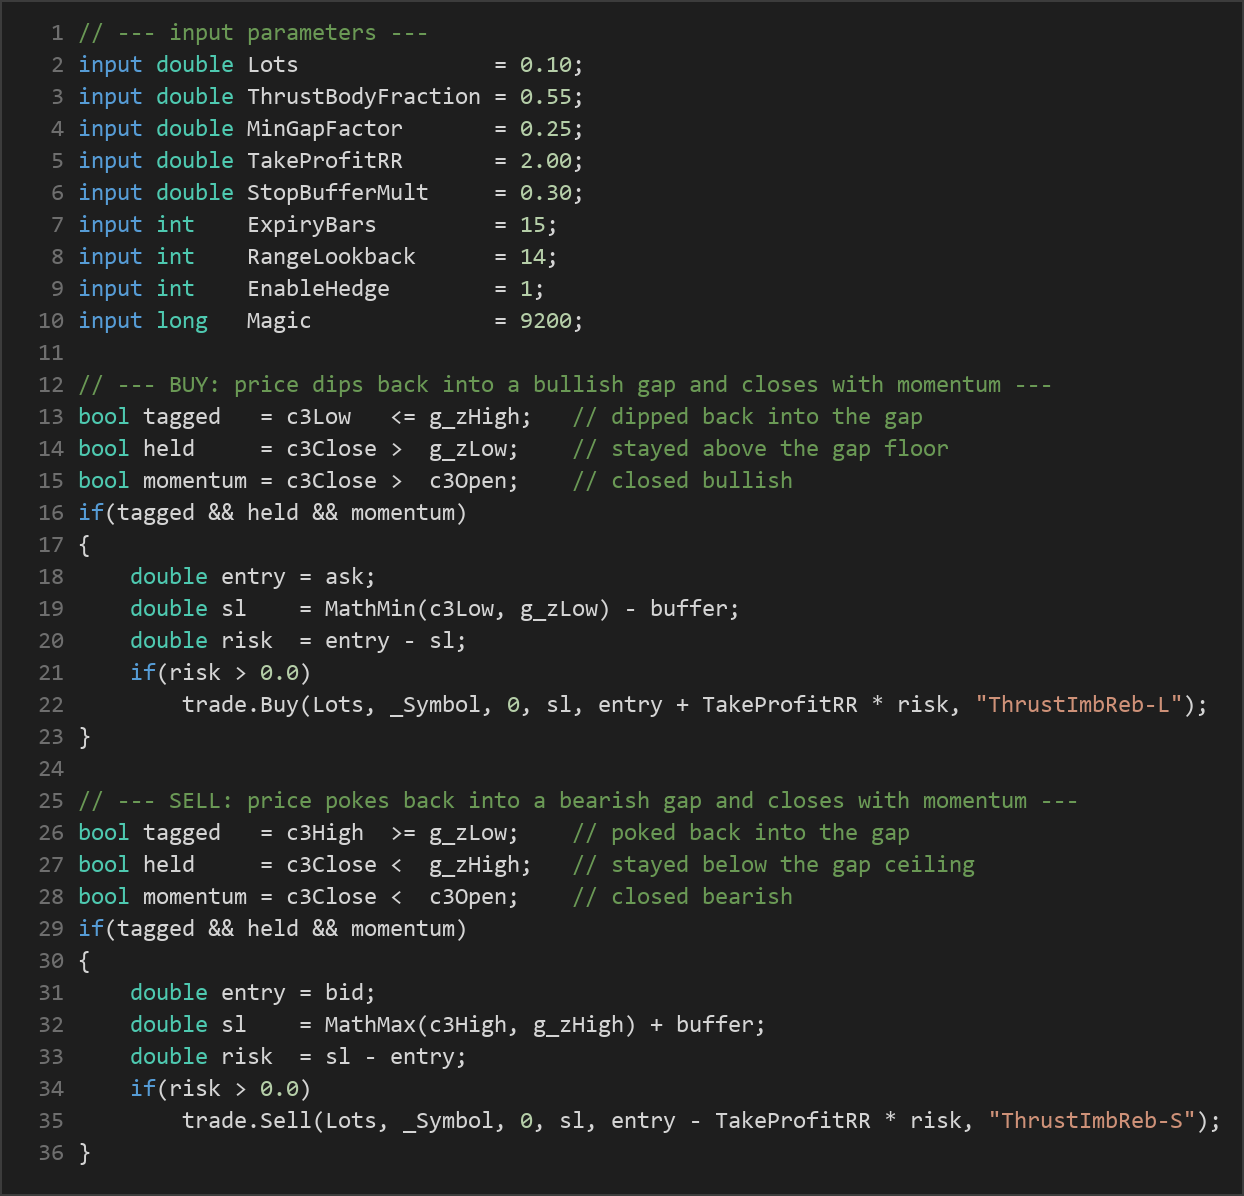
- The rebound continuation entry. Once a valid gap is stored, the strategy signals an entry only when price dips back into the gap and the bar closes with momentum in the thrust direction. For a bullish gap, the candle must tap into the zone, hold above the gap floor, and close bullish. For a bearish gap, it must poke into the zone, stay below the gap ceiling, and close bearish. This "wait for the close" rule distinguishes the approach from a simple wick-rejection entry.
- Stop-loss logic. Stops are structure-based, not fixed pip values. A long stop sits just below the lower of the entry candle's low and the gap floor, minus a buffer of
StopBufferMult× average range. A short stop mirrors this above the structure. This anchors risk to where the setup would genuinely be invalidated.
- Take-profit logic. The target is a multiple of the risk distance, set by
TakeProfitRR. With the default of 2.0, the strategy seeks two units of reward for every one unit risked — a fixed reward-to-risk framework managed entirely by the broker-side SL and TP.
- The inversion hedge. If price instead closes fully through the gap, the imbalance is considered failed and "flipped" — former support becomes resistance, or vice versa. When
EnableHedgeis on, the strategy opens an opposite leg under a separate magic number to ride the inversion, so an invalidated gap becomes the next trade rather than a pure loss. This hedge leg also uses structure-based stops and the same reward-to-risk target.
- Housekeeping and expiry. A gap is dropped once its primary trade has fully closed, or once it has aged past
ExpiryBarswithout being tapped. Only one imbalance is tracked at a time, and no new gap is detected on a bar that is still managing an existing one.
Strategy Parameters
| Parameter | Default | Min | Max | Description |
|---|---|---|---|---|
| Lots | 0.10 | 0.01 | 1.0 | Fixed trade volume in lots for each leg, primary and hedge. |
| ThrustBodyFraction | 0.55 | 0.30 | 0.90 | Minimum body-to-range ratio for the middle candle to qualify as a decisive thrust. Higher values demand stronger impulses. |
| MinGapFactor | 0.25 | 0.00 | 1.50 | Minimum gap height as a multiple of average bar range. Higher values ignore small gaps formed in chop. |
| TakeProfitRR | 2.00 | 1.0 | 5.0 | Reward-to-risk multiple for the take-profit target relative to the stop distance. |
| StopBufferMult | 0.30 | 0.0 | 1.5 | Extra buffer added beyond structure for the stop-loss, as a multiple of average range. |
| ExpiryBars | 15 | 3 | 50 | Number of bars an untapped gap remains valid before it is discarded. |
| RangeLookback | 14 | 5 | 50 | Number of bars used to compute the average high-low range yardstick. |
| EnableHedge | 1 | 0 | 1 | Toggles the inversion hedge leg on (1) or off (0). |
Note that a Magic number input (default 9200) identifies the primary leg, and the hedge leg uses Magic + 1 so the two can be managed independently.
Recommended Chart Settings
The Thrust Imbalance Rebound Hedge was designed as a general price-action engine and is not hard-wired to a single instrument. Because it scales its gap and stop logic to each market's own average range, it can be studied across major forex pairs such as EUR/USD or GBP/USD, as well as on indices and metals where clean impulse moves are common.
A practical starting point for study is the M15 or H1 timeframe, which tends to produce more reliable thrust candles and fewer false gaps than very low timeframes. Lower timeframes generate more frequent signals but also more noise, while higher timeframes produce fewer, larger setups. Whatever you choose, remember that results will vary considerably across different symbols, sessions, and market conditions — what reads well in a trending environment may behave very differently in a range. Always study the behavior on a demo account before drawing conclusions.
How to Install on MetaTrader 5
- Download the .ex5 file from the link below
- Copy it to your MT5
MQL5\Expertsfolder - Restart MetaTrader 5 or refresh the Navigator panel
- Drag the EA onto a chart matching the recommended symbol and timeframe
- Configure the input parameters and enable Algo Trading
What to Consider Before Using This EA
Like every approach, the Thrust Imbalance Rebound Hedge has genuine strengths and real limitations worth understanding before you study it on live conditions.
Strengths. Because it uses no indicators, there is no repainting, no lag from smoothing, and the logic is fully transparent — you can see exactly which candles created a setup. The structure-based stops anchor risk to meaningful price levels rather than arbitrary pip counts, and the fixed reward-to-risk target enforces discipline. The inversion hedge is a thoughtful touch: a failed gap is reframed as the next opportunity rather than simply a loss.
Limitations. Fair Value Gap strategies historically perform best in trending, impulsive markets and tend to struggle in tight ranges, where gaps are small and price chops back and forth through them. In those conditions the inversion hedge can also whipsaw, opening an opposite leg only for price to reverse again. The strategy tracks just one imbalance at a time, so it may miss overlapping setups during fast moves. It also uses a fixed lot size, meaning risk per trade varies with the stop distance unless you adjust position sizing manually. As always, the strategy signals setups — it does not predict outcomes, and any edge it may indicate must be validated across many trades, not a handful.
Risk Management Tips
Sound risk management matters more than any single entry signal. Consider these general principles as you study this EA:
- Risk a small, fixed fraction per trade. Many educators suggest risking no more than 1–2% of account equity on any single position. Because this EA uses a fixed lot size, you may need to size lots to match your stop distance and account balance.
- Test on a demo account first. Run the strategy in simulation for an extended period across different market conditions before considering any real capital.
- Understand drawdown. Even a sound strategy experiences losing streaks. Know the maximum drawdown you are willing to tolerate and how a hedging system can compound exposure if both legs are active.
- Keep leverage modest. Lower leverage reduces the impact of an adverse move and gives your account room to survive variance.
- Review regularly. Markets change. Periodically reassess whether the parameters still suit current conditions rather than assuming a single configuration works forever.
Risk Warning
Trading foreign exchange, CFDs, and other leveraged financial instruments involves substantial risk of loss and is not suitable for all investors. The strategies and tools discussed on this page are provided for educational purposes only and do not constitute financial advice, investment recommendations, or solicitation to trade. Always consult a qualified financial adviser before making trading decisions. Past backtest performance is not indicative of future results.
Downloads
- Expert Advisor: ThrustImbalanceReboundHedge.ex5 (56 downloads)
- Source Code: ThrustImbalanceReboundHedge.mq5 (58 downloads)
- Documentation: ThrustImbalanceReboundHedge.pdf (64 downloads)