Disclaimer: This article is for educational and informational purposes only. It does not constitute financial or investment advice. Trading forex and CFDs carries significant risk of loss. Past performance of any strategy — including backtests — does not guarantee future results. Never trade with money you cannot afford to lose.
What Is This Strategy?
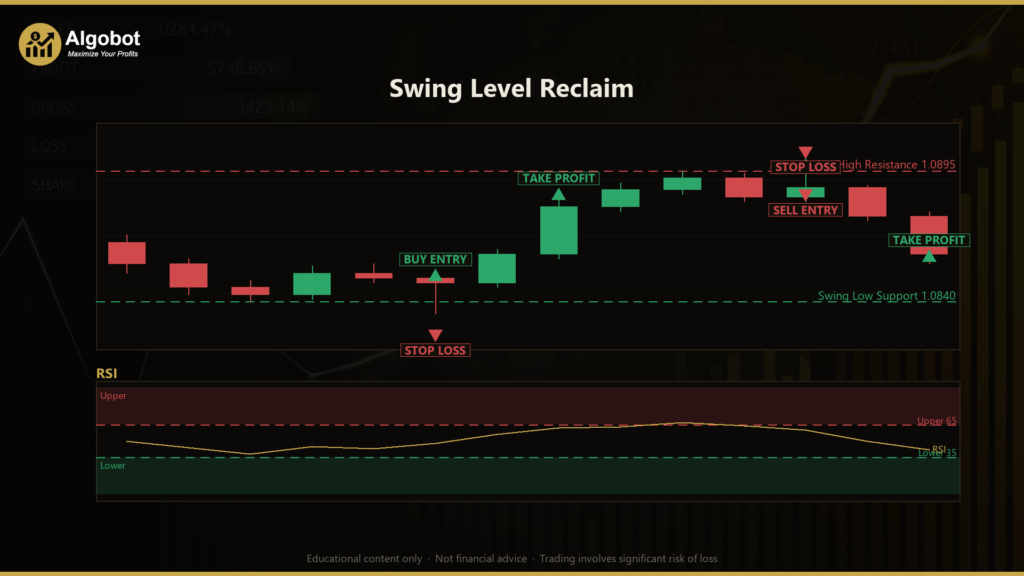
The Swing Level Reclaim strategy is a price-action approach built around support and resistance (mapped automatically with fractal swing pivots) and confirmed by the Relative Strength Index (RSI), a momentum oscillator that measures the speed of recent price changes. It is a discretionary trading idea expressed as an automated Expert Advisor (EA) for MetaTrader 5, and its core focus is the false breakout — a move where price briefly pushes past an obvious level, triggers stop orders resting beyond it, and then snaps back. Traders often call this a "stop hunt," "liquidity sweep," or "sweep and reclaim."
The strategy is designed for markets that respect horizontal structure and tend to fake out before reversing — conditions you frequently see around prior swing highs and lows on intraday and swing timeframes. Rather than chasing a breakout, the Swing Level Reclaim waits for price to wick beyond a level and then close back inside it, treating that reversal as evidence that the breakout failed and that momentum may be turning. A genuine, decisive break in the other direction is explicitly ignored: the level is simply discarded so it never produces a counter-trend trade.
As a learning tool, this EA suits traders who want to study how swing structure, liquidity sweeps, and momentum confirmation can be combined into a rules-based system. It is not a shortcut and makes no promises about outcomes — think of it as a transparent, well-commented example of how a reclaim concept can be encoded, backtested, and examined. Beginners can use it to understand support/resistance mechanics, while more experienced traders can dissect the parameter logic and adapt it to their own research.
How It Works
The strategy evaluates once per completed bar and keeps a rolling memory of recent price structure. Here is the logic in plain English:
- Mapping structure: The EA scans for fractal swing pivots. A swing low is a bar whose low is the lowest within a window of
SwingLookbackbars on each side; a swing high is the mirror image. Confirmed pivots become the active support and resistance levels. - Keeping levels fresh: Each level carries a "fresh" flag and an age. A level is discarded when it gets older than
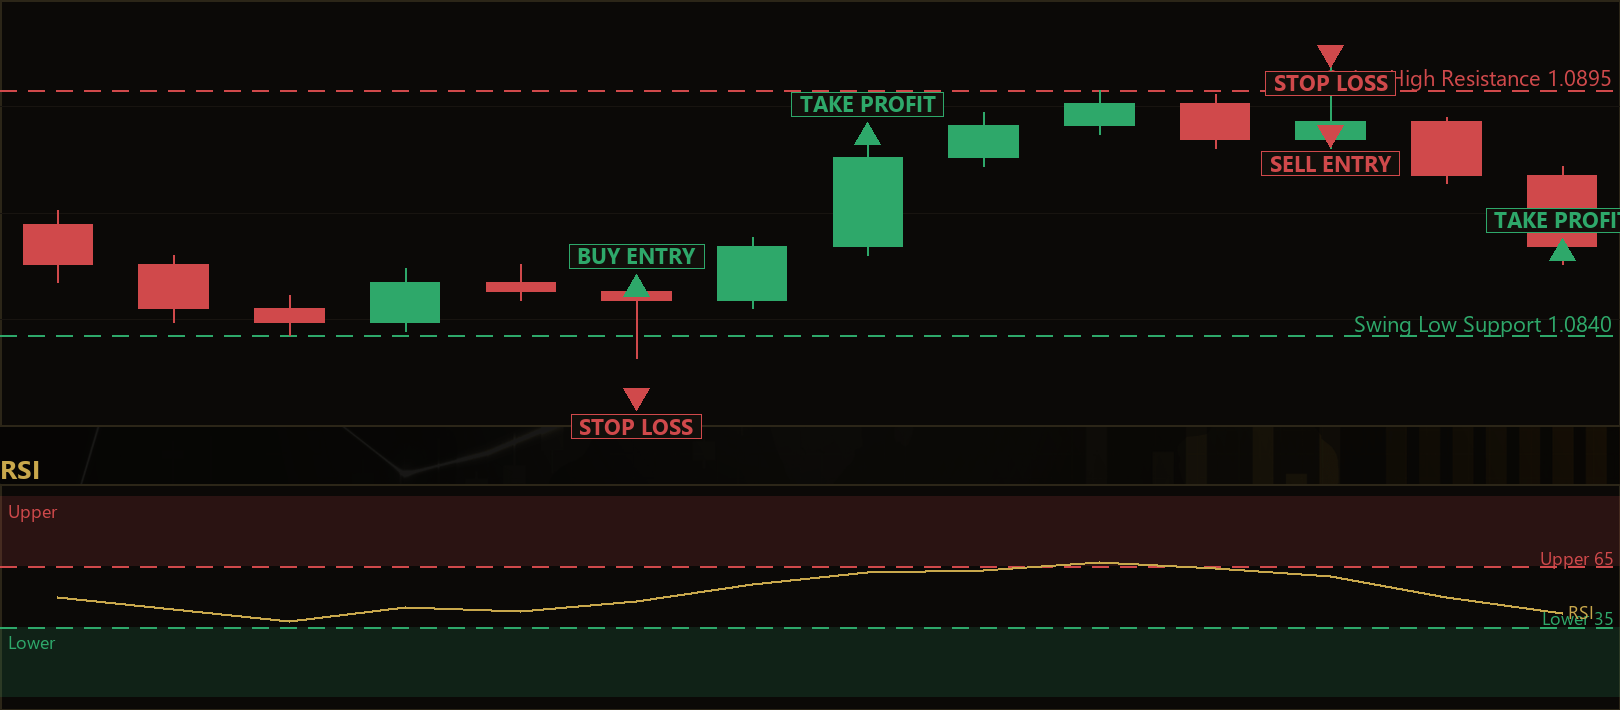
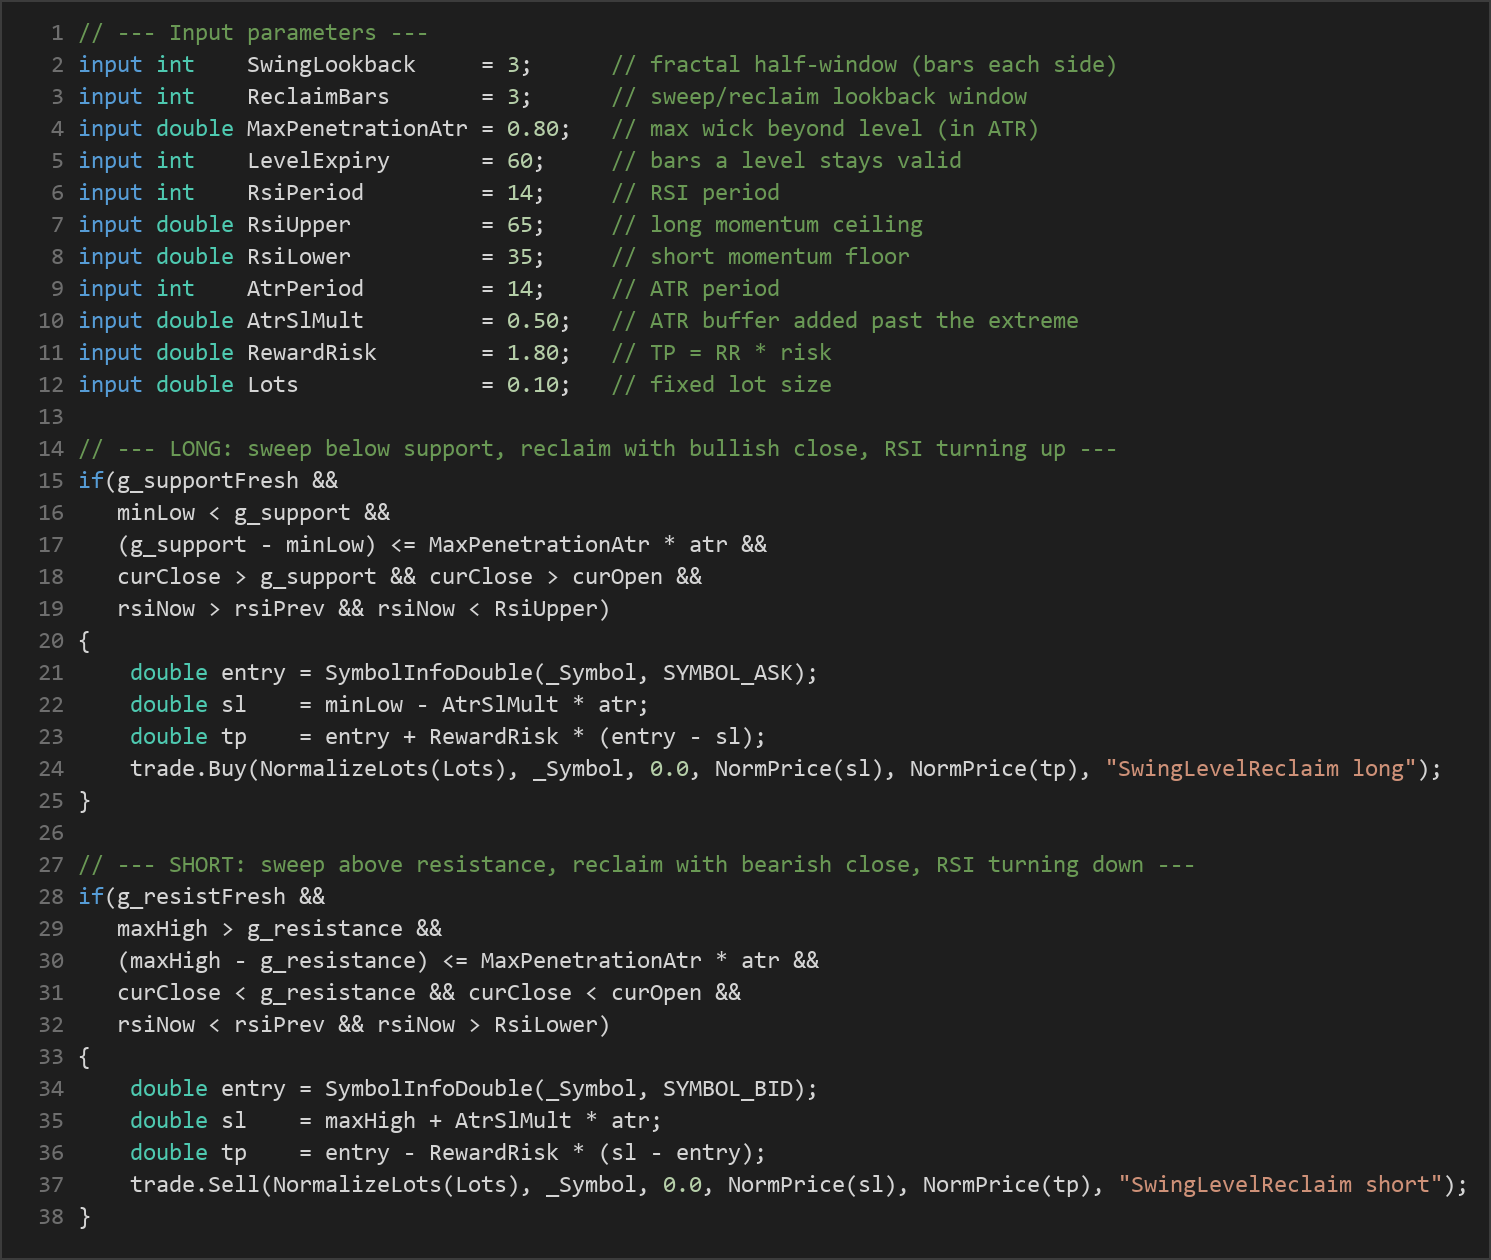
LevelExpirybars, or when price decisively closes beyond it (a close more thanMaxPenetrationAtr × ATRpast the level). That decisive break is treated as a real breakout/breakdown that invalidates the level — not as a trade signal. ATR (Average True Range) is a volatility measure used to scale these distances to current market conditions. - The long signal (sweep below support, then reclaim): The strategy signals a potential long when, over the last
ReclaimBarsbars, price wicked below a fresh support level (sweeping stops), the penetration stayed withinMaxPenetrationAtr × ATR(a controlled wick, not a true breakdown), the current bar closes back above support, the candle is bullish (close above open), and RSI is turning up while still belowRsiUpper. - The short signal (sweep above resistance, then reclaim): The mirror image. Price wicks above a fresh resistance level within the allowed penetration, the current bar closes back below resistance, the candle is bearish (close below open), and RSI is turning down while still above
RsiLower. - Stop-loss logic: The stop is placed just beyond the swept extreme — for longs, below the lowest low of the sweep window minus
AtrSlMult × ATR; for shorts, above the highest high plus the same buffer. This puts the stop past the level's logical invalidation point, padded by volatility. - Take-profit logic: The target uses a fixed reward-to-risk multiple. Risk is the distance from entry to stop, and the take-profit is set at
RewardRisk × riskin the direction of the trade. - Position management: Only one position per magic number is allowed at a time, and the triggering level is "consumed" (marked no longer fresh) once a trade is sent, so the same sweep cannot fire repeatedly.
Strategy Parameters
| Parameter | Default | Min | Max | Description |
|---|---|---|---|---|
| SwingLookback | 3 | 2 | 8 | Fractal half-window: bars required on each side to confirm a swing pivot. Larger values find fewer, more significant levels. |
| ReclaimBars | 3 | 1 | 6 | How many recent bars form the sweep/reclaim window used to detect the wick beyond a level. |
| MaxPenetrationAtr | 0.80 | 0.20 | 2.0 | Maximum allowed wick beyond a level, in ATR units. A close past this threshold invalidates the level instead of triggering a trade. |
| LevelExpiry | 60 | 10 | 200 | Number of bars a confirmed level stays valid before it is considered stale and discarded. |
| RsiPeriod | 14 | 5 | 30 | Lookback period for the RSI momentum oscillator. |
| RsiUpper | 65 | 50 | 80 | Momentum ceiling for longs: RSI must be turning up but still below this value. |
| RsiLower | 35 | 20 | 50 | Momentum floor for shorts: RSI must be turning down but still above this value. |
| AtrPeriod | 14 | 5 | 30 | Lookback period for the ATR volatility measure used in penetration and stop sizing. |
| AtrSlMult | 0.50 | 0.10 | 2.0 | ATR buffer added beyond the swept extreme when placing the stop-loss. |
| RewardRisk | 1.80 | 1.0 | 4.0 | Reward-to-risk multiple: take-profit distance as a multiple of the entry-to-stop risk. |
| Lots | 0.10 | 0.01 | 1.0 | Fixed trade volume in lots (subject to broker minimum, maximum, and step). |
Recommended Chart Settings
This EA is symbol- and timeframe-agnostic: it runs on whatever instrument and timeframe you attach it to at test time, building its levels from that chart's own price history. Because the concept depends on respected horizontal structure and clean liquidity sweeps, it is commonly studied on liquid markets — such as major forex pairs or indices — using intraday-to-swing timeframes (for example, M15, H1, or H4) where swing pivots are meaningful and noise is lower than on very fast charts.
Whatever you choose, remember that results will vary considerably across instruments, sessions, and market regimes. Trending, ranging, and high-volatility conditions can each change how often the sweep-and-reclaim pattern appears and how reliably it follows through. Always test on the exact symbol and timeframe you intend to study before drawing any conclusions.
How to Install on MetaTrader 5
- Download the
.ex5file from the link below. - Copy it to your MT5
MQL5\Expertsfolder. - Restart MetaTrader 5 or refresh the Navigator panel.
- Drag the EA onto a chart matching the recommended symbol and timeframe.
- Configure the input parameters and enable Algo Trading.
What to Consider Before Using This EA
The strength of the Swing Level Reclaim approach is its clear, logical structure. It trades against obvious breakouts only when they fail, and it places stops at a genuine invalidation point rather than at an arbitrary distance. The penetration filter and the "decisive break invalidates the level" rule are designed to keep the EA from fighting real trends, and the RSI turn requirement adds a momentum check on top of the price-action trigger.
That said, every approach has limitations. Reclaim setups can be late or whipsawed in fast, news-driven moves, where price blows clean through a level without the controlled wick the EA needs. In strongly trending markets, fresh support and resistance can break decisively and repeatedly, so the strategy may sit on the sidelines or take losses as levels are invalidated. RSI, like any oscillator, can stay stretched during momentum and give ambiguous "turning" signals. Fixed lot sizing does not adapt to account growth or volatility, and a fixed reward-to-risk target may exit before a larger move completes or hold through a reversal. None of these are flaws unique to this EA — they are inherent trade-offs of a structure-plus-momentum design, and they are exactly the kind of behavior worth observing during testing.
Risk Management Tips
- Size positions sensibly. A common educational guideline is to risk no more than 1–2% of account equity on any single trade. Adjust lot size so the distance to your stop-loss reflects that limit, rather than trading a fixed lot blindly.
- Use a demo account first. Run the EA on a demo or simulated account until you understand how it behaves across different sessions and market conditions.
- Understand drawdown. Even a well-designed strategy will experience losing streaks. Study the maximum historical drawdown so you know what a normal rough patch looks like before it happens live.
- Diversify and don't over-leverage. Concentrating risk on one symbol or using excessive leverage can amplify losses quickly.
- Keep a trading journal. Recording why each trade triggered helps you separate strategy behavior from market noise and refine your parameters thoughtfully.
Risk Warning
Trading foreign exchange, CFDs, and other leveraged financial instruments involves substantial risk of loss and is not suitable for all investors. The strategies and tools discussed on this page are provided for educational purposes only and do not constitute financial advice, investment recommendations, or solicitation to trade. Always consult a qualified financial adviser before making trading decisions. Past backtest performance is not indicative of future results.
Downloads
- Expert Advisor: SwingLevelReclaim.ex5 (61 downloads)
- Source Code: SwingLevelReclaim.mq5 (61 downloads)
- Documentation: SwingLevelReclaim.pdf (73 downloads)