
Disclaimer: This article is for educational and informational purposes only. It does not constitute financial or investment advice. Trading forex and CFDs carries significant risk of loss. Past performance of any strategy — including backtests — does not guarantee future results. Never trade with money you cannot afford to lose.
What Is This Strategy?
Stochastic Pop Momentum is a momentum-ignition strategy built on the Stochastic Oscillator, applied through Jake Bernstein's contrarian "Stochastic Pop & Drop" concept. The Stochastic Oscillator is a bounded indicator (0–100) that measures where the current close sits inside its recent high-to-low range. Most traders learn it as a fade tool: a reading above 80 is "overbought — sell", and a reading below 20 is "oversold — buy". This strategy deliberately does the opposite, treating a decisive push through those levels as a sign of fresh directional demand rather than exhaustion.
The reasoning is that an overbought reading is only bearish inside a range. When a market is trending, a thrust that shoves the fast Stochastic line through the 80 trigger — with the slower signal line still trailing behind — is a leadership and acceleration event. The crowd that keeps selling because price "looks overbought" supplies the liquidity the trend runs against. To separate a genuine continuation "pop" from a range-bound false pop, the strategy gates every signal with a trend filter built from an Exponential Moving Average (EMA), a moving average that weights recent prices more heavily so it reacts faster than a simple average.
As a learning tool, this strategy is well suited to traders who want to study how momentum-continuation logic differs from classic reversion, how oscillator readings behave differently in trends versus ranges, and how a structural stop-loss combined with a breakeven lock can shape a trade's risk profile. It is designed for trending market conditions on liquid instruments and should be viewed as a framework for understanding momentum ignition — not as a shortcut to any particular outcome.
How It Works
The strategy evaluates its rules once per closed bar and keeps at most one position open at a time. It builds distinct long and short setups that mirror each other.
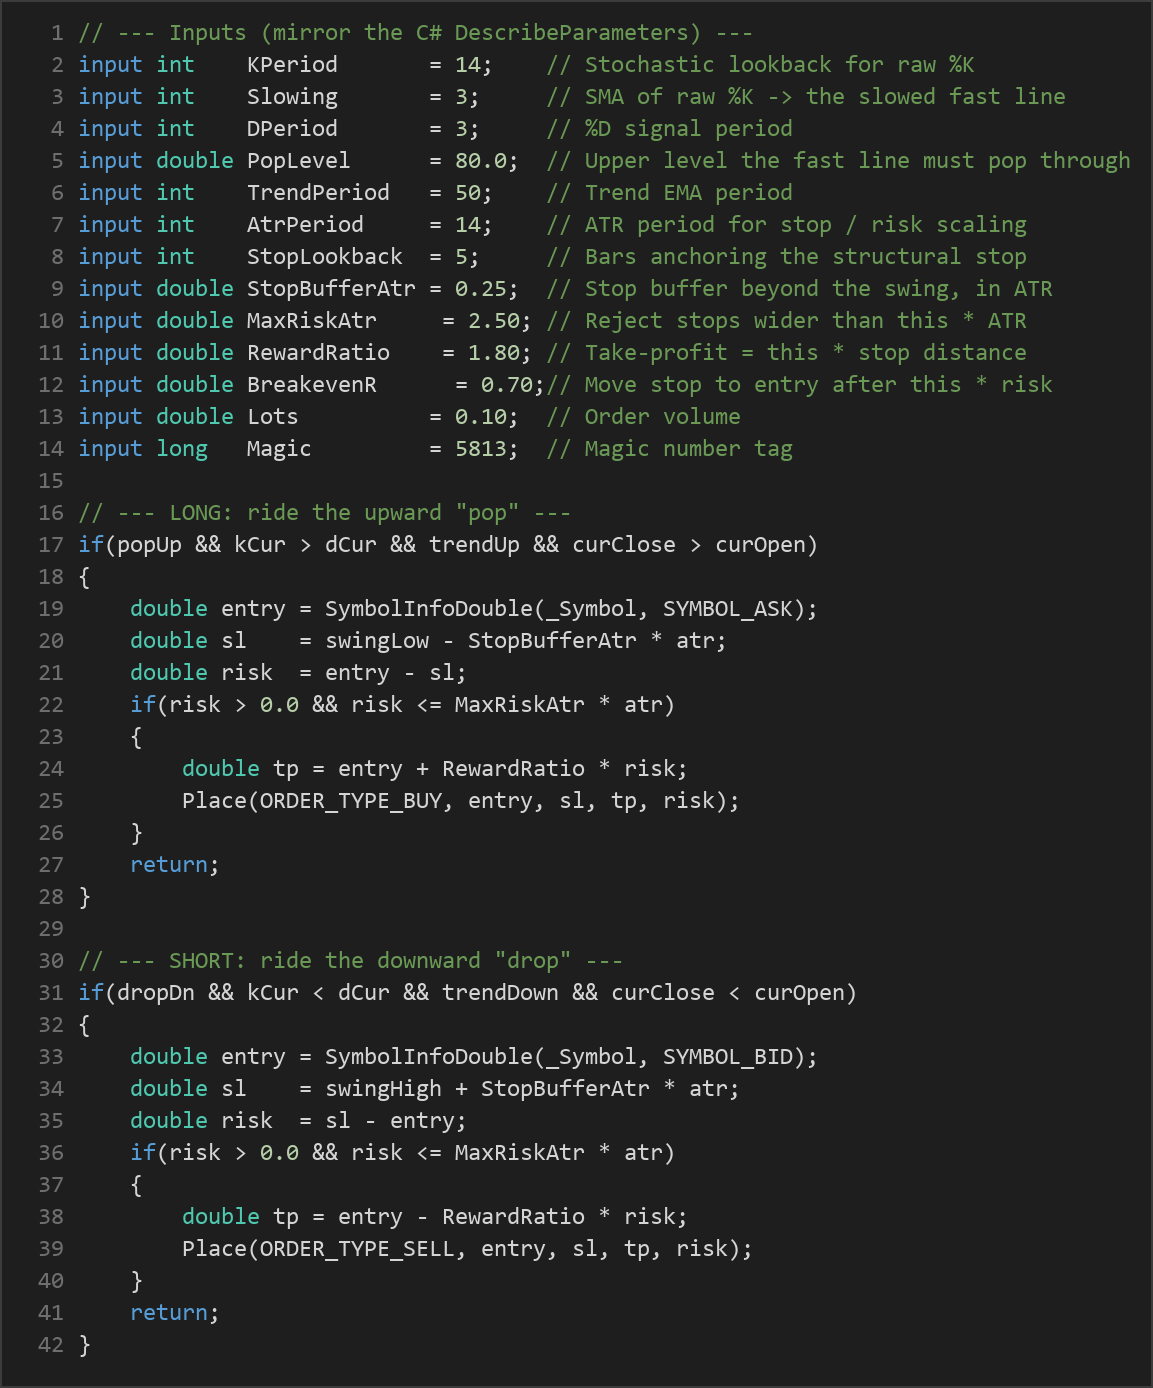
Long entry — "ride the pop" — the strategy signals a long only when all of the following align:
- The slowed %K (fast Stochastic line) crosses freshly above the Pop Level (previous %K at or below the level, current %K above it). This "fresh cross" requirement ensures the pop is a new event, not a stale reading.
- %K is above %D (the signal line), meaning the fast line leads the slow line — a sign of building upward momentum.
- Price is above a rising trend EMA (the EMA today is higher than it was three bars ago), confirming the pop agrees with the prevailing uptrend.
- The ignition bar closed bullish (close above open), giving a candle-level confirmation of buying pressure.
Short entry — "ride the drop" — the exact mirror image: %K crosses freshly below the drop level (calculated as 100 minus the Pop Level), %K is below %D, price sits below a falling trend EMA, and the ignition bar closed bearish.
Stop-loss logic — the stop is structural, anchored to recent price action rather than a fixed distance:
- For longs, it is placed just below the lowest low over the last
StopLookbackbars; for shorts, just above the highest high. A buffer ofStopBufferAtr × ATRis added beyond that swing extreme so normal noise does not clip the trade. ATR (Average True Range) measures recent volatility. - If the resulting stop distance would exceed
MaxRiskAtr × ATR, the setup is rejected entirely. This keeps per-trade risk bounded and comparable across symbols and timeframes.
Take-profit logic — the target is set at RewardRatio multiplied by the structural stop distance. With the default 1.80 ratio, the take-profit sits at 1.8 times the risk taken on the trade.
Trade management — two mechanisms aim to protect an open position:
- Breakeven lock: once price moves
BreakevenR × riskin the trade's favour, the stop is pulled up to the entry price, so a winning trade can no longer turn into a loss. This is checked every tick for a prompt reaction. - Momentum-fade exit: if the Stochastic %K/%D lines cross back against the position — the pop losing steam — the trade is closed early rather than waiting for the stop or target. This cuts stalled trades before they retrace.
Because only closed bars drive decisions (the forming bar is used solely to detect that a new bar has opened), the logic is non-repainting.

Strategy Parameters
| Parameter | Default | Min | Max | Description |
|---|---|---|---|---|
| KPeriod | 14 | 5 | 40 | Stochastic lookback for the raw %K (the highest-high / lowest-low window). |
| Slowing | 3 | 1 | 10 | Smoothing applied to raw %K (SMA) to produce the slowed fast line. |
| DPeriod | 3 | 1 | 10 | %D signal-line period: a simple moving average of the slowed %K. |
| PopLevel | 80.0 | 60.0 | 90.0 | Upper trigger the fast line must pop through; the drop level is 100 − PopLevel. |
| TrendPeriod | 50 | 10 | 200 | Trend EMA period; pops are taken only in the direction of this baseline. |
| AtrPeriod | 14 | 5 | 40 | ATR period used to scale the stop buffer and the risk cap. |
| StopLookback | 5 | 2 | 20 | Number of bars whose swing extreme anchors the structural stop. |
| StopBufferAtr | 0.25 | 0.00 | 1.50 | Extra stop buffer beyond the swing extreme, in ATR units. |
| MaxRiskAtr | 2.50 | 1.00 | 6.00 | Rejects setups whose stop distance exceeds this multiple of ATR. |
| RewardRatio | 1.80 | 0.80 | 4.00 | Take-profit distance as a multiple of the structural stop distance. |
| BreakevenR | 0.70 | 0.20 | 2.00 | Move the stop to breakeven once price runs this multiple of risk in favour. |
| Lots | 0.10 | 0.01 | 1.00 | Position size (order volume) in lots. |
| Magic | 5813 | 0 | 9,999,999 | Magic number tag that identifies this strategy's positions. |
Recommended Chart Settings
This strategy is timeframe-agnostic because every calculation uses the timeframe selected at run time, but it was designed with FX majors and metals in mind on the M15 to H1 timeframes, where trend-continuation pops tend to be cleaner and spreads stay reasonable. You can apply it to other instruments, but you should test each symbol and timeframe on its own. Trending, liquid markets suit the logic best; choppy or thinly traded conditions produce more of the false pops the trend filter is meant to exclude. Results will always vary across different market conditions, so treat the defaults as a starting point for study rather than fixed settings.
How to Install on MetaTrader 5
- Download the .ex5 file from the link below.
- Copy it to your MT5
MQL5\Expertsfolder. - Restart MetaTrader 5 or refresh the Navigator panel.
- Drag the EA onto a chart matching the recommended symbol and timeframe.
- Configure the input parameters and enable Algo Trading.
What to Consider Before Using This EA
The main strength of this approach is that it inverts a common assumption in a disciplined way. By treating an overbought pop as ignition rather than exhaustion — and only accepting it when the EMA trend agrees — the strategy tries to capture the exact moments when momentum-continuation historically outperforms the reflexive fade. The structural stop, ATR risk cap, breakeven lock, and momentum-fade exit combine to keep individual trades tightly defined.
There are real limitations to understand. The Stochastic Oscillator is a lagging, range-derived indicator, and pops can and do fail — especially when a trend is maturing or when price is genuinely stretched. In sideways markets, the classic fade tends to win and this continuation logic tends to lose, which is why the trend gate matters so much; when that gate is weak or the market is transitioning, whipsaws increase. The strategy also passes on any setup whose stop would be too wide, so during highly volatile sessions it may sit out entirely. Requiring a fresh cross, momentum lead, trend agreement, and a confirming candle body makes signals selective, meaning long quiet stretches with no trades are normal. None of these are flaws to be "fixed" — they are the trade-offs of a selective, continuation-based system, and understanding them is the point of studying it.
Risk Management Tips
Sound risk management matters more than any single entry rule. Consider these general principles as you study this strategy:
- Risk a small, fixed fraction per trade. Many educational sources suggest risking no more than 1–2% of account equity on any single position. Size your
Lotsaccordingly rather than using a default blindly. - Test on a demo account first. Run the EA in a demo or on the MT5 Strategy Tester across several market regimes before considering any live use, so you understand its behaviour and typical drawdown.
- Understand drawdown. Even a selective strategy will string together losing trades. Know the worst peak-to-trough decline you could tolerate emotionally and financially, and confirm the strategy's behaviour fits within it.
- Diversify and avoid over-leverage. Concentrating risk in one symbol or over-sizing positions amplifies losses. Keep leverage conservative.
- Review regularly. Markets change; parameters that suited one period may not suit another. Revisit performance and assumptions periodically.
Risk Warning
Trading foreign exchange, CFDs, and other leveraged financial instruments involves substantial risk of loss and is not suitable for all investors. The strategies and tools discussed on this page are provided for educational purposes only and do not constitute financial advice, investment recommendations, or solicitation to trade. Always consult a qualified financial adviser before making trading decisions. Past backtest performance is not indicative of future results.
Downloads
- Expert Advisor: StochasticPopMomentum.ex5 (45 downloads)
- Source Code: StochasticPopMomentum.mq5 (41 downloads)
- Documentation: StochasticPopMomentum.pdf (50 downloads)