Disclaimer: This article is for educational and informational purposes only. It does not constitute financial or investment advice. Trading forex and CFDs carries significant risk of loss. Past performance of any strategy — including backtests — does not guarantee future results. Never trade with money you cannot afford to lose.
What Is This Strategy?
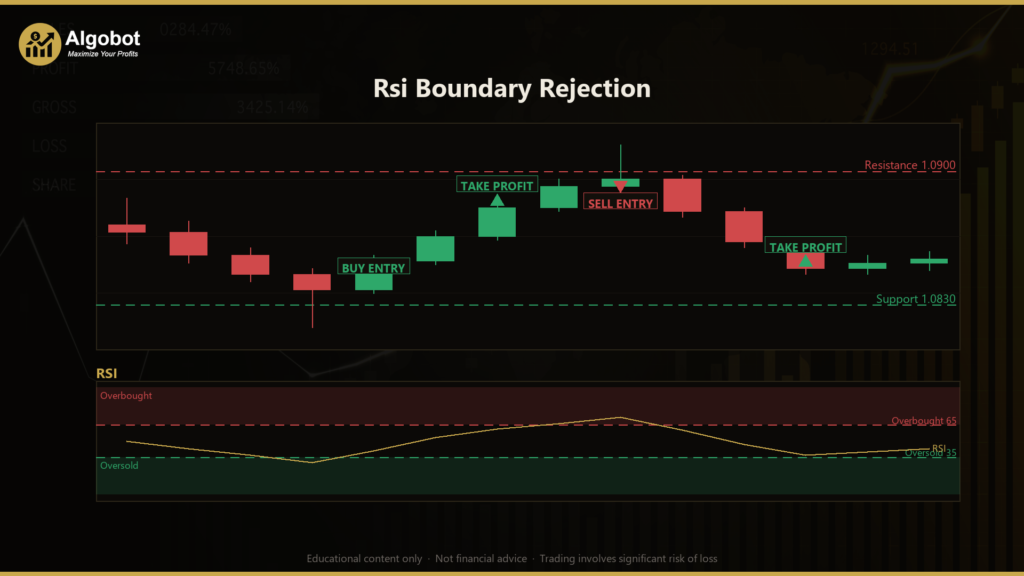
The Rsi Boundary Rejection strategy is a mean-reversion reversal system that combines two classic ideas from technical analysis: price-action support and resistance levels, and the Relative Strength Index (RSI), a momentum oscillator that measures whether a market is overbought or oversold. Rather than chasing breakouts, this approach is built to do the opposite — it looks for failed breakouts at obvious chart levels and fades them, meaning it trades against the short-term move on the expectation that price will snap back into its prior range.
The core observation behind Rsi Boundary Rejection is something most active traders have seen on a chart: price briefly spikes through a recent swing high or swing low, trips the stop orders resting just beyond that level, and then quickly reverses because there was no genuine buying or selling pressure behind the poke. This "sweep and reclaim" behaviour is a recurring liquidity event in liquid markets. On its own, a level poke is noisy, so the strategy adds a second filter — momentum must already be stretched in the same direction — before it considers a trade valid.
As a learning tool, this strategy is well suited to traders who want to study how price action and momentum can be combined into a single, rule-based system. It is designed for swing and mean-reversion trading styles rather than fast scalping or trend-following. Because every condition is defined by code, it is also a useful example of how a discretionary "stop-run reversal" idea can be translated into objective, testable rules. This is a strategy analysis — not a profit opportunity — and the goal here is to understand the logic, not to expect a particular outcome.
How It Works
The strategy evaluates conditions once per newly closed bar, so it never acts on an incomplete, still-forming candle. When a bar closes, it becomes the "signal bar" that the rules are tested against. Here is how the logic flows:
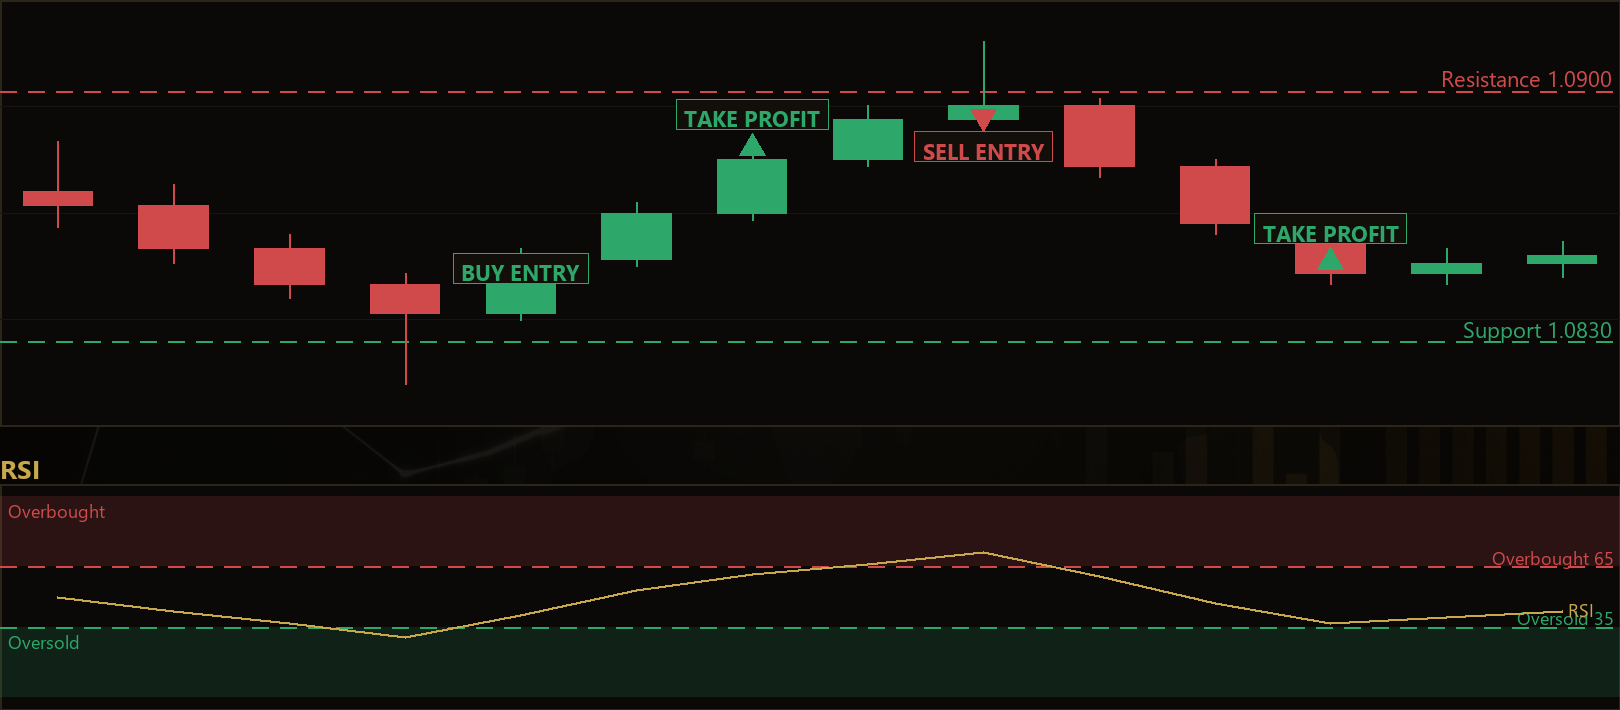
- Defining the level (price action): Over the most recent closed bars before the signal bar (controlled by the Lookback parameter), the strategy marks resistance as the highest high and support as the lowest low. These levels self-update on every new bar, so they always reflect current structure on whatever symbol and timeframe you load.
- Detecting the sweep (price action): The signal bar must pierce a level by a meaningful amount — at least a fraction of the Average True Range, or ATR (a volatility measure of the typical bar's range) — and then close back inside the range. This filters out tiny rounding touches and requires a real poke followed by rejection.
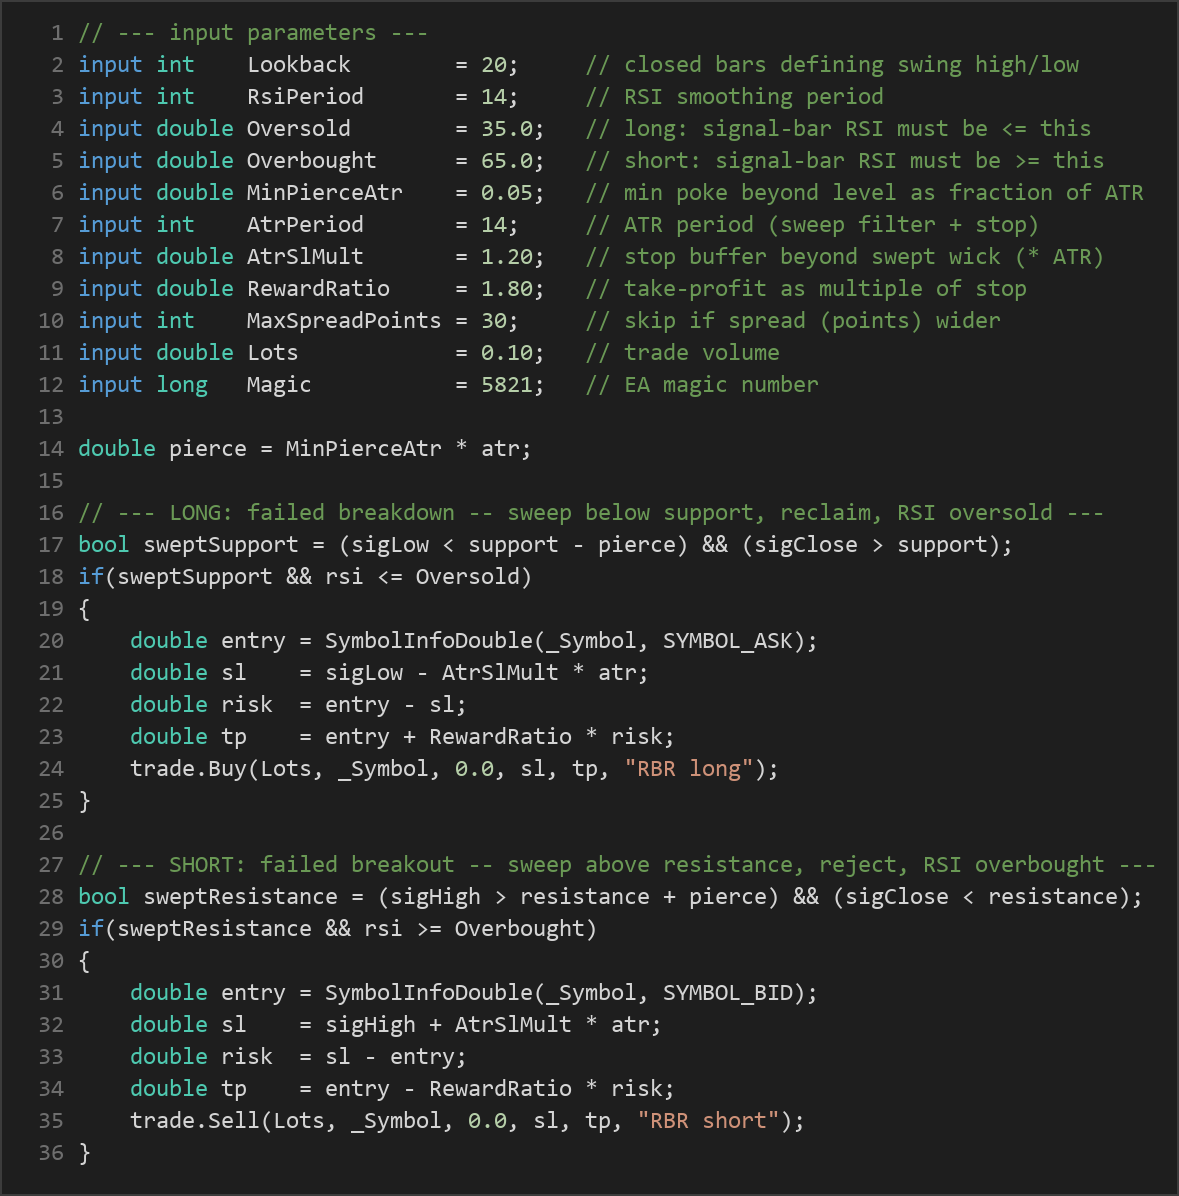
- Long setup: the bar's low drops below support by more than
MinPierceAtr × ATR, but the bar closes back above support — a failed breakdown. - Short setup: the bar's high rises above resistance by more than
MinPierceAtr × ATR, but the bar closes back below resistance — a failed breakout. - Confirming exhaustion (RSI): The RSI reading on the signal bar must already be at an extreme in the same direction. For longs, RSI must be at or below the Oversold threshold; for shorts, RSI must be at or above the Overbought threshold. Requiring both structure and momentum to agree is the central idea — either signal alone is ignored.
- Entry: When all conditions align, the strategy signals a market entry — a buy at the ask price for a long, or a sell at the bid price for a short.
- Stop-loss logic: The stop is placed just beyond the swept wick — below the signal bar's low for a long, or above its high for a short — buffered by
AtrSlMult × ATR. The reasoning is that if price trades back through the very extreme that was supposed to reject it, the reversal thesis has failed and the trade should be closed. - Take-profit logic: The target is set at a fixed multiple of the stop distance, defined by RewardRatio. If the stop is 30 points away and RewardRatio is 1.80, the target sits 54 points from entry. This keeps the reward-to-risk ratio consistent regardless of volatility.
- Trade management: The strategy holds only one position per magic number at a time and lets the ATR-based stop and target manage the exit. It also skips any trade when the current spread is wider than MaxSpreadPoints, helping avoid poor entry conditions.
The long and short rules are exact mirror images of each other, so the system treats both directions symmetrically.
Strategy Parameters
| Parameter | Default | Min | Max | Description |
|---|---|---|---|---|
| Lookback | 20 | 8 | 60 | Number of closed bars used to define the swing high (resistance) and swing low (support). |
| RsiPeriod | 14 | 7 | 28 | Smoothing period for the RSI momentum oscillator. |
| Oversold | 35.0 | 15.0 | 45.0 | Signal-bar RSI must be at or below this value to fade a failed breakdown (long). |
| Overbought | 65.0 | 55.0 | 85.0 | Signal-bar RSI must be at or above this value to fade a failed breakout (short). |
| MinPierceAtr | 0.05 | 0.00 | 1.00 | Minimum poke beyond the level, as a fraction of ATR, to qualify as a real sweep. |
| AtrPeriod | 14 | 7 | 30 | ATR period used for both the sweep filter and the stop distance. |
| AtrSlMult | 1.20 | 0.30 | 4.00 | Stop-loss buffer placed beyond the swept wick, as a multiple of ATR. |
| RewardRatio | 1.80 | 0.80 | 4.00 | Take-profit distance as a multiple of the stop distance. |
| MaxSpreadPoints | 30 | 1 | 200 | Skip the trade if the current spread (in points) is wider than this. |
| Lots | 0.10 | 0.01 | 1.00 | Trade volume in lots. |
| Magic | 5821 | 0 | 9,999,999 | Unique identifier so the EA manages only its own positions. |
Recommended Chart Settings
Rsi Boundary Rejection was designed with mean-reverting markets in mind. Its default "playground" is a liquid FX major or a metal — for example EURUSD, AUDUSD, or XAUUSD (gold) — on the M15 to H1 timeframes. These instruments tend to produce the kind of stop-run-and-reverse behaviour the strategy is built to detect, and the M15–H1 window suits a swing/mean-reversion holding style.
Because every level, sweep threshold, and stop is derived from ATR and recent price structure, the logic self-scales to whatever symbol and timeframe you load — no manual pip or point tuning is required. That said, results will vary significantly across different instruments and market conditions. A strongly trending market, in particular, can behave very differently from the range-bound conditions this approach favours. Always test on your specific broker, symbol, and timeframe before drawing any conclusions.
How to Install on MetaTrader 5
- Download the .ex5 file from the link below
- Copy it to your MT5
MQL5\Expertsfolder - Restart MetaTrader 5 or refresh the Navigator panel
- Drag the EA onto a chart matching the recommended symbol and timeframe
- Configure the input parameters and enable Algo Trading
What to Consider Before Using This EA
Every strategy involves trade-offs, and an honest assessment helps you use this one as the educational tool it is meant to be.
Strengths of the approach. The logic targets a genuine, repeatable market event — liquidity sweeps at obvious levels — rather than an arbitrary indicator crossover. Demanding two independent confirmations (a same-bar reclaim of structure and a stretched RSI reading) is a deliberate filter that screens out many of the naive level-fades that get run over by real breakouts. The ATR-based stops and targets also adapt to volatility automatically, which keeps the risk framework consistent across different instruments.
Known limitations. Mean-reversion systems share a common weakness: they trade against momentum, so a strong, sustained trend can produce a series of losses as price pushes through level after level without reversing. RSI, like all oscillators, can remain pinned at an extreme far longer than seems reasonable during powerful moves — an "oversold" market can keep falling. Because the strategy only takes one position at a time and waits for a fairly specific confluence of conditions, signals may also be infrequent on some symbols. Whipsaw conditions, news spikes, and unusually wide spreads can all degrade performance, and the spread gate, while helpful, is not a complete safeguard.
The honest takeaway is that this is a well-defined, single-concept strategy with clear logic — not a finished, hands-off solution. It is best treated as a framework to study, test, and understand.
Risk Management Tips
Risk management is what separates a sustainable approach from a fragile one. Whatever strategy you study, a few general principles apply:
- Risk a small, fixed fraction per trade. Many educational sources suggest risking no more than 1–2% of account equity on any single position. The Lots parameter here is fixed, so you should size it relative to your account and the ATR-based stop distance rather than leaving it at a default.
- Start on a demo account. Run the EA in a simulated environment first to understand how often it trades, how it behaves in different market conditions, and how the stops and targets play out before any real capital is involved.
- Understand drawdown. Even a sound strategy will have losing streaks. Knowing the depth and duration of historical drawdowns helps you decide whether you could realistically stick with the approach during a rough patch.
- Account for costs. Spreads, commissions, and slippage all eat into results, especially for a strategy that enters at market. Keep the spread gate sensible for your broker.
- Never risk money you cannot afford to lose. Leverage amplifies both gains and losses, and no rule set removes the underlying risk of trading.
Risk Warning
Trading foreign exchange, CFDs, and other leveraged financial instruments involves substantial risk of loss and is not suitable for all investors. The strategies and tools discussed on this page are provided for educational purposes only and do not constitute financial advice, investment recommendations, or solicitation to trade. Always consult a qualified financial adviser before making trading decisions. Past backtest performance is not indicative of future results.
Downloads
- Expert Advisor: RsiBoundaryRejection.ex5 (59 downloads)
- Source Code: RsiBoundaryRejection.mq5 (56 downloads)
- Documentation: RsiBoundaryRejection.pdf (69 downloads)