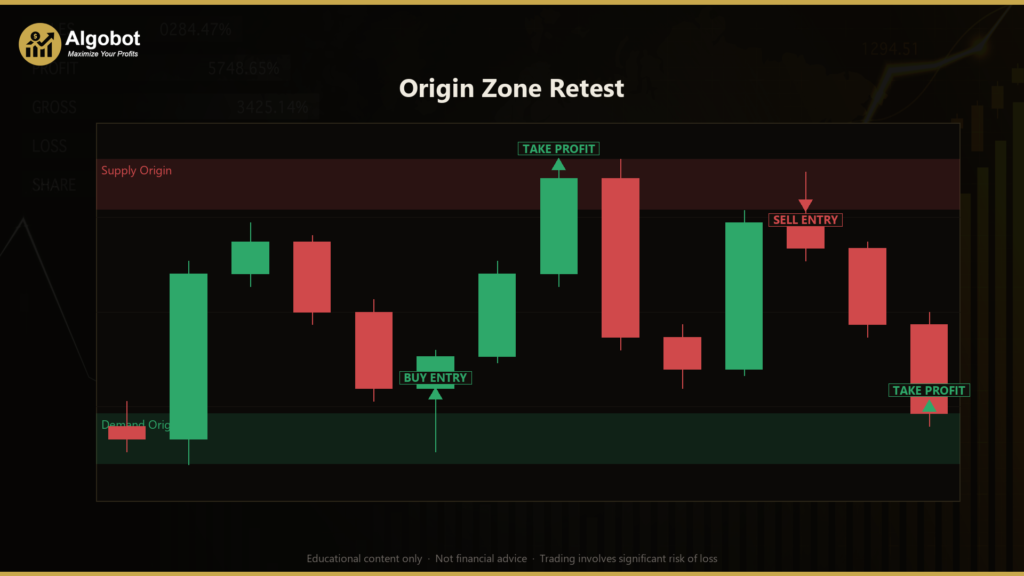
Disclaimer: This article is for educational and informational purposes only. It does not constitute financial or investment advice. Trading forex and CFDs carries significant risk of loss. Past performance of any strategy — including backtests — does not guarantee future results. Never trade with money you cannot afford to lose.
What Is This Strategy?
The Origin Zone Retest is a single-timeframe, price-action strategy that combines supply and demand zones with a momentum (impulse) filter built on the Average True Range (ATR) indicator. ATR is a volatility measure that reports the average size of recent price bars, and here it acts as the yardstick that decides whether a candle is genuinely "strong." The strategy identifies a powerful departure candle, remembers the origin it launched from, and then waits patiently for price to return to that origin before it considers a trade. Because it relies only on raw candle geometry rather than a stack of lagging indicators, it belongs to the broader family of supply-and-demand price-action trading.
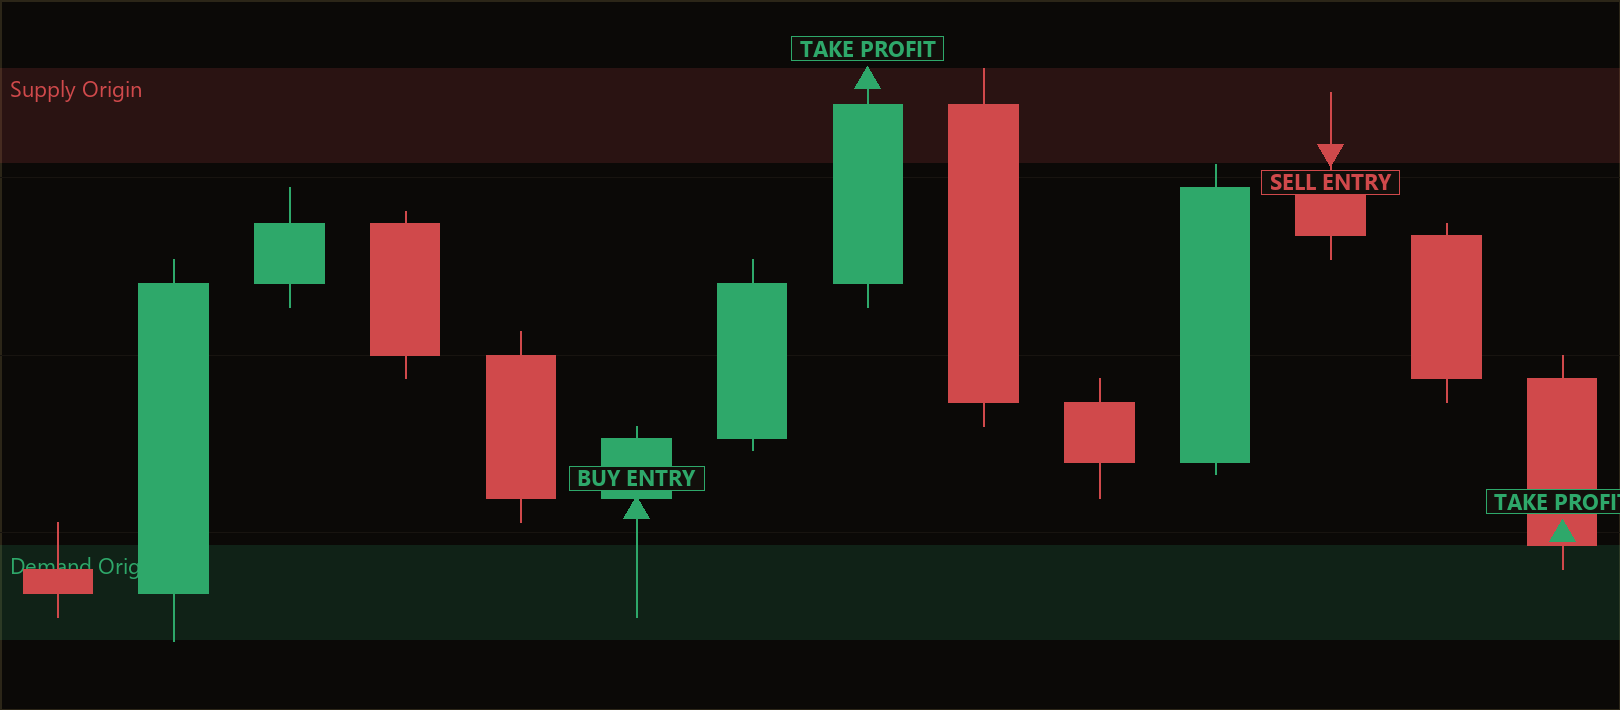
The core idea is intuitive. When a large, one-directional candle leaves an area quickly, it suggests that motivated buyers or sellers stepped in there. That launching area — the "origin" — becomes a fresh demand zone after a bullish impulse, or a fresh supply zone after a bearish impulse. The strategy assumes these areas are often defended the first time price revisits them, which can offer an objective, repeatable entry with a clearly defined risk boundary.
As a learning tool, this strategy is well suited to traders who want to study how impulse-and-retest logic can be expressed in strict, mechanical rules. It is designed for trending or momentum-driven conditions rather than flat, directionless ranges. Treat what follows as a strategy analysis meant to build understanding of supply/demand mechanics — not as a promise of any particular outcome.
How It Works
The strategy processes one completed bar at a time. It never acts on the still-forming candle; it evaluates the just-closed bar, which keeps signals stable and repaintable-free. Here is the logic, step by step.
Detecting the impulse (origin zone creation):
- The strategy measures each closed candle's body (the distance between open and close) against two thresholds.
- The body must be at least
ImpulseAtrMult× ATR — large relative to current volatility. - The body must also fill at least
BodyRatioof the candle's full high-to-low range — a "clean" directional candle, not one with long wicks. - A qualifying bullish impulse stamps a fresh demand origin spanning from the candle's low up to its open.
- A qualifying bearish impulse stamps a fresh supply origin spanning from the candle's open up to its high.
- If a zone would be thinner than half an ATR, it is padded out to that minimum thickness so it remains realistically retestable.
- Only one freshest zone per side is kept at any time, which keeps the strategy focused and low-noise.
Entry conditions — the retest:
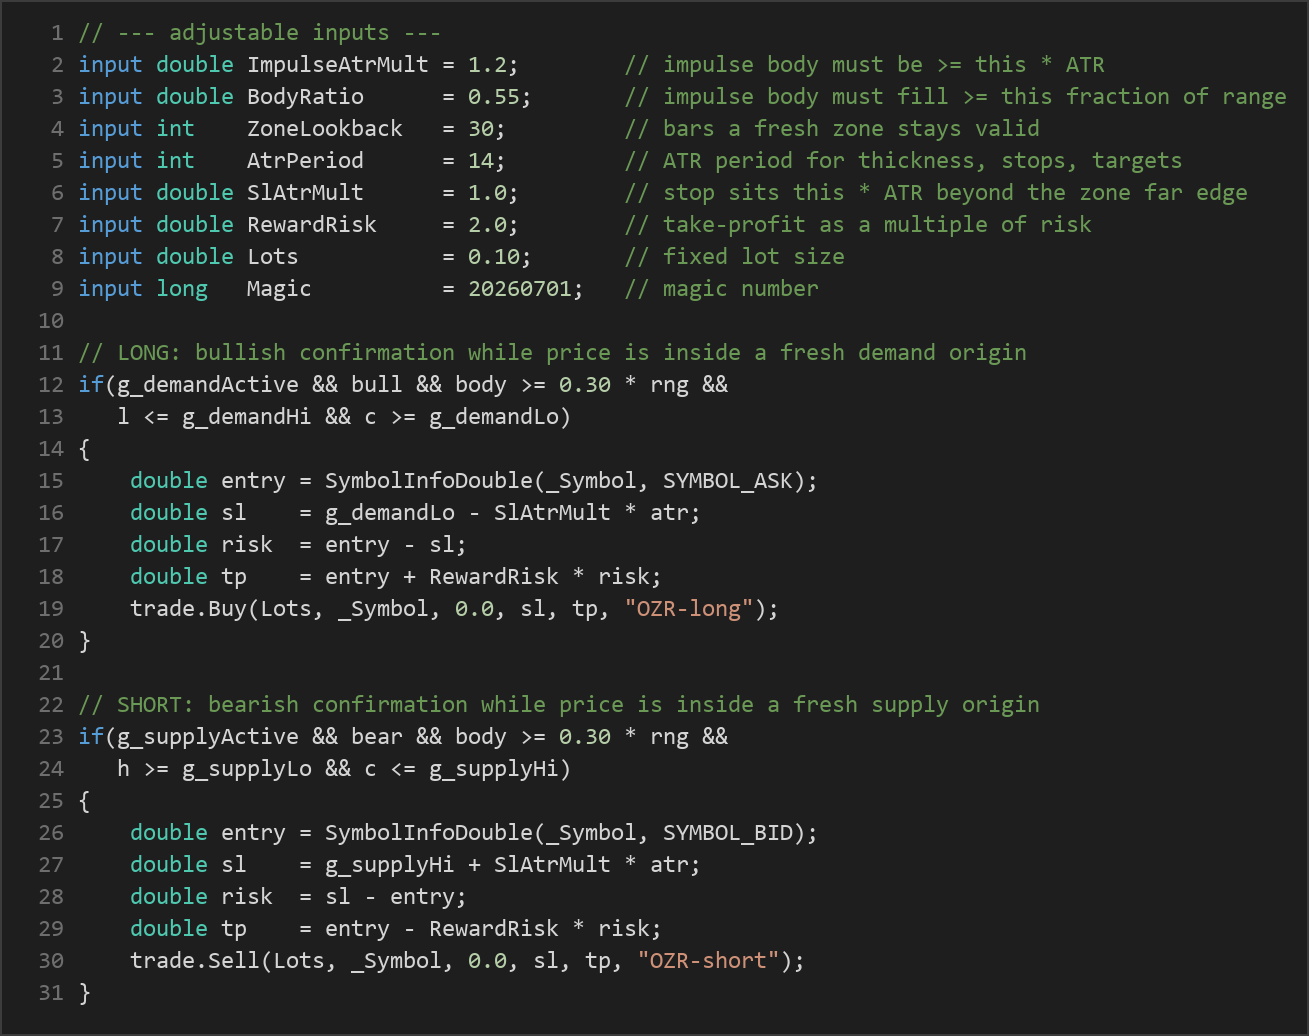
- The strategy signals a LONG when a fresh demand origin is active and the just-closed candle is bullish, its body fills at least 30% of its range, its low dips into the zone, and it closes at or above the zone's lower edge.
- The strategy signals a SHORT when a fresh supply origin is active and the just-closed candle is bearish, its body fills at least 30% of its range, its high reaches into the zone, and it closes at or below the zone's upper edge.
- A new position is only considered when no position for this strategy's magic number is already open.
- A zone is consumed after a single touch — once used, it is deactivated so it cannot fire twice.
Stop-loss logic:
- For a long, the stop is placed one
SlAtrMult× ATR below the demand zone's far (lower) edge. - For a short, the stop is placed one
SlAtrMult× ATR above the supply zone's far (upper) edge. - The resulting risk must be at least 0.15 × ATR; trades with a stop too tight to be meaningful are filtered out. This screens away dojis and micro-range noise.
Take-profit logic:
- The target is set at
RewardRiskmultiples of the measured risk distance, giving a fixed, asymmetric reward-to-risk profile (2:1 by default).
Trade management (break-even):
- Once an open trade has travelled one full unit of risk in your favour, the stop is lifted to the entry price (break-even), reducing exposure on a position that has already moved as far as its initial risk.
Zone housekeeping:
- A zone expires after
ZoneLookbackbars if it is never retested. - A zone is discarded if price closes through its far edge, since the level is then considered broken rather than defended.
Strategy Parameters
| Parameter | Default | Min | Max | Description |
|---|---|---|---|---|
| ImpulseAtrMult | 1.2 | 0.6 | 2.5 | How large the impulse candle's body must be, as a multiple of ATR. Higher values demand stronger momentum before a zone is created. |
| BodyRatio | 0.55 | 0.40 | 0.80 | Minimum fraction of the candle's total range that its body must fill. Higher values reject wicky, indecisive candles. |
| ZoneLookback | 30 | 10 | 100 | Number of bars a fresh zone stays valid before it expires unused. |
| AtrPeriod | 14 | 7 | 30 | Lookback period for the ATR used to size zone thickness, stops, and targets. |
| SlAtrMult | 1.0 | 0.3 | 2.5 | How far beyond the zone's far edge the stop-loss sits, as a multiple of ATR. |
| RewardRisk | 2.0 | 1.0 | 4.0 | Take-profit distance expressed as a multiple of the trade's risk. |
| Lots | 0.10 | 0.01 | 1.0 | Fixed trade volume in lots. |
Recommended Chart Settings
The Origin Zone Retest is a single-timeframe strategy, so it reads only the chart it is attached to — there is no higher-timeframe dependency to configure. Because its impulse and zone logic scale automatically with ATR, it can be studied across a range of instruments and timeframes. A common starting point for this style is a liquid forex pair such as EUR/USD on an intraday timeframe like M15 or H1, where momentum bursts and their retests are frequent enough to observe clearly.
Remember that supply and demand behaves differently across assets and sessions. A setting that looks reasonable on one pair or timeframe may behave very differently on another, and results will vary across changing market conditions. Always study the strategy on your chosen symbol and timeframe before drawing conclusions.
How to Install on MetaTrader 5
- Download the
OriginZoneRetest.ex5file from the link below. - Copy it to your MT5
MQL5\Expertsfolder. - Restart MetaTrader 5 or refresh the Navigator panel.
- Drag the EA onto a chart matching the recommended symbol and timeframe.
- Configure the input parameters and enable Algo Trading.
What to Consider Before Using This EA
Every mechanical strategy has strengths and trade-offs, and understanding both is part of using it responsibly.
Strengths of this approach:
- Objective and rule-based. Zones are defined by candle geometry, so there is no discretionary guesswork about where a level sits.
- Structure-based risk. Stops are anchored to the far edge of a real price zone rather than an arbitrary pip count, and every trade carries a defined, asymmetric target.
- Low-noise design. Keeping only the single freshest zone per side, consuming zones after one touch, and requiring a minimum body/range and stop distance all work to filter out marginal setups.
- Break-even management. Moving the stop to entry after one unit of risk reduces exposure once a trade has proven itself.
Known limitations:
- Trend dependency. Impulse-and-retest logic historically performs best when momentum follows through. In choppy, mean-reverting, or low-volatility ranges, zones may form and fail more often, and many retests may simply push through the level.
- First-touch assumption. The strategy is built on the idea that a fresh origin is defended on its first revisit. That is a tendency, not a rule, and there will be zones that break cleanly.
- Single freshest zone. By design the strategy tracks only one zone per side, so it may ignore other valid levels on the chart in exchange for focus.
- Fixed lot size. The default uses a static volume rather than sizing to account equity, which you should review against your own risk plan.
- News and gaps. Sudden fundamental events can produce impulse candles and violent retests that behave unpredictably relative to the historical pattern.
This is a tool for studying how supply/demand and momentum can be combined mechanically. It is neither a guaranteed edge nor something to dismiss — it is a framework worth understanding on its own terms.
Risk Management Tips
Sound risk management matters more than any single entry signal. Keep these general principles in mind as you study this or any strategy:
- Risk a small, fixed fraction per trade. Many educators suggest never risking more than 1–2% of account equity on a single position. Because this EA uses a fixed lot size by default, calculate what that lot actually risks given the ATR-based stop, and adjust accordingly.
- Test on a demo account first. Run the strategy in a simulated environment until you understand its behaviour, its typical setups, and its losing streaks before considering any live capital.
- Understand drawdown. Even a well-designed strategy will have losing sequences. Know the worst historical drawdown you are studying and ask whether you could tolerate it emotionally and financially.
- Mind position sizing across correlated markets. Running the EA on several correlated pairs can multiply your effective exposure beyond what a single-chart view suggests.
- Keep a trading journal. Recording why each trade triggered and how it resolved will teach you far more about the strategy than any parameter tweak.
Risk management is not a footnote to a strategy — it is the strategy. Prioritise capital preservation over chasing any individual setup.
Risk Warning
Trading foreign exchange, CFDs, and other leveraged financial instruments involves substantial risk of loss and is not suitable for all investors. The strategies and tools discussed on this page are provided for educational purposes only and do not constitute financial advice, investment recommendations, or solicitation to trade. Always consult a qualified financial adviser before making trading decisions. Past backtest performance is not indicative of future results.
Downloads
- Expert Advisor: OriginZoneRetest.ex5 (55 downloads)
- Source Code: OriginZoneRetest.mq5 (57 downloads)
- Documentation: OriginZoneRetest.pdf (61 downloads)