Disclaimer: This article is for educational and informational purposes only. It does not constitute financial or investment advice. Trading forex and CFDs carries significant risk of loss. Past performance of any strategy — including backtests — does not guarantee future results. Never trade with money you cannot afford to lose.
What Is This Strategy?
The Order Block Structure Continuation strategy is a pure price-action Expert Advisor (EA) for MetaTrader 5 built around the ICT (Inner Circle Trader) order block concept combined with market structure and break of structure (BOS) logic. Unlike many automated systems, it uses no oscillators or moving-average crossovers as entry signals. Instead, it reads the raw shape of the candles — swing highs, swing lows, displacement, and the institutional "order block" — to decide when and where to act. The only indicator it touches is the Average True Range (ATR), and that is used solely to size the protective stop buffer, never to generate a signal.
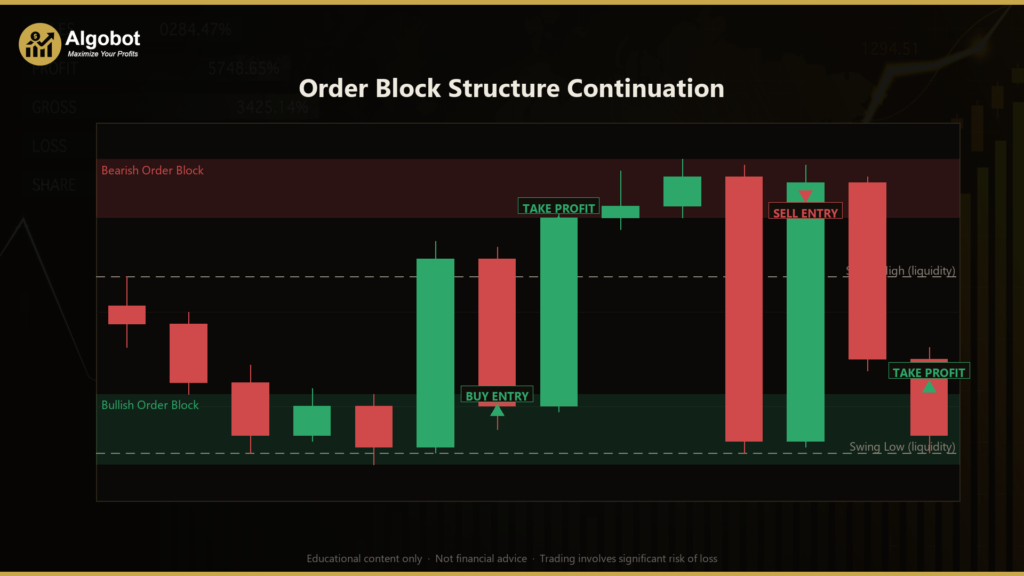
This is a trend-continuation / pullback model. It is designed for trending or impulsive market conditions, where price breaks a structural level, pauses, and then retraces into the zone that launched the move before continuing in the same direction. In plain terms, it waits for the market to "show its hand" with a decisive close beyond a prior swing, then tries to join that move on the retracement rather than chasing the breakout itself.
As a learning tool, the Order Block Structure Continuation EA is well suited to traders who want to study how concepts like liquidity, displacement, and order-block mitigation can be translated into deterministic, rule-based code. It is not a shortcut to results — it is a transparent worked example of a popular price-action methodology. Discretionary traders curious about automating their structure-based ideas, and students of ICT-style trading, will find it the most instructive.
How It Works
The strategy runs an incremental state machine. All structural analysis happens on closed bars, while the entry trigger (mitigation) is checked on every tick. Here is the full lifecycle in plain English:
- Market structure (swing detection): The EA scans for fractal swing highs and lows. A bar qualifies as a swing high if its high is strictly greater than the highs of
SwingStrengthbars on each side (and the mirror logic for a swing low). These confirmed swings mark where resting liquidity is likely to sit. - Break of structure (BOS): When a bar closes above the most recent confirmed swing high, the strategy reads this as a bullish displacement — the dealing range has turned up. A close below the most recent confirmed swing low signals a bearish displacement. Only a true close beyond the level counts; an intrabar spike that closes back inside does not.
- Arming the order block: After a BOS, the EA walks backward (up to
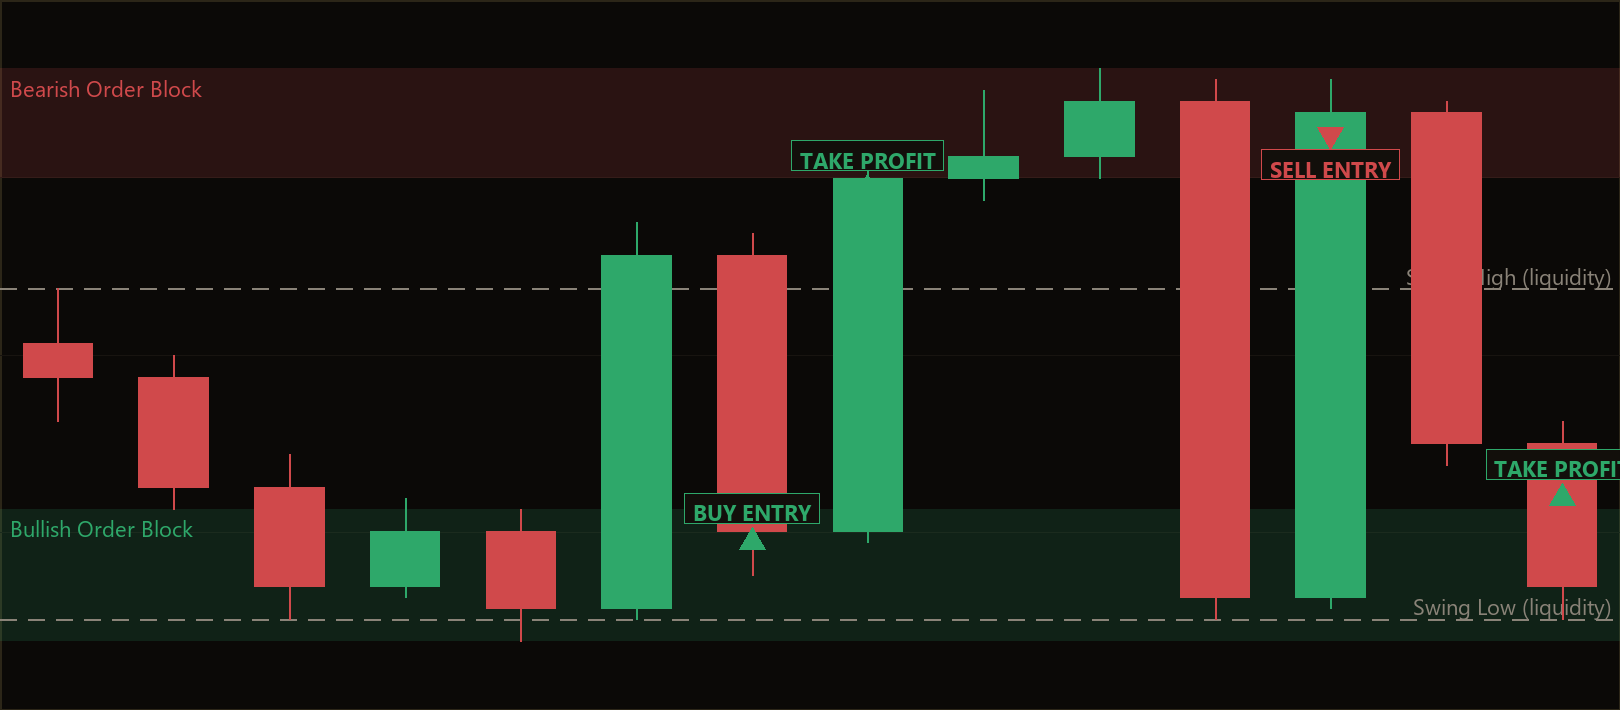
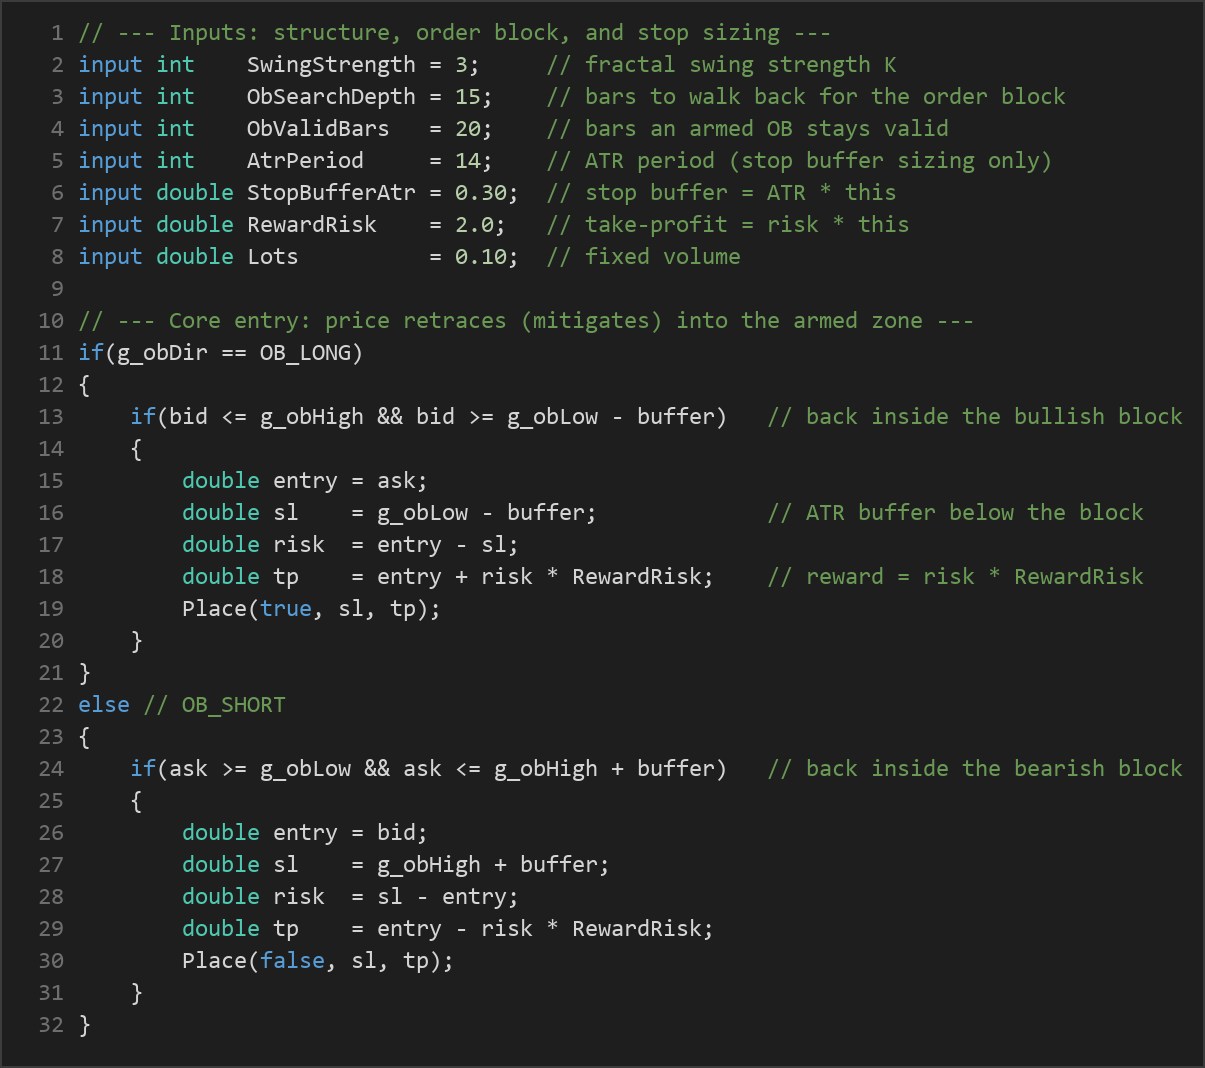
ObSearchDepthbars) from the breakout bar to find the last opposing candle — the down candle before an up move, or the up candle before a down move. That candle's high-to-low range becomes the order block zone. A bullish BOS arms a long zone and cancels any short zone, and vice versa. - Mitigation (the entry trigger): With a zone armed, the strategy waits for price to retrace back into it ("mitigate" the order block). For a long setup, it signals an entry when the bid trades down into the bullish zone; for a short setup, when the ask trades up into the bearish zone. This is the continuation entry — joining the displacement direction on the pullback.
- Stop-loss logic: The protective stop is placed just beyond the far edge of the order block, padded by a buffer equal to
ATR × StopBufferAtr. For longs the stop sits below the zone low; for shorts, above the zone high. ATR makes the buffer adapt to current volatility. - Take-profit logic: The target is set by a fixed reward-to-risk multiple. The distance from entry to stop (the risk) is multiplied by
RewardRiskand projected in the trade direction. With the default of 2.0, the target is twice the stop distance away. - Position management and expiry: Only one position at a time is allowed, tagged by its Magic number. An armed order block that is never mitigated expires after
ObValidBarsclosed bars, so stale zones do not linger. Once a trade is placed, the zone is consumed.
Strategy Parameters
| Parameter | Default | Min | Max | Description |
|---|---|---|---|---|
| SwingStrength | 3 | 2 | 8 | Fractal strength K — how many bars must sit on each side of a pivot for it to count as a confirmed swing high/low. Higher values mean fewer, more significant swings. |
| ObSearchDepth | 15 | 5 | 40 | How many bars to walk back from the break-of-structure bar when searching for the last opposing candle (the order block). |
| ObValidBars | 20 | 5 | 60 | How many closed bars an armed order block stays valid before it expires un-mitigated. |
| AtrPeriod | 14 | 7 | 30 | Lookback period for the ATR used to size the stop buffer (used for stop sizing only, not as a signal). |
| StopBufferAtr | 0.30 | 0.05 | 1.50 | Multiplier applied to ATR to set the stop-loss buffer beyond the order block edge. |
| RewardRisk | 2.0 | 1.0 | 5.0 | Reward-to-risk ratio. The take-profit distance equals the stop distance multiplied by this value. |
| Lots | 0.10 | 0.01 | 1.0 | Fixed trade volume in lots per position. |
Note: the EA also exposes a
Magicnumber input (default 7340) used to tag and identify its own positions. It is an operational tag rather than a tunable strategy parameter.
Recommended Chart Settings
This strategy was designed as a price-action structure model and is most coherent on the higher intraday timeframes, such as the H1 (1-hour) chart, where swing structure and order blocks are cleaner and less prone to noise than on very low timeframes. Major forex pairs with tight spreads — for example EUR/USD or GBP/USD — are a sensible starting point for study because their liquidity tends to produce well-defined displacement and retracement behaviour.
That said, structure-based behaviour varies considerably from one symbol and timeframe to another, and across different market regimes. Treat any chart setting as a starting point for your own testing rather than a fixed recommendation. Results will differ across instruments, sessions, and volatility conditions.
How to Install on MetaTrader 5
- Download the
.ex5file from the link below - Copy it to your MT5
MQL5\Expertsfolder - Restart MetaTrader 5 or refresh the Navigator panel
- Drag the EA onto a chart matching the recommended symbol and timeframe
- Configure the input parameters and enable Algo Trading
What to Consider Before Using This EA
The Order Block Structure Continuation model has clear conceptual strengths. It is fully rule-based and transparent — every decision (swing, BOS, order block, mitigation) can be inspected bar by bar, which makes it an excellent study piece for understanding ICT-style price action. Its use of ATR for the stop buffer means risk distance adapts to volatility, and its fixed reward-to-risk target enforces a disciplined exit framework. Trading only one position at a time keeps exposure simple to reason about.
There are also real limitations worth understanding. Order blocks and break of structure are subjective concepts in discretionary trading; encoding them into fixed rules necessarily simplifies them, so the EA's interpretation may differ from how a human chartist would mark the same zone. As a continuation model, it depends on trending or impulsive conditions — in choppy, range-bound markets, breaks of structure can be frequent false signals ("liquidity grabs") that lead to whipsaw entries. Because it waits for a retracement, strong moves that never pull back into the zone are simply missed, and the order block may expire before mitigation occurs.
The strategy also reacts to a single confirmed swing at a time and does not incorporate higher-timeframe bias, news filters, or session timing. In short, it may underperform during news-driven volatility, low-liquidity periods, and persistent ranges. None of this makes the approach invalid — it simply means the model should be studied and tested thoroughly before any consideration of live use.
Risk Management Tips
Sound risk management matters far more than any single entry signal. Consider these general principles as part of your education:
- Risk a small, fixed fraction per trade. Many educational sources suggest risking no more than 1–2% of account equity on any single position. Note that this EA uses a fixed lot size, so you should calculate whether that volume aligns with your intended per-trade risk on your account.
- Always test on a demo account first. Run the EA on a demo or in the Strategy Tester across varied conditions before committing any real capital.
- Understand drawdown. Even a sound process experiences losing streaks. Study how deep and how long historical drawdowns can run so the experience does not surprise you.
- Mind costs and conditions. Spreads, slippage, and swap can meaningfully affect a strategy that enters on retracements — factor them into your testing.
- Never trade money you cannot afford to lose, and treat automated tools as study aids, not guarantees.
Risk Warning
Trading foreign exchange, CFDs, and other leveraged financial instruments involves substantial risk of loss and is not suitable for all investors. The strategies and tools discussed on this page are provided for educational purposes only and do not constitute financial advice, investment recommendations, or solicitation to trade. Always consult a qualified financial adviser before making trading decisions. Past backtest performance is not indicative of future results.
Downloads
- Expert Advisor: OrderBlockStructureContinuation.ex5 (65 downloads)
- Source Code: OrderBlockStructureContinuation.mq5 (65 downloads)
- Documentation: OrderBlockStructureContinuation.pdf (66 downloads)