Disclaimer: This article is for educational and informational purposes only. It does not constitute financial or investment advice. Trading forex and CFDs carries significant risk of loss. Past performance of any strategy — including backtests — does not guarantee future results. Never trade with money you cannot afford to lose.
What Is This Strategy?
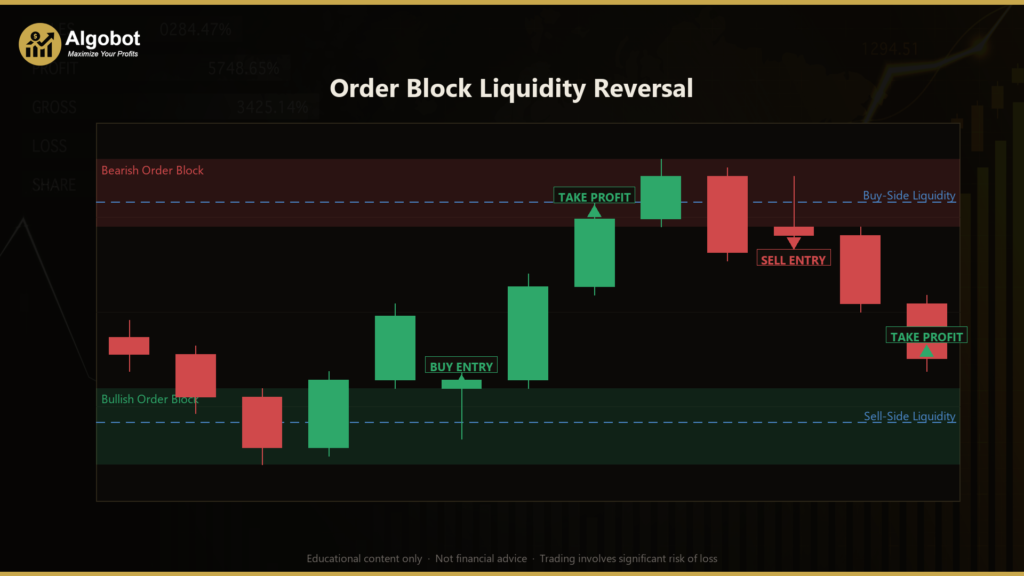
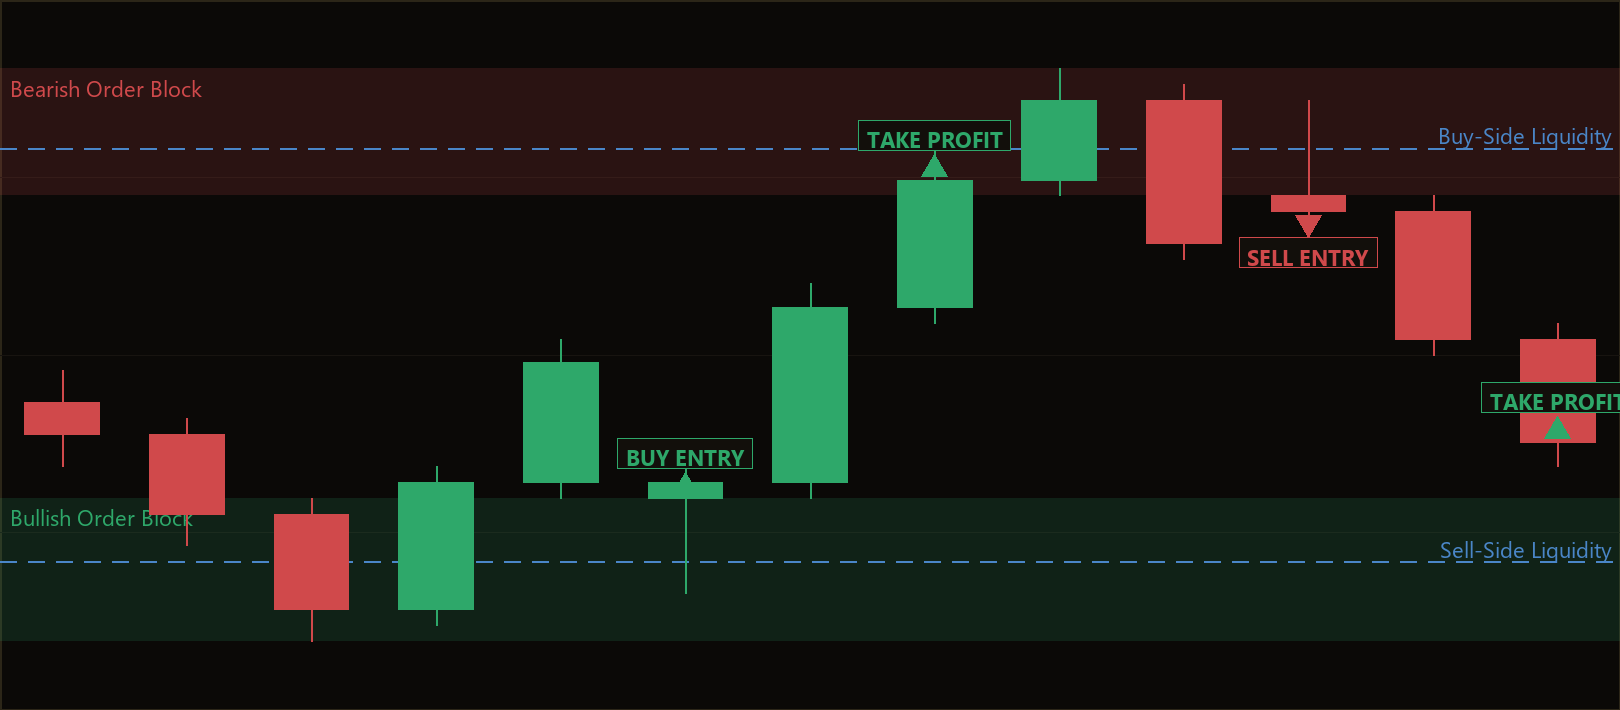
The Order Block Liquidity Reversal is a pure price-action expert advisor built around the order block concept popularized by ICT (Inner Circle Trader) methodology, and it uses no traditional indicators at all. An "order block" is the last opposing candle before a strong directional move — the area where institutional orders are presumed to have been placed before price accelerated away. Instead of reading moving averages or oscillators, this strategy reads the raw structure of the candles themselves: swing pivots, breaks of structure, displacement (energetic momentum), and liquidity sweeps (stop-hunts).
In trading-style terms, this is a mean-reversion entry on a trend-continuation framework. The strategy first confirms that the market has shifted direction (a break of structure), then waits patiently for price to retrace back into the order block zone that created that shift. It is designed for markets that move in clear impulsive legs followed by pullbacks — conditions you typically see on liquid forex pairs and indices during active trading sessions, rather than in tight, directionless ranges.
As a learning tool, the Order Block Liquidity Reversal is well suited to traders who want to understand modern "smart money" concepts in a concrete, rules-based form. Because every condition is derived from candle structure rather than a black-box indicator, you can study exactly why a signal appeared. It is best treated as an educational framework for studying market structure — not as a shortcut to results.
How It Works
The strategy evaluates the market once per closed bar and builds a bullish setup as described below (the bearish setup is a mirror image). Each step must pass before the next is considered:
- Structure (break of structure): The strategy tracks confirmed swing highs and lows using a fractal pivot of
SwingLookbackbars on each side. A bullish break of structure occurs when a bar closes above the most recent confirmed swing high, signalling that buyers have taken control. - Origin (the order block): After that break, the strategy looks back for the last down-close candle before the up-move. That candle's
[Low, High]range becomes the bullish order block — the zone the strategy will watch for a re-entry. - Displacement: The up-leg leaving the block must be energetic. At least one bar in the leg must have a range larger than
DisplacementMulttimes the average range of the bars preceding the block. This filters out weak, drifting moves and keeps only impulsive ones. - Liquidity sweep: The block's low must have traded below the prior swing low before price reversed up. This is the ICT "stop-hunt" signature — the idea that price first dipped to grab sell-side liquidity (resting stop orders) before reversing.
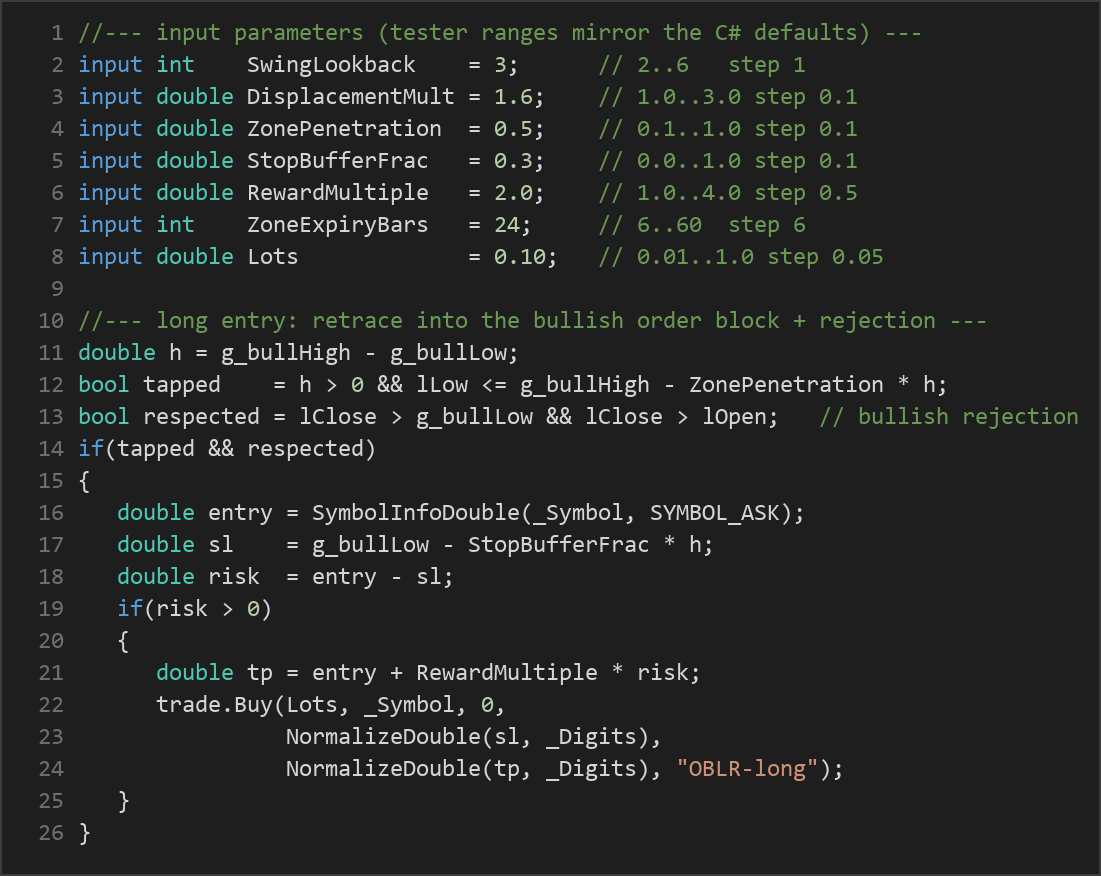
- Entry: On a later bar, the strategy signals a long when price retraces back into the block by at least
ZonePenetrationof the block's height and that bar closes bullishly (close above its open) while still respecting the block's low. This combination is treated as a rejection from the zone. - Stop-loss: The protective stop is placed just beyond the block low, buffered by
StopBufferFracof the block's height, so a clean violation of the zone closes the idea. - Take-profit: The target is set at
RewardMultipletimes the measured risk distance (entry minus stop), giving a fixed reward-to-risk structure on every trade.
The strategy also manages housekeeping: it trades one position at a time, abandons a zone if price closes through the wrong side of it (the block is "violated"), and expires any untouched zone after ZoneExpiryBars bars so stale levels are not traded.
Strategy Parameters
| Parameter | Default | Min | Max | Description |
|---|---|---|---|---|
| SwingLookback | 3 | 2 | 6 | Number of bars on each side of a pivot required to confirm a swing high or low. Larger values find bigger, less frequent swings. |
| DisplacementMult | 1.6 | 1.0 | 3.0 | How much larger a leg bar's range must be versus the recent average range to qualify as energetic "displacement." Higher values demand stronger moves. |
| ZonePenetration | 0.5 | 0.1 | 1.0 | Fraction of the order block's height that price must retrace into before an entry is considered. Lower values trigger on shallow taps; higher values require a deeper pullback. |
| StopBufferFrac | 0.3 | 0.0 | 1.0 | Extra cushion beyond the block edge for the stop-loss, expressed as a fraction of the block height. Larger buffers reduce premature stop-outs but widen risk. |
| RewardMultiple | 2.0 | 1.0 | 4.0 | Take-profit distance as a multiple of the risk distance. A value of 2.0 targets twice the amount risked on each trade. |
| ZoneExpiryBars | 24 | 6 | 60 | How many bars an unfilled order block stays valid before it expires and is discarded. |
| Lots | 0.10 | 0.01 | 1.0 | Fixed trade volume in lots for each position. |
Recommended Chart Settings
The Order Block Liquidity Reversal is structure-based, so it works best where price prints clean impulsive legs and orderly pullbacks. Liquid instruments — major forex pairs such as EUR/USD or GBP/USD, or major indices — on an intraday-to-swing timeframe like H1 or H4 are a sensible starting point for study. These timeframes give swing pivots and order blocks enough room to form without the excessive noise of very low timeframes.
Because the logic relies on displacement and liquidity sweeps, behaviour can change meaningfully between trending and ranging conditions. Treat any chosen symbol and timeframe as a starting point for your own testing, and remember that results will vary across different market conditions, brokers, and spread environments.
How to Install on MetaTrader 5
- Download the .ex5 file from the link below
- Copy it to your MT5
MQL5\Expertsfolder - Restart MetaTrader 5 or refresh the Navigator panel
- Drag the EA onto a chart matching the recommended symbol and timeframe
- Configure the input parameters and enable Algo Trading
What to Consider Before Using This EA
The strengths of this approach are clarity and discipline. Every rule is mechanical and derived from candle structure, so the strategy avoids the lag and parameter-stacking that comes with heavy indicator use. The fixed reward-to-risk model and the requirement for displacement plus a liquidity sweep mean it only acts on relatively high-conviction setups, and the one-position-at-a-time rule keeps exposure simple to understand.
There are real limitations to weigh, too. Order block and "smart money" concepts are interpretive — the rules here are one reasonable codification, not a universal definition, and different traders mark blocks differently. Because the strategy waits for a retrace into a zone, it can miss moves that never pull back, and it can be whipsawed in choppy, low-volatility ranges where breaks of structure are frequent but unreliable. Fixed lot sizing does not adapt to account growth or volatility, and a wide StopBufferFrac can enlarge risk per trade. As with any pullback strategy, performance may degrade during news-driven gaps or fast directional markets that blow through both the zone and the stop. None of these points make the approach good or bad — they simply define the conditions under which it may underperform.
Risk Management Tips
Sound risk management matters more than any single entry rule. Consider these general principles as part of your education:
- Risk a small, fixed fraction per trade. Many educators suggest risking no more than 1–2% of account equity on any single position, and sizing your lots so the distance to your stop reflects that limit rather than using a flat lot count blindly.
- Test on a demo account first. Run the strategy on a demo or simulation environment across many market conditions before considering any live capital, so you understand its behaviour and frequency of trades.
- Understand drawdown. Even a well-constructed strategy will experience losing streaks. Study the depth and duration of historical drawdowns so you can judge whether you could tolerate them emotionally and financially.
- Account for costs. Spreads, commissions, slippage, and swap fees all affect real outcomes and are often understated in idealized tests.
- Never over-leverage. Leverage magnifies both gains and losses; use only what you genuinely understand and can manage.
Risk Warning
Trading foreign exchange, CFDs, and other leveraged financial instruments involves substantial risk of loss and is not suitable for all investors. The strategies and tools discussed on this page are provided for educational purposes only and do not constitute financial advice, investment recommendations, or solicitation to trade. Always consult a qualified financial adviser before making trading decisions. Past backtest performance is not indicative of future results.
Downloads
- Expert Advisor: OrderBlockLiquidityReversal.ex5 (60 downloads)
- Source Code: OrderBlockLiquidityReversal.mq5 (80 downloads)
- Documentation: OrderBlockLiquidityReversal.pdf (62 downloads)