Disclaimer: This article is for educational and informational purposes only. It does not constitute financial or investment advice. Trading forex and CFDs carries significant risk of loss. Past performance of any strategy — including backtests — does not guarantee future results. Never trade with money you cannot afford to lose.
What Is This Strategy?
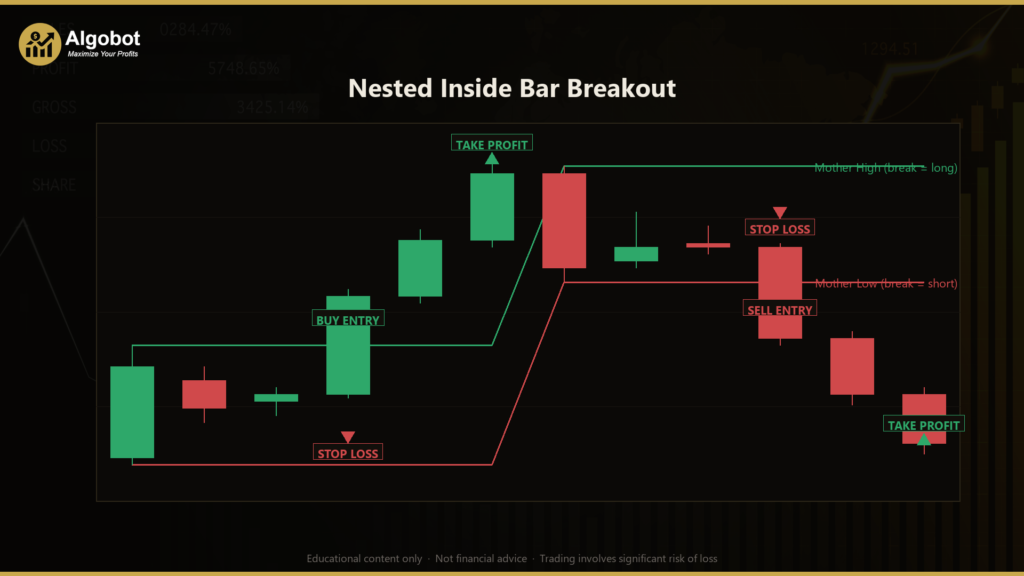
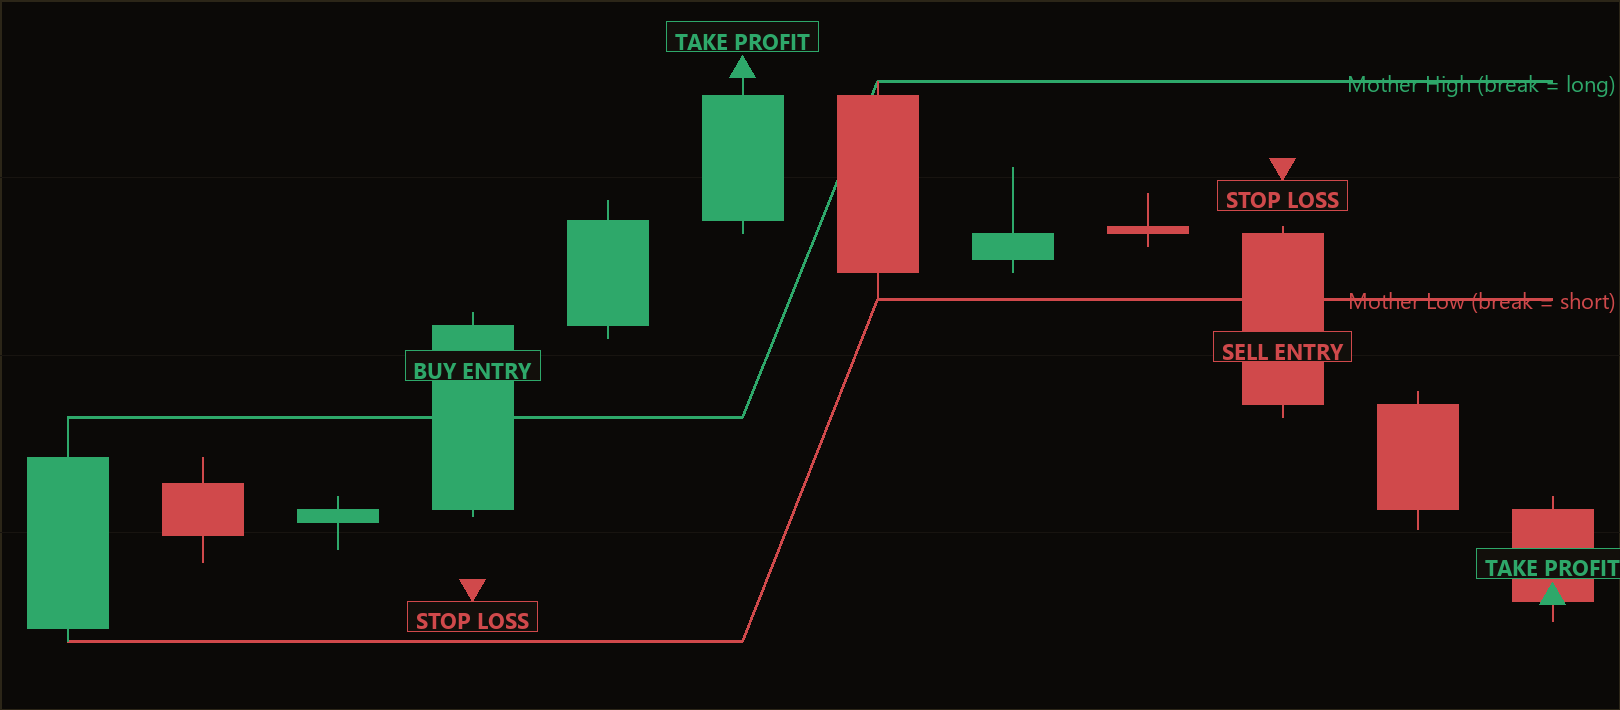
The Nested Inside Bar Breakout is a pure price-action breakout strategy that uses a stacked inside bar pattern — no moving averages, oscillators, or other indicators are involved. An inside bar is a candle whose entire range (its high and low) sits within the range of the candle before it, which is a classic signal that price is contracting and volatility is being squeezed out of the market. This strategy looks for two inside bars in a row — a "nest" — to confirm an unusually tight coil before acting.
The approach is designed for volatility-contraction conditions: quiet, range-bound moments when the market coils into a progressively narrower range before releasing into a directional move. In trading terms, this is a breakout or "volatility expansion" style. The core idea is that when each new candle prints fully inside the previous one, buy and sell stop orders tend to stack just beyond the surrounding "mother" bar's high and low. When price finally pushes through one of those extremes, the cascade of stops can produce a sharp, one-directional expansion — and the strategy aims to ride that first move.
As a learning tool, this strategy is well suited to traders who want to study price action and pattern recognition without the lag or clutter of indicators. It is a compact, transparent example of how a compression-then-expansion model is built: how a pattern is detected on closed bars, how an intrabar trigger is defined, and how stops and targets are anchored to actual market structure. Treat it as a study of breakout mechanics rather than a profit opportunity, and test it thoroughly before considering any live use.
How It Works
The strategy operates on closed bars for pattern detection and watches the forming (live) bar intrabar for the breakout trigger. It references four candles by their "shift" (how many bars back from the current one):
- Mother bar — shift 3, the candle that contains the whole nest.
- Inside bar 1 — shift 2, the middle candle.
- Inside bar 2 — shift 1, the inner (most recently closed) candle.
- Forming bar — shift 0, the live expansion candle being watched tick by tick.
Entry conditions — the strategy signals a setup only when all of these are true:
- First inside bar is valid: Inside bar 1's high is at or below the mother bar's high, and its low is at or above the mother bar's low — it sits fully within the mother bar.
- Second inside bar is valid: Inside bar 2's high is at or below inside bar 1's high, and its low is at or above inside bar 1's low — forming a tightening nest, not just a single inside bar.
- Genuine squeeze confirmed: The inner bar's range must be no larger than the
ContractionRatiofraction of the mother bar's range. This filters out lazy drifts and requires a real compression before the strategy will act.
Breakout trigger (watched intrabar on the forming bar):
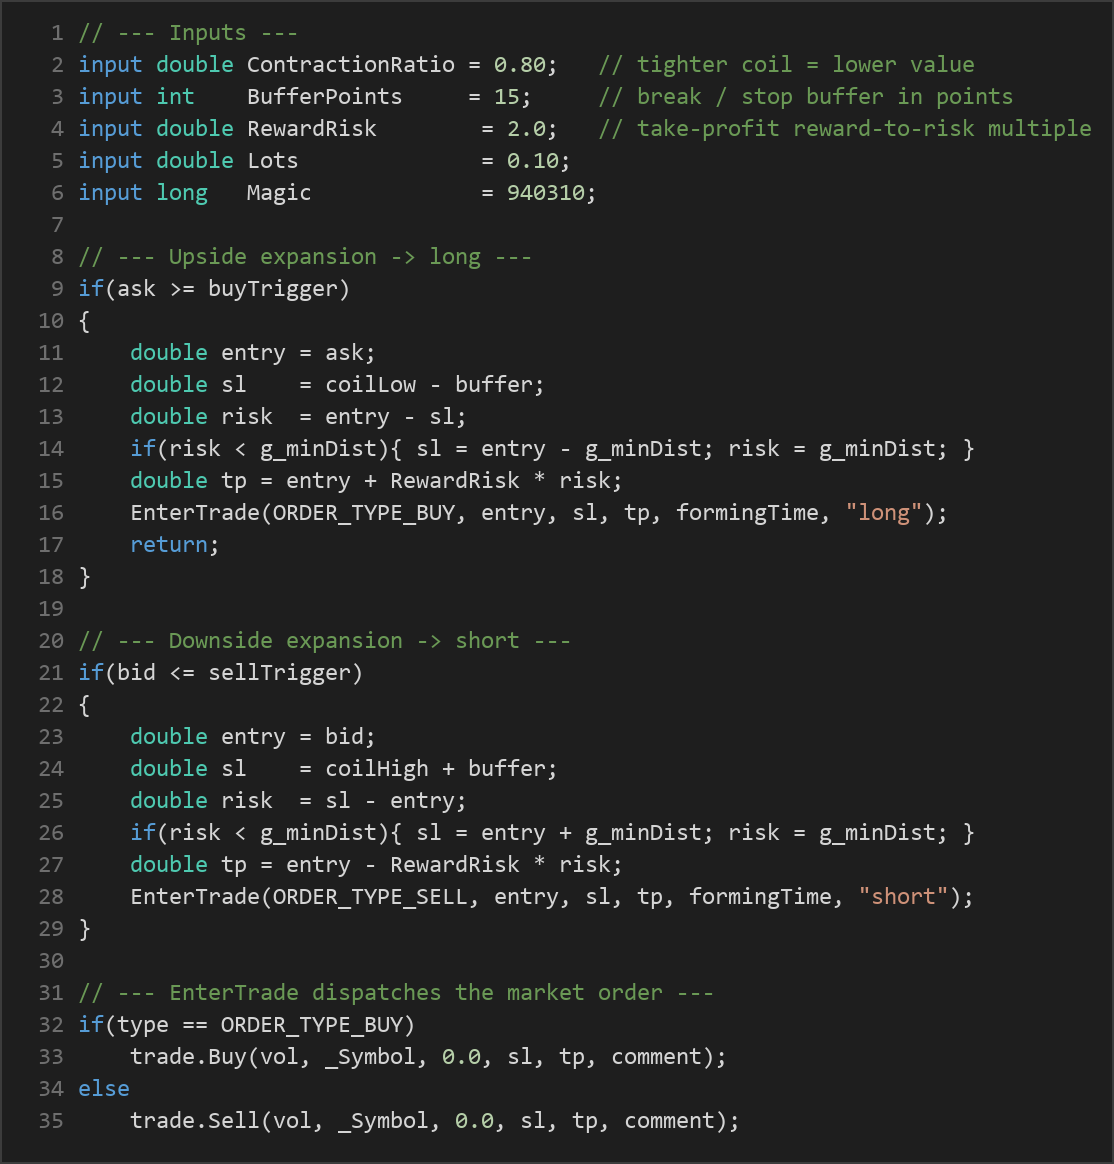
- A buy trigger is placed a
BufferPointsbuffer above the mother bar's high. - A sell trigger is placed a
BufferPointsbuffer below the mother bar's low. - If the live Ask price reaches the buy trigger first, the strategy signals a long market entry. If the live Bid price reaches the sell trigger first, it signals a short market entry. Only the first side to break is taken.
Stop-loss logic:
- The protective stop is anchored to the opposite extreme of the tight coil. For a long, the stop sits a buffer below the lowest low of the two inside bars; for a short, it sits a buffer above the highest high. This keeps risk small and defined, tied to the structure of the squeeze itself.
- A safety floor applies: if the calculated stop distance is smaller than the broker's minimum stop level, the stop is widened to that minimum so the order is valid.
Take-profit logic:
- The target is a fixed reward-to-risk multiple (
RewardRisk) of the measured stop distance. With the default of 2.0, the take-profit is set twice as far from entry as the stop-loss.
Trade management and self-expiry:
- Only one position per magic number is allowed at a time; the bracket (stop-loss and take-profit) manages the exit.
- Only one entry attempt per forming bar is permitted, so the strategy will not re-fire intrabar after a stop or target is hit on the same candle.
- Because the nest only exists while its three bars occupy shifts 1–3, the setup self-expires once the first expansion bar closes — the pattern is acted on quickly or not at all.
Strategy Parameters
| Parameter | Default | Min | Max | Description |
|---|---|---|---|---|
| ContractionRatio | 0.80 | 0.40 | 1.00 | The inner inside bar's range as a maximum fraction of the mother bar's range. Lower values demand a tighter coil before a setup is valid; higher values are more permissive. |
| BufferPoints | 15 | 0 | 80 | The buffer, in points, placed beyond the mother bar extreme for the breakout trigger and beyond the coil extreme for the stop. Larger values reduce false triggers but widen risk. |
| RewardRisk | 2.0 | 1.0 | 5.0 | The take-profit reward-to-risk multiple. A value of 2.0 sets the target twice as far from entry as the stop-loss. |
| Lots | 0.10 | 0.01 | 1.00 | The fixed trade volume in lots. This is normalized to the broker's volume step and clamped to its minimum and maximum allowed size. |
Recommended Chart Settings
This strategy is a generic price-action model and is not hard-coded to one instrument. It is most commonly studied on liquid forex pairs and major indices where inside-bar nests form cleanly. A practical starting point is a single major forex pair (for example, a EUR or GBP pair) on an intraday timeframe such as M15, M30, or H1, where compression-then-expansion cycles are frequent enough to study but each bar still carries meaningful structure.
Because the strategy reacts to the buffer and stop distances in points, the appropriate BufferPoints value will differ between instruments with different point sizes and typical volatility. Always re-test the parameters on the specific symbol and timeframe you intend to study. Results will vary considerably across different market conditions, sessions, and instruments, so treat any single configuration as a starting hypothesis rather than a finished setting.
How to Install on MetaTrader 5
- Download the .ex5 file from the link below
- Copy it to your MT5
MQL5\Expertsfolder - Restart MetaTrader 5 or refresh the Navigator panel
- Drag the EA onto a chart matching the recommended symbol and timeframe
- Configure the input parameters and enable Algo Trading
What to Consider Before Using This EA
Strengths. The logic is transparent and indicator-free, so every decision can be traced directly to candle structure. Risk is defined before entry — the stop is anchored to the coil and the target is a multiple of that risk — which makes the strategy a clear teaching example of structured, asymmetric risk-to-reward. The self-expiring nature of the pattern also avoids holding stale signals, and the one-attempt-per-bar guard prevents repeated firing inside a single candle.
Known limitations. Inside-bar breakouts are prone to false breakouts, where price pokes through the mother extreme, triggers the entry, then reverses back into the range. In choppy, low-momentum markets, this can produce a series of small losses. The nested two-bar requirement is strict, so genuine setups can be relatively rare, and the strategy will sit idle for long stretches — which is normal for a selective breakout model. Because entries are taken at market on the live break, slippage and spread can meaningfully affect the realized entry price and the effective risk-to-reward.
Where it may underperform. Strongly trending markets that never compress, news-driven gaps, and very tight, illiquid instruments can all degrade the pattern's reliability. The fixed reward-to-risk target means the strategy will not capture extended runs beyond its take-profit, nor will it adapt to changing volatility on its own. None of this makes the approach good or bad — it simply means the model has a defined comfort zone, and understanding that zone is part of using it responsibly.
Risk Management Tips
Sound risk management matters more than any single entry rule. Consider the following general principles as you study this strategy:
- Risk a small, fixed fraction per trade. Many educators suggest risking no more than 1–2% of account equity on any one position. Size your lots so that the distance to your stop-loss represents that fraction, rather than using a fixed lot size blindly.
- Always start on a demo account. Test the strategy in a risk-free simulated environment until you understand how it behaves across different sessions and conditions before considering real capital.
- Understand drawdown. Even a well-designed breakout model will have losing streaks. Know the maximum historical drawdown of any configuration you study, and ask whether you could tolerate it emotionally and financially.
- Account for spread and slippage. Market-order breakouts are sensitive to execution costs. Factor realistic spreads into your testing rather than assuming ideal fills.
- Keep records and review. Journal each setup — the pattern, the parameters, and the outcome — so you can learn what conditions suit the strategy and which do not.
Risk Warning
Trading foreign exchange, CFDs, and other leveraged financial instruments involves substantial risk of loss and is not suitable for all investors. The strategies and tools discussed on this page are provided for educational purposes only and do not constitute financial advice, investment recommendations, or solicitation to trade. Always consult a qualified financial adviser before making trading decisions. Past backtest performance is not indicative of future results.
Downloads
- Expert Advisor: NestedInsideBarBreakout.ex5 (64 downloads)
- Source Code: NestedInsideBarBreakout.mq5 (59 downloads)
- Documentation: NestedInsideBarBreakout.pdf (68 downloads)