Disclaimer: This article is for educational and informational purposes only. It does not constitute financial or investment advice. Trading forex and CFDs carries significant risk of loss. Past performance of any strategy — including backtests — does not guarantee future results. Never trade with money you cannot afford to lose.
What Is This Strategy?
The Mitigation Block Continuation strategy is a pure price-action expert advisor (EA) built around the ICT concept of the mitigation block — a method of reading raw candle geometry rather than relying on any technical indicator. There are no moving averages, no oscillators, and no smoothing filters anywhere in its logic. Every decision the strategy makes comes from the shape and sequence of candles: where price breaks structure, the direction each candle closes, and the high-to-low range of recent swings. This places it firmly in the trend-continuation style of trading, sometimes called Smart Money or institutional order-flow analysis.
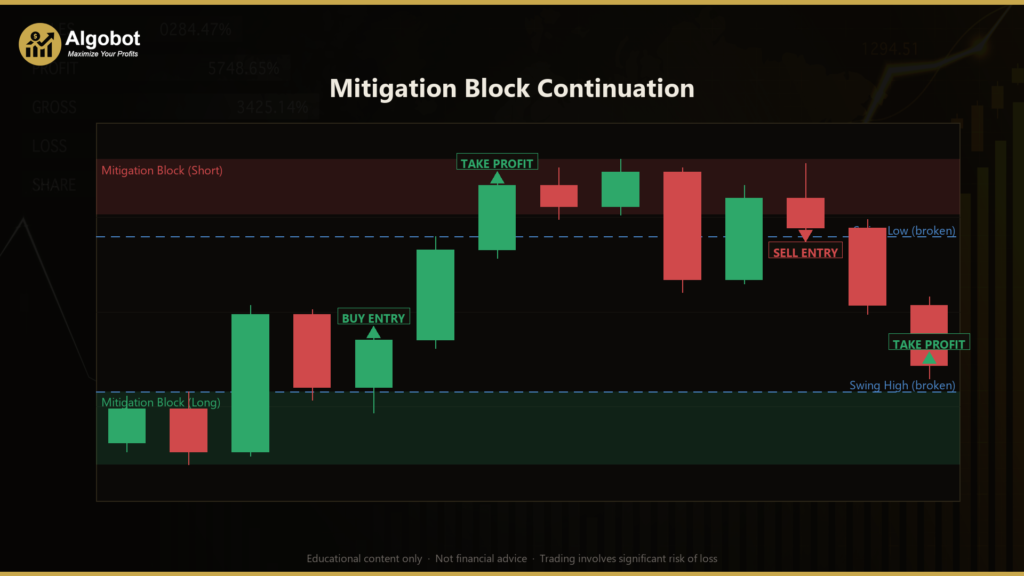
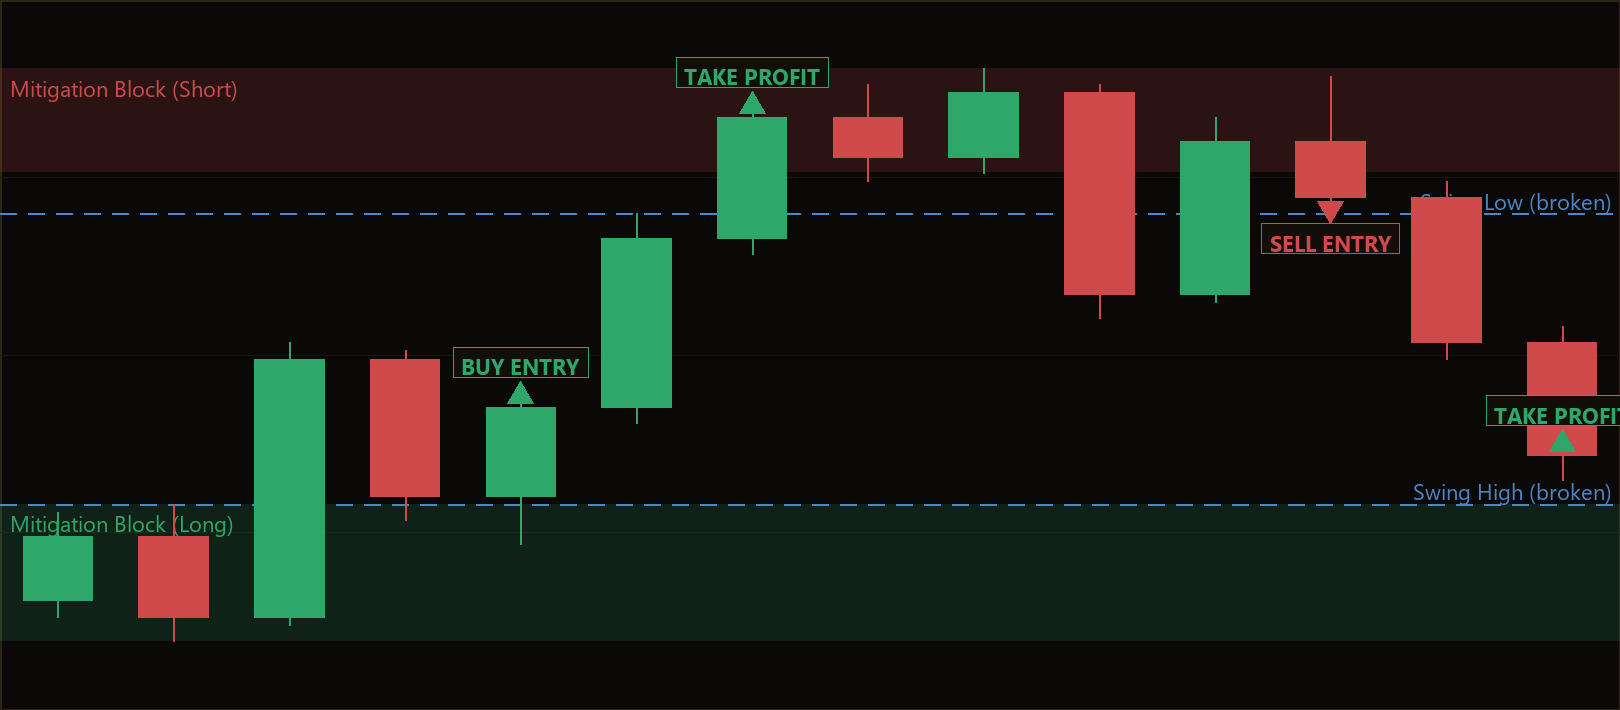
A "mitigation block" describes a specific footprint that price leaves behind during a strong trend. When a trend is healthy, a small pullback dips into the last opposing candle and then the trend resumes by breaking structure — closing decisively beyond the recent swing extreme — without first sweeping the protected swing on the other side. That shallow pullback (sometimes called a failure swing) is thought to leave an unfilled pocket of institutional orders inside the last opposing candle. The premise is that price tends to return to that block to "mitigate," or fill, those orders before continuing in the trend direction. The strategy anticipates that return and joins the continuation.
As a learning tool, this EA is well suited to traders who want to study break-of-structure and order-block concepts in a clean, rules-based form. Because the logic is fully mechanical, you can watch exactly how each signal forms on a chart and connect the abstract ICT theory to concrete candle behavior. It is best treated as an educational sandbox for understanding continuation entries — not as a finished, hands-off system.
How It Works
The strategy operates once per newly-closed bar on its chart timeframe. It moves through a clear sequence: detect a break of structure, mark the mitigation block, wait for price to return, then confirm and enter. Here is how each stage signals:
- Break of structure (arming the setup): The strategy tracks a rolling window of recent highs and lows (the
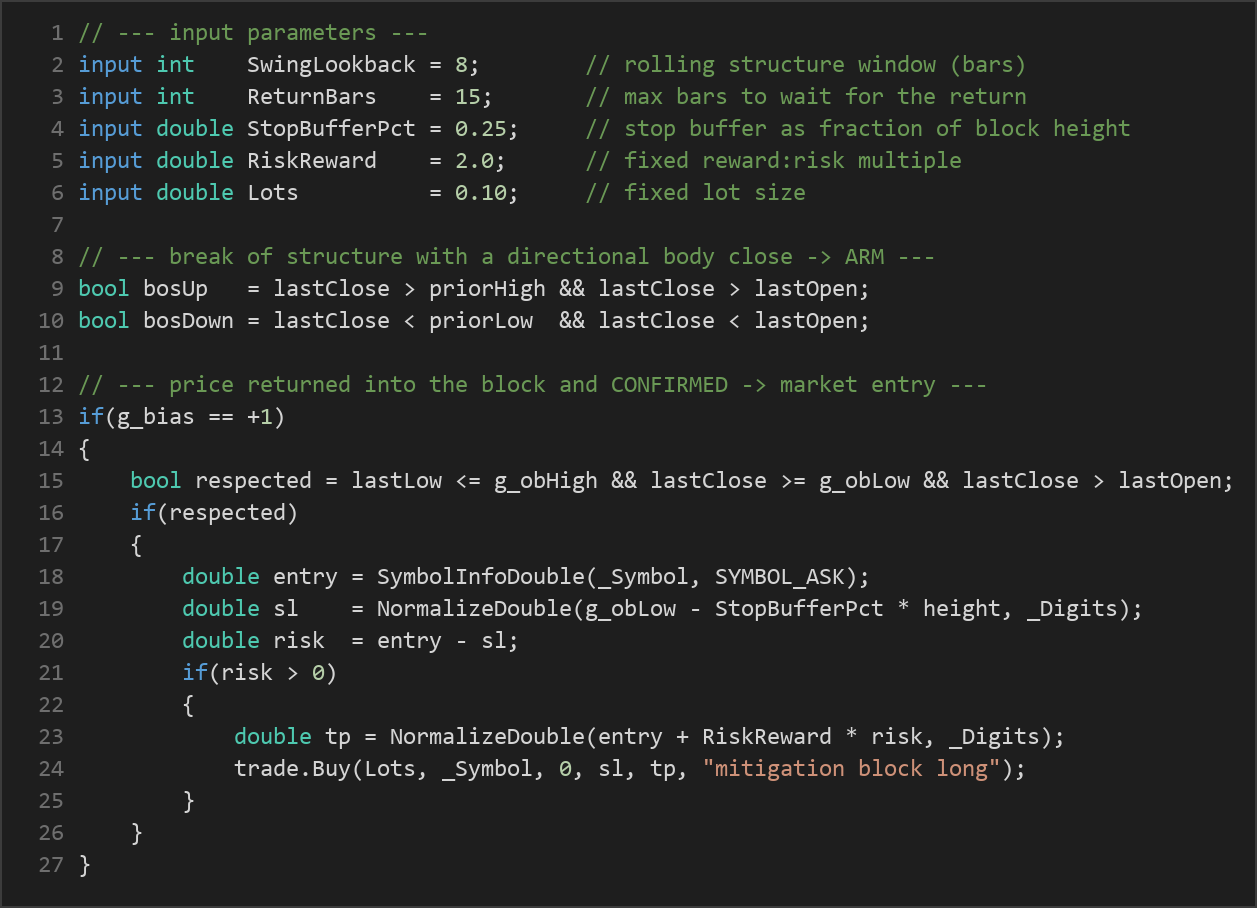
SwingLookback). When the most recently closed candle closes above the prior swing high and closes bullish (close above open), it signals a bullish break of structure. The mirror condition — a close below the prior swing low with a bearish candle — signals a bearish break. This directional body close is what distinguishes intentional momentum from a simple fractal pivot. - Marking the mitigation block: Once structure breaks, the strategy scans backward to find the last opposing candle before the impulse — the last down-close candle for a bullish setup, or the last up-close candle for a bearish setup. The full high-to-low range of that candle (wick included) becomes the mitigation block. The setup is then "armed."
- Waiting for the return: The strategy never enters on the same bar that armed the setup. Instead it counts bars and waits for price to dip back into the block. The
ReturnBarsparameter caps how long it will wait before discarding the setup as stale. - Block invalidation: While waiting, if price instead closes through the far edge of the block (below the block on a long, above it on a short), the setup is considered dead and is discarded. This keeps the strategy from chasing a structure that has already failed.
- Confirmed market entry: When price returns into the block and the closing candle confirms the trend direction — for a long, the candle dips into the block and closes bullish; for a short, it taps the block and closes bearish — the strategy enters at market. It does not rest a passive limit order; it waits for the block to be visibly "respected" before committing.
- Stop-loss logic: The stop is placed just beyond the far edge of the block. For a long, it sits below the block low minus a buffer (
StopBufferPctof the block height); for a short, above the block high plus the same buffer. The structure of the block itself defines the invalidation point. - Take-profit logic: The target is set using a fixed reward-to-risk multiple (
RiskReward). The distance from entry to stop is measured as the risk, and the take-profit is placed that multiple beyond the entry, producing an asymmetric payoff profile where each winning trade is designed to be larger than each losing trade.
Once a position is open, the strategy steps back and lets the stop-loss and take-profit manage the trade. It does not add to positions or move stops dynamically.
Strategy Parameters
| Parameter | Default | Min | Max | Description |
|---|---|---|---|---|
| SwingLookback | 8 | 3 | 30 | Number of bars in the rolling window used to define swing highs and lows for break-of-structure detection. Smaller values react to shorter-term structure; larger values require more significant breaks. |
| ReturnBars | 15 | 3 | 50 | Maximum number of bars the strategy will wait for price to return into the mitigation block. If the return does not happen within this window, the armed setup is discarded. |
| StopBufferPct | 0.25 | 0.0 | 1.0 | Stop-loss buffer expressed as a fraction of the block's height. A value of 0.25 places the stop a quarter of the block height beyond its far edge, giving the trade a little breathing room. |
| RiskReward | 2.0 | 1.0 | 6.0 | The fixed reward-to-risk multiple used to set the take-profit. At 2.0, the target sits twice the stop distance away from entry. |
| Lots | 0.10 | 0.01 | 1.0 | Fixed trade size in lots for every position. This is a static volume and does not scale with account equity. |
Recommended Chart Settings
The Mitigation Block Continuation EA is designed to run on a single symbol and the chart's primary timeframe, acting on each newly-closed bar. Because the logic is built on swing structure and candle geometry rather than any symbol-specific value, it can be studied on a variety of instruments — major forex pairs and liquid indices are common choices for ICT-style structure trading. Intraday timeframes such as M15, M30, or H1 tend to produce cleaner break-of-structure sequences for learning purposes, while higher timeframes generate fewer but larger setups.
There is no single "correct" chart for this approach. Structure-based continuation signals behave very differently in trending versus ranging conditions, and results will vary across symbols, sessions, and volatility regimes. Always test any configuration on historical data and a demo account before drawing conclusions about how it behaves.
How to Install on MetaTrader 5
- Download the .ex5 file from the link below
- Copy it to your MT5
MQL5\Expertsfolder - Restart MetaTrader 5 or refresh the Navigator panel
- Drag the EA onto a chart matching the recommended symbol and timeframe
- Configure the input parameters and enable Algo Trading
What to Consider Before Using This EA
Like every mechanical strategy, the Mitigation Block Continuation approach has both strengths and clear limitations, and it is worth understanding both before you study it on live data.
Strengths. The logic is transparent and fully rules-based, which makes it an excellent teaching tool for break-of-structure and order-block concepts. Requiring a directional body close to break structure filters out some random noise, and demanding a confirmed return into the block — rather than a passive limit fill — means the strategy waits for momentum to reappear before committing. The structure-based stop gives every trade a logical invalidation point, and the fixed reward-to-risk target enforces an asymmetric payoff discipline that many discretionary traders struggle to maintain.
Limitations. Trend-continuation systems depend on trends actually continuing. In choppy, range-bound, or news-driven markets, break-of-structure signals frequently fail, and price may close through the block far more often than it respects it. The fixed lot size means position sizing does not adapt to account growth or to the size of the stop, so risk per trade in currency terms can swing widely depending on the block height. Because entries are taken at market on confirmation rather than at the block edge, the actual stop distance — and therefore the realized risk-to-reward — can differ from the theoretical target. Finally, the ICT premise that institutional orders "reliably revisit" a block is a model of market behavior, not a law; it may indicate a useful tendency historically, but it does not hold on every setup.
The honest takeaway is that this EA is a structured way to study a popular continuation concept — not a finished system to deploy unsupervised. Treat it as a framework to learn from and to test rigorously.
Risk Management Tips
Sound risk management matters far more than any single entry technique. As you study this strategy, keep these general principles in mind:
- Risk a small, fixed percentage per trade. Many educators suggest never risking more than 1–2% of account equity on any single position. Because this EA uses a fixed lot size, consider whether that volume is appropriate for your account before testing.
- Understand your drawdown. Even a strategy with an asymmetric reward-to-risk profile can experience long strings of losing trades. Study the historical sequence of losses, not just the wins, so you understand how deep a drawdown you might face.
- Use a demo account first. Run the EA on a demo or in the MT5 Strategy Tester across different symbols and market conditions before risking any real capital. This is where you learn how the signals behave in practice.
- Account for spread and slippage. Market entries and structure-based stops are sensitive to execution costs. Test with realistic spread settings rather than idealized ones.
- Never trade money you cannot afford to lose. Leverage amplifies both gains and losses, and no rules-based system removes the underlying risk of trading.
Risk Warning
Trading foreign exchange, CFDs, and other leveraged financial instruments involves substantial risk of loss and is not suitable for all investors. The strategies and tools discussed on this page are provided for educational purposes only and do not constitute financial advice, investment recommendations, or solicitation to trade. Always consult a qualified financial adviser before making trading decisions. Past backtest performance is not indicative of future results.
Downloads
- Expert Advisor: MitigationBlockContinuation.ex5 (45 downloads)
- Source Code: MitigationBlockContinuation.mq5 (48 downloads)
- Documentation: MitigationBlockContinuation.pdf (48 downloads)