Disclaimer: This article is for educational and informational purposes only. It does not constitute financial or investment advice. Trading forex and CFDs carries significant risk of loss. Past performance of any strategy — including backtests — does not guarantee future results. Never trade with money you cannot afford to lose.
What Is This Strategy?
The Impulse System Color Shift is a trend-plus-momentum confluence strategy that combines an Exponential Moving Average (EMA) — a moving average that weights recent prices more heavily — with the MACD histogram, a momentum oscillator derived from the difference between two moving averages. It is inspired by Dr. Alexander Elder's classic "Impulse System," and it belongs to the family of trend-following, momentum-confirmed trading styles that try to enter a fresh directional leg early rather than chase a move that is already mature.
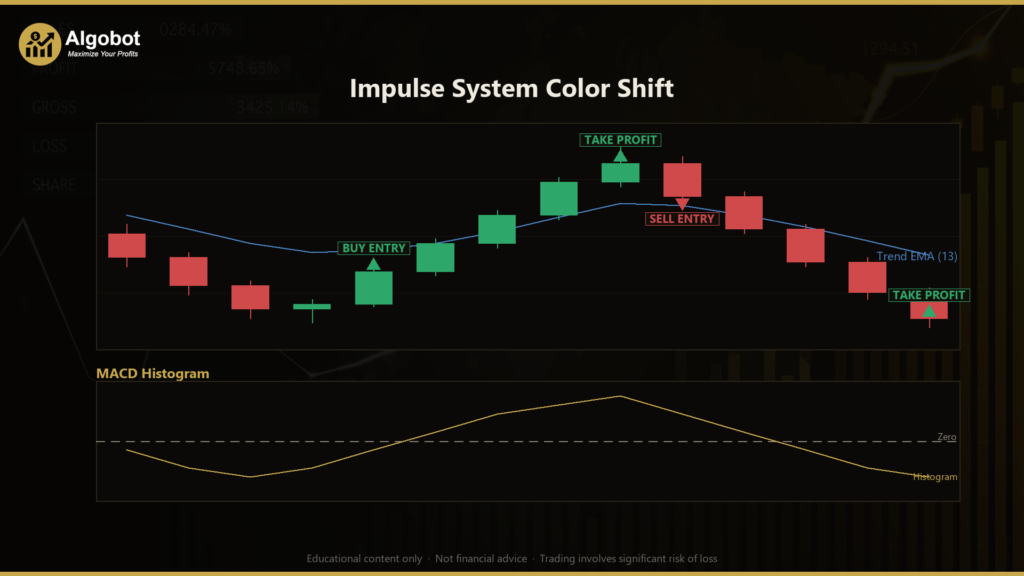
The core idea is simple but disciplined: most trend timers fire on a single read — a moving-average slope alone, or a single MACD tick. The Impulse System instead demands that two independent forces agree before it acts. The EMA measures the market's direction, and the MACD histogram measures its acceleration. When both point the same way, the bar earns a "color": green for a bullish impulse (direction up and acceleration up), red for a bearish impulse (direction down and acceleration down), or blue for neutral when the two disagree. The strategy only commits when conviction is shared between trend and momentum.
As a learning tool, this strategy is well suited to traders who want to understand how confluence filters work — how combining two non-redundant signals can reduce false starts compared with a single indicator. It is designed for markets with sustained directional legs, such as a liquid forex major, a metal, or an index on intermediate timeframes. Frame your study of it as an exercise in signal design and risk structuring, not as a shortcut to returns.
How It Works
The strategy processes one signal per newly closed bar on the chart's primary timeframe. It reads two "votes" and acts only when they lock into alignment — a color shift — rather than while a color simply persists.
- Direction vote (trend): The strategy computes an EMA over
EmaPeriodbars and compares it with the prior bar's EMA. A rising EMA is a vote for up; a falling EMA is a vote for down. - Acceleration vote (momentum): It builds a MACD histogram from
MacdFast,MacdSlow, andMacdSignalEMAs (histogram = MACD line − signal line) and compares it with the prior bar. A rising histogram votes up; a falling histogram votes down. - Color assignment: A bar is green (+1) when both votes are up, red (−1) when both votes are down, and blue (0) when they disagree and there is no shared conviction.
- The trigger is the shift, not the color: The strategy signals a bullish shift the first bar that turns green after being red or blue, and a bearish shift the first bar that turns red. That moment is when direction and acceleration first align — the cleanest ignition point of a new leg.
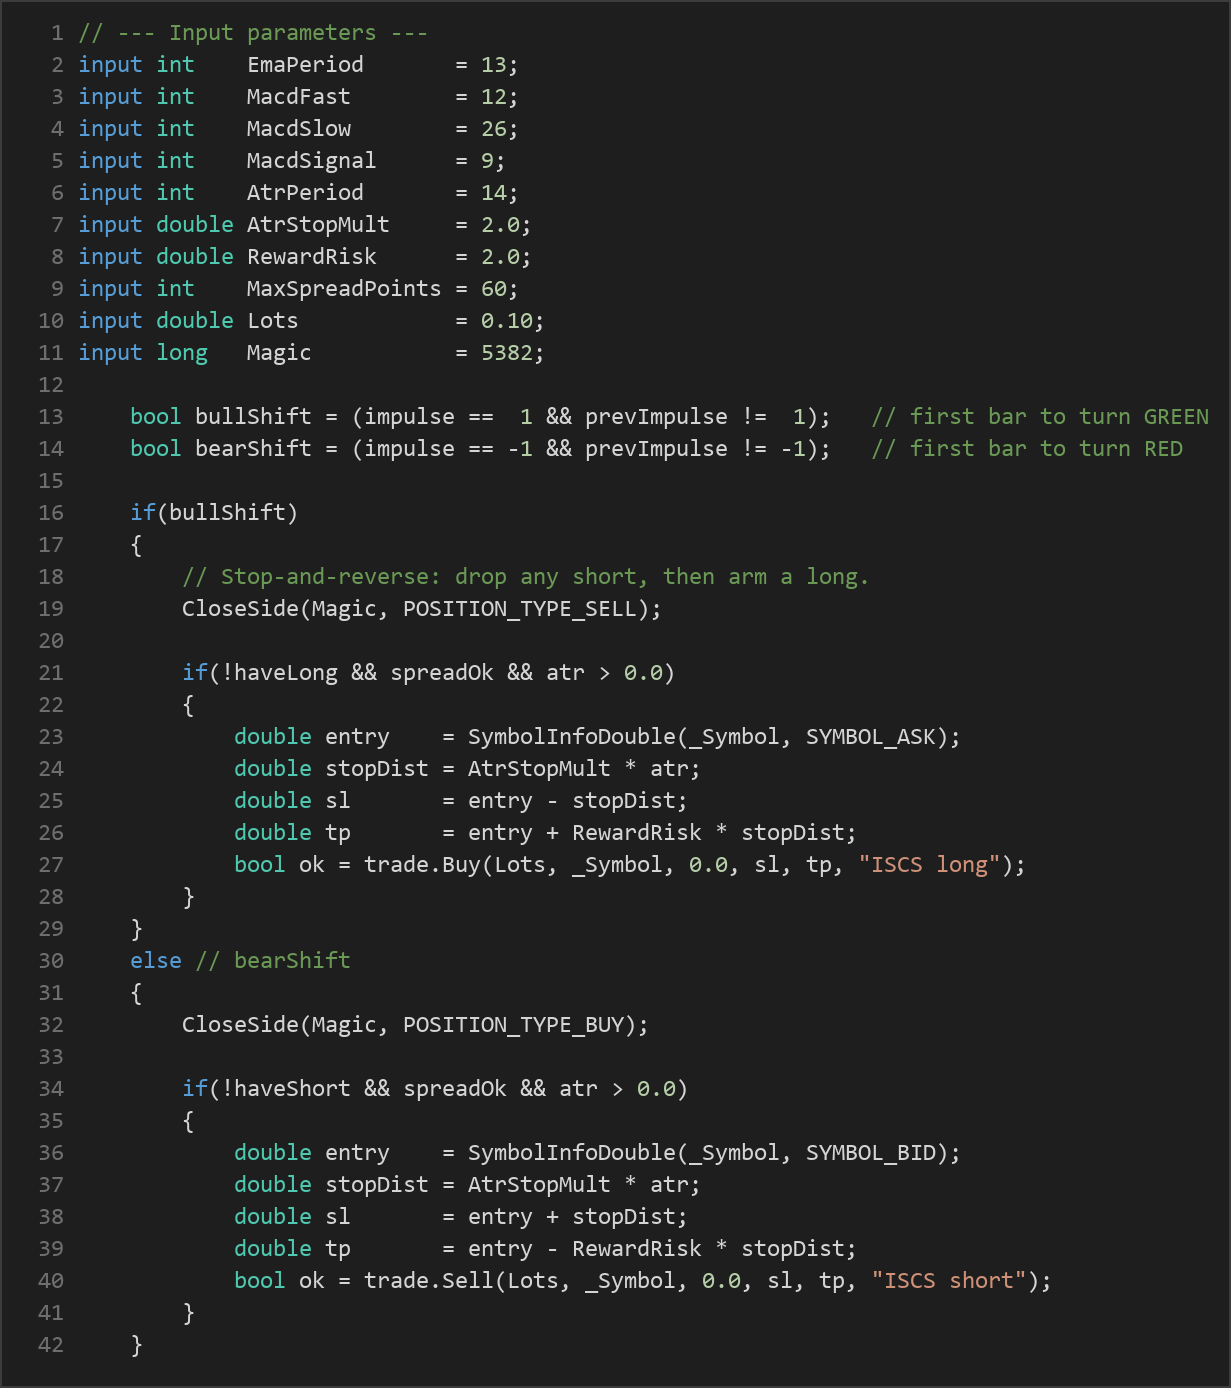
- Stop-and-reverse entries: On a fresh green shift, the strategy closes any open short and opens a long. On a fresh red shift, it closes any open long and opens a short. The position is always aligned with the prevailing impulse, and a flip both exits the old side and arms the new one.
- Stop-loss logic: Protective stops are volatility-scaled using the Average True Range (ATR), an indicator that measures typical bar range. The stop sits
AtrStopMult × ATRaway from entry — below entry for longs, above entry for shorts — so the risk distance widens in volatile conditions and tightens in calm ones. - Take-profit logic: The target is placed at
RewardRisk × stop distancefrom entry, so the reward-to-risk ratio is fixed regardless of current volatility. - Spread filter: New entries are skipped when the current spread (in points) exceeds
MaxSpreadPoints, which helps keep simulated and live fills realistic. Setting it to 0 disables the filter.
Because it is a stop-and-reverse engine, the book is always positioned in one direction or the other after the first qualified signal — it does not sit flat waiting on the sidelines once trend and momentum have spoken.
Strategy Parameters
| Parameter | Default | Min | Max | Description |
|---|---|---|---|---|
| EmaPeriod | 13 | 5 | 50 | Lookback of the trend EMA; its bar-to-bar slope supplies the direction vote. |
| MacdFast | 12 | 5 | 20 | Fast EMA length of the MACD calculation. |
| MacdSlow | 26 | 15 | 60 | Slow EMA length of the MACD calculation. |
| MacdSignal | 9 | 3 | 20 | Signal-line EMA; the histogram slope supplies the acceleration vote. |
| AtrPeriod | 14 | 5 | 30 | ATR lookback used to size the stop distance. |
| AtrStopMult | 2.0 | 0.5 | 5.0 | Stop distance as a multiple of ATR, placed beyond the entry price. |
| RewardRisk | 2.0 | 0.5 | 5.0 | Take-profit distance as a reward-to-risk multiple of the ATR stop. |
| MaxSpreadPoints | 60 | 0 | 300 | Skip new entries when the spread (points) is wider than this (0 = no filter). |
| Lots | 0.10 | 0.01 | 1.0 | Trade volume in lots. |
| Magic | 5382 | 0 | 9,999,999 | Unique EA identifier used to tag and manage this strategy's positions. |
Recommended Chart Settings
This strategy was designed for a liquid FX major, metal, or index on intermediate timeframes — roughly M15 to H1 — where trend legs tend to be long enough for the dual trend-and-momentum filter to add value. The Expert Advisor uses only the chart's primary timeframe, so it runs on whichever timeframe you attach it to at backtest or run time.
Because the defaults (EMA 13, MACD 12/26/9, ATR 14) are general-purpose, you should expect behavior to differ noticeably across symbols and market regimes. Results will vary across different market conditions, and any parameter set that appears to fit one instrument or period may behave quite differently on another. Treat the recommended settings as a starting point for study, not a fixed prescription.
How to Install on MetaTrader 5
- Download the .ex5 file from the link below
- Copy it to your MT5
MQL5\Expertsfolder - Restart MetaTrader 5 or refresh the Navigator panel
- Drag the EA onto a chart matching the recommended symbol and timeframe
- Configure the input parameters and enable Algo Trading
What to Consider Before Using This EA
Strengths. The Impulse System Color Shift addresses a well-known weakness of single-indicator timers: entering on noise. By requiring both the EMA slope and the MACD histogram slope to agree, it filters out many of the choppy, indecisive bars that a lone signal would trade. The ATR-scaled stop and fixed reward-to-risk structure mean that risk adapts to volatility automatically rather than being a fixed pip value, which is a sound piece of trade design. Acting on the color shift rather than the persistent color also helps it engage near the start of a move.
Known limitations. Confluence systems are, by construction, slower to fire than single-indicator systems. In fast reversals the two votes may not align until part of the move has already happened. As a stop-and-reverse engine, the strategy is always in the market once signals begin, so it can accumulate a series of small losses during range-bound, sideways conditions — precisely the environment where trend-and-momentum agreement flickers back and forth. Whipsaw is the primary risk here: repeated green/red shifts in a directionless market can chip away at an account through repeated reversals and spread costs.
Where it may underperform. Expect the weakest behavior in low-volatility consolidation, during news-driven spikes that gap through stops, and on illiquid symbols where spreads widen beyond the filter's tolerance. The strategy has no separate regime filter to detect and sit out flat markets, so managing the environment you deploy it in is part of using it responsibly. Study its behavior across several instruments and multiple market phases before drawing any conclusions.
Risk Management Tips
Sound risk management matters more than any single indicator setting. Consider the following general principles as you study this strategy:
- Risk a small, fixed fraction per trade. A common educational guideline is to risk no more than 1–2% of account equity on any single position. Size your
Lotsso that the ATR-based stop distance corresponds to that fraction, rather than choosing lot size arbitrarily. - Understand your drawdown tolerance. Even a well-designed strategy will have losing streaks. Know in advance how much peak-to-trough decline you are willing to endure, and how that interacts with a stop-and-reverse system that can flip repeatedly.
- Test on a demo account first. Run the EA on a demo or simulated account across different symbols and market conditions before considering any live use. This lets you observe whipsaw behavior and spread sensitivity without capital at stake.
- Account for costs. Spreads, commissions, and slippage all reduce results. The built-in
MaxSpreadPointsfilter helps, but real-world execution can still differ from a backtest. - Never over-leverage. Leverage amplifies both gains and losses. Keep position sizes conservative relative to your account, and never trade with money you cannot afford to lose.
Approach this EA as a way to learn how trend and momentum confluence, volatility-based stops, and reward-to-risk targeting fit together — and let that understanding, not any expectation of outcome, guide how you use it.
Risk Warning
Trading foreign exchange, CFDs, and other leveraged financial instruments involves substantial risk of loss and is not suitable for all investors. The strategies and tools discussed on this page are provided for educational purposes only and do not constitute financial advice, investment recommendations, or solicitation to trade. Always consult a qualified financial adviser before making trading decisions. Past backtest performance is not indicative of future results.
Downloads
- Expert Advisor: ImpulseSystemColorShift.ex5 (49 downloads)
- Source Code: ImpulseSystemColorShift.mq5 (42 downloads)
- Documentation: ImpulseSystemColorShift.pdf (54 downloads)