Disclaimer: This article is for educational and informational purposes only. It does not constitute financial or investment advice. Trading forex and CFDs carries significant risk of loss. Past performance of any strategy — including backtests — does not guarantee future results. Never trade with money you cannot afford to lose.
What Is This Strategy?
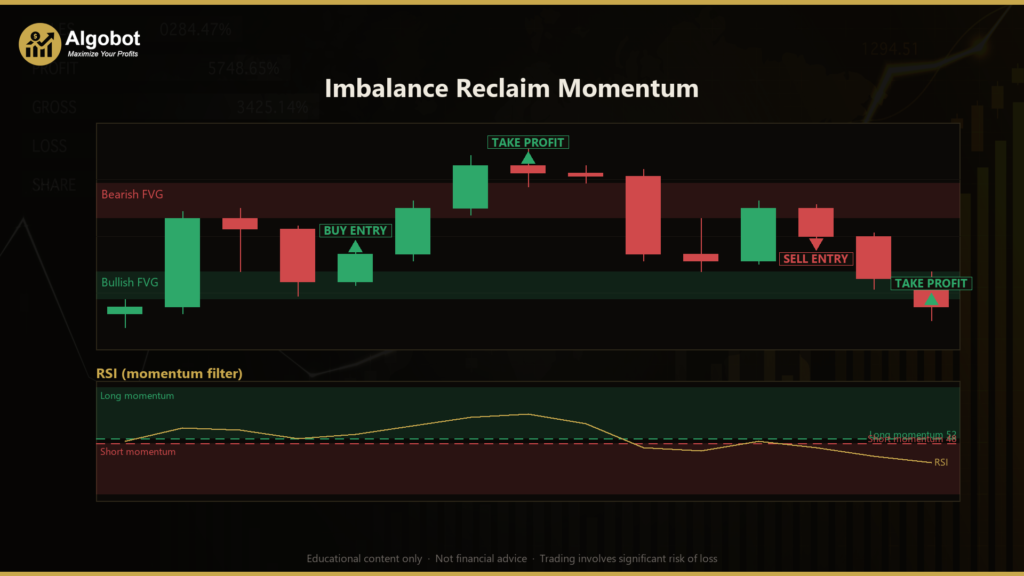
Imbalance Reclaim Momentum is an automated MetaTrader 5 strategy built around the Fair Value Gap (FVG) price pattern combined with a Relative Strength Index (RSI) momentum filter. A Fair Value Gap — sometimes called an imbalance — is a three-candle structure where price moves so quickly in one direction that it leaves an untraded "gap" between the wick of the first candle and the wick of the third. These gaps are a core concept in modern price-action and order-flow trading, and they often act as zones that price returns to before continuing its move.
Rather than chasing the initial breakout, this strategy takes a more patient, reversion-to-continuation approach. It waits for an imbalance to form on a strong displacement candle, then watches for price to pull back into the gap and confirm a reclaim before any trade is considered. The RSI — a momentum oscillator that measures the speed and strength of recent price changes on a 0-to-100 scale — is used as a final gate so that long trades are only taken when momentum is leaning bullish and short trades only when momentum is leaning bearish.
This makes Imbalance Reclaim Momentum most relevant to traders studying trend-continuation and order-flow concepts on a single timeframe. It is best viewed as a learning tool for understanding how imbalance detection, pullback confirmation, and momentum filtering can be combined into one rule set. It is suitable for intermediate learners who already understand basic candlestick structure and want to study how these ideas can be expressed in code, rather than as a hands-off solution.
How It Works
The strategy operates only on fully closed bars (it ignores the still-forming candle) and manages one armed gap at a time. Here is the logic step by step:
- Detecting the imbalance: The strategy scans the three newest closed candles. It measures the middle (displacement) candle's range and compares it to the current ATR (Average True Range, a volatility measure). The gap is only considered valid when that range is larger than
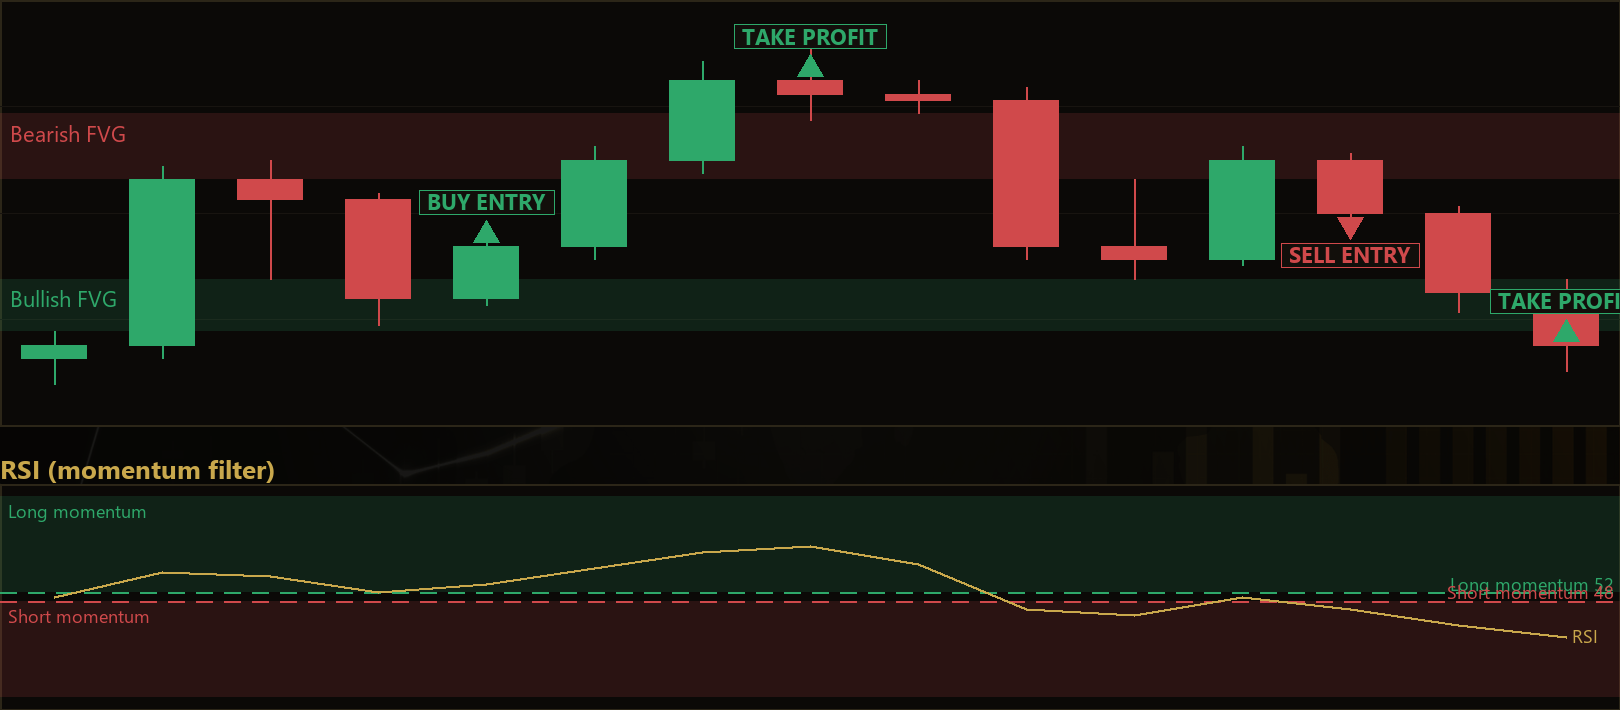
ATR × DisplacementMult, ensuring the move was a genuine, strong displacement rather than noise. - Bullish gap: A bullish Fair Value Gap is identified when the high of the oldest candle sits below the low of the newest candle, driven by a bullish displacement candle. The strategy then "arms" this gap and looks for potential long setups.
- Bearish gap: The mirror condition — the low of the oldest candle sits above the high of the newest candle, driven by a bearish displacement candle — arms a gap for potential short setups.
- Waiting for the pullback: Once a gap is armed, the strategy does not enter immediately. It waits for price to trade back into the gap zone (a "tap"). This avoids many false signals that occur when price slices straight through a fresh gap.
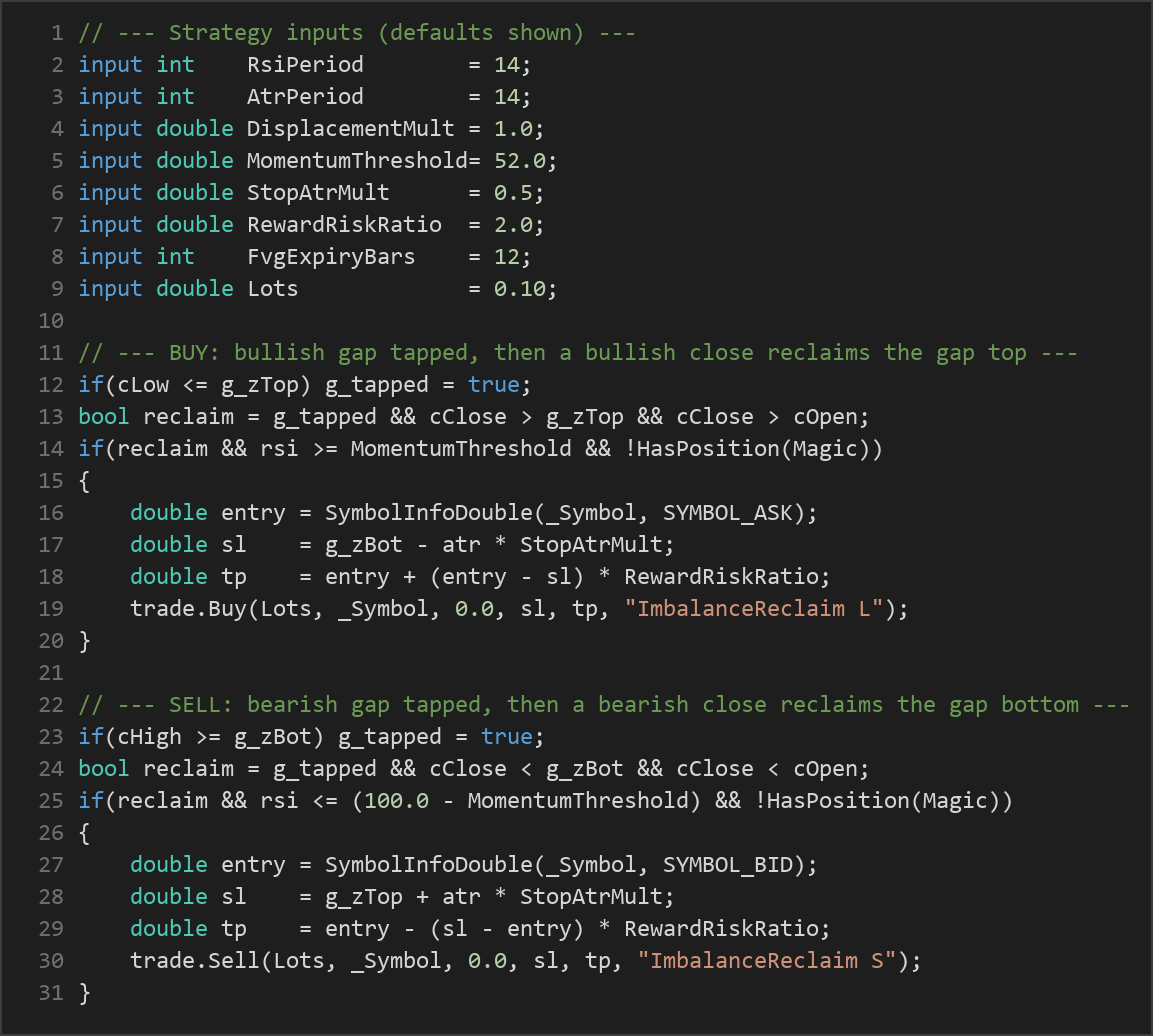
- Requiring a confirmed reclaim: After the tap, the strategy signals only when a candle closes back out of the gap in the original direction. For a long, the close must finish above the gap top and be a bullish candle; for a short, the close must finish below the gap bottom and be a bearish candle. This filters out clean fill-throughs where price never resumes.
- Momentum gate: The reclaim alone is not enough. For longs, RSI must be greater than or equal to
MomentumThreshold; for shorts, RSI must be less than or equal to100 − MomentumThreshold. This is intended to align entries with prevailing momentum. - Stop-loss logic: Risk is defined by the far edge of the gap plus a volatility buffer. A long places its stop at the gap bottom minus
ATR × StopAtrMult; a short places its stop at the gap top plus the same buffer. - Take-profit logic: The target is a fixed multiple of the measured risk. The distance from entry to stop is multiplied by
RewardRiskRatioand projected in the trade's direction to set the take-profit. - Expiry and invalidation: If an armed gap grows stale (older than
FvgExpiryBarsbars) without triggering, it is abandoned. A gap is also invalidated if price closes fully through the wrong side of it. Only one position per symbol is held at a time, tracked by a unique magic number.
Every entry is therefore the result of a chain of conditions — a valid imbalance, a pullback, a confirmed reclaim, and aligned momentum — which the strategy treats as a single, well-defined signal.
Strategy Parameters
| Parameter | Default | Min | Max | Description |
|---|---|---|---|---|
| RsiPeriod | 14 | 5 | 30 | Look-back length for the RSI momentum filter. Lower values react faster; higher values smooth the reading. |
| AtrPeriod | 14 | 5 | 40 | Look-back length for the ATR used to measure displacement strength and the stop-loss buffer. |
| DisplacementMult | 1.0 | 0.3 | 3.0 | How large the middle candle's range must be relative to ATR for the gap to count as a strong displacement. |
| MomentumThreshold | 52.0 | 50.0 | 70.0 | RSI gate for entries. Longs need RSI ≥ this value; shorts need RSI ≤ (100 − this value). |
| StopAtrMult | 0.5 | 0.1 | 3.0 | ATR multiple added beyond the far edge of the gap to place the stop-loss. |
| RewardRiskRatio | 2.0 | 0.5 | 5.0 | Reward-to-risk multiple used to project the take-profit from the measured risk distance. |
| FvgExpiryBars | 12 | 3 | 50 | Maximum number of bars an armed gap stays valid before it is abandoned as stale. |
| Lots | 0.10 | 0.01 | 1.0 | Fixed trade volume in lots for each position. |
Recommended Chart Settings
Imbalance Reclaim Momentum is designed to run on a single timeframe — every calculation uses the chart's primary period, so you simply attach it to one chart and let it work from that timeframe's candles. Fair Value Gap concepts are commonly studied on intraday charts such as the M15, M30, or H1, where displacement candles and pullbacks are frequent enough to study but not as noisy as very low timeframes.
For instrument choice, liquid major forex pairs (for example EUR/USD or GBP/USD) tend to produce cleaner imbalance structures because of tighter spreads and steadier volatility. That said, the behavior of any imbalance-based approach changes meaningfully across symbols, sessions, and volatility regimes. Results will vary considerably across different market conditions, so treat the recommended settings as a starting point for study and observation rather than a fixed configuration.
How to Install on MetaTrader 5
- Download the .ex5 file from the link below
- Copy it to your MT5
MQL5\Expertsfolder - Restart MetaTrader 5 or refresh the Navigator panel
- Drag the EA onto a chart matching the recommended symbol and timeframe
- Configure the input parameters and enable Algo Trading
What to Consider Before Using This EA
Every strategy has trade-offs, and understanding them is part of learning. On the strength side, the multi-step confirmation chain is the defining feature here. By requiring a strong displacement, a pullback, a confirmed reclaim, and aligned RSI momentum, the strategy is deliberately selective — it is designed to ignore many of the weak, straight-through gap fills that simpler "enter on first touch" approaches act on. The ATR-based stop and fixed reward-to-risk target also give each trade a clearly defined risk structure rather than an open-ended exit.
On the limitation side, Fair Value Gaps are a discretionary concept being expressed as fixed rules, and no fixed rule captures the idea perfectly. The patient confirmation logic that filters out false signals will also cause the strategy to miss moves that run away without offering a pullback. Because it holds only one position per symbol and works one gap at a time, it can sit idle during fast trends. In choppy, low-volatility ranges the displacement filter may rarely trigger, while in violently whipsawing conditions a reclaim can fail immediately after entry. RSI thresholds near 50 can also be sensitive, sometimes allowing entries when momentum is barely leaning one way.
In short, this approach may underperform in environments that lack clean directional displacement or that gap straight through zones without retracing. Studying when it stays out of the market is just as instructive as studying when it acts.
Risk Management Tips
Risk management is the foundation of responsible trading education, regardless of which strategy you study:
- Position sizing: The default
Lotsvalue is fixed, so it does not scale to your account size. Always size positions relative to your balance rather than using an arbitrary fixed lot. - Risk per trade: A widely taught guideline is to risk no more than 1–2% of your account on any single trade. Use the strategy's ATR-based stop distance to work backward to an appropriate lot size.
- Use a demo account first: Run the EA on a demo or paper account until you understand how it behaves across different sessions and volatility conditions before considering anything else.
- Understand drawdown: Even a well-structured strategy will experience losing streaks. Study the depth and duration of historical drawdowns so the inevitable losing periods do not surprise you.
- Avoid over-optimization: Tuning parameters until they fit one slice of history (curve-fitting) often produces results that do not hold up going forward. Favor robust, stable settings over perfect-looking ones.
- Stay engaged: Automated does not mean unattended. Monitor open positions, news events, and changing market conditions while the EA runs.
Risk Warning
Trading foreign exchange, CFDs, and other leveraged financial instruments involves substantial risk of loss and is not suitable for all investors. The strategies and tools discussed on this page are provided for educational purposes only and do not constitute financial advice, investment recommendations, or solicitation to trade. Always consult a qualified financial adviser before making trading decisions. Past backtest performance is not indicative of future results.
Downloads
- Expert Advisor: ImbalanceReclaimMomentum.ex5 (53 downloads)
- Source Code: ImbalanceReclaimMomentum.mq5 (52 downloads)
- Documentation: ImbalanceReclaimMomentum.pdf (62 downloads)