Disclaimer: This article is for educational and informational purposes only. It does not constitute financial or investment advice. Trading forex and CFDs carries significant risk of loss. Past performance of any strategy — including backtests — does not guarantee future results. Never trade with money you cannot afford to lose.
What Is This Strategy?
The Gap Fill Fade Reversal is a pure price-action, mean-reversion strategy for MetaTrader 5 that trades price gaps — moments when a candle opens at a meaningfully different level from the previous candle's close. Unlike most automated systems, it uses no traditional indicators at all: no moving average, no RSI, no ATR. Instead, it reads raw candle geometry to decide when a sudden jump in price is likely to "snap back" toward where it started.
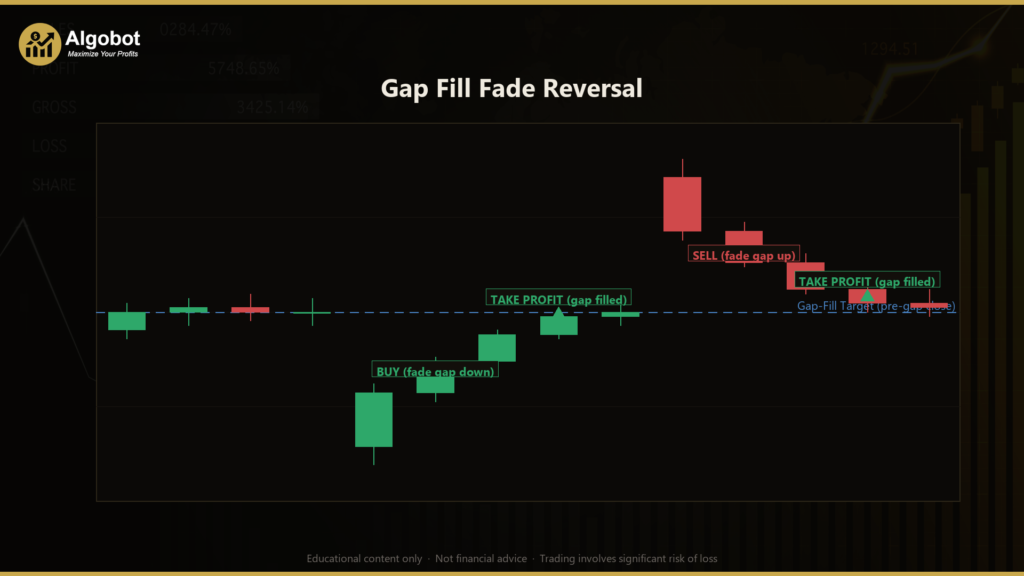
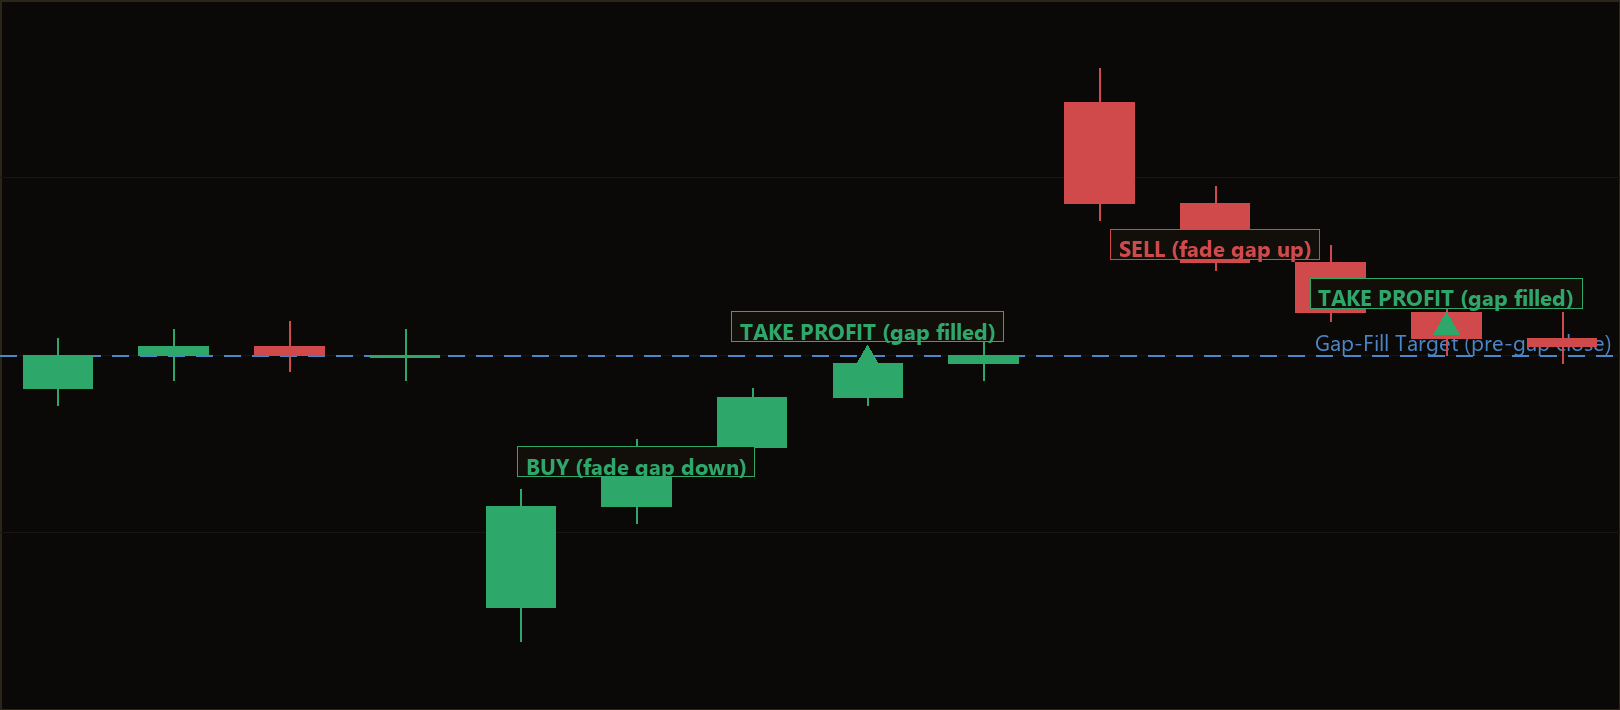
The core observation behind the strategy is a long-studied market behavior: when price gaps away from its prior close — often driven by news, a liquidity vacuum, or a burst of emotional order flow — it frequently retraces to "fill" that empty space before continuing. A gap is simply the void between one bar's close and the next bar's open where no trading occurred. The Gap Fill Fade Reversal fades that move, meaning it trades against the direction of the jump, aiming for the pre-gap price level as its target. To avoid blindly catching a falling (or rising) knife, it waits for the gap candle itself to print a rejection close — a close that pushes back against the direction it jumped — before committing.
As a learning tool, this strategy is well suited to traders who want to understand mean-reversion logic and candle-based confirmation without the noise of layered indicators. It is best studied as an example of how raw price structure alone can define an entry, a stop, and a target. It is not a profit opportunity, and it is not designed for trend-following environments. Treat it as a clean, readable case study in price-action automation.
How It Works
The strategy looks at two completed candles: the prior bar (labeled P) and the just-closed gap bar (labeled G). It measures the gap from P's close to G's open, then compares that distance against a volatility yardstick built from recent bar ranges. Here is how the logic flows:
- It measures market volatility first. The strategy averages the high-to-low range of the bars before the gap bar, over a window set by
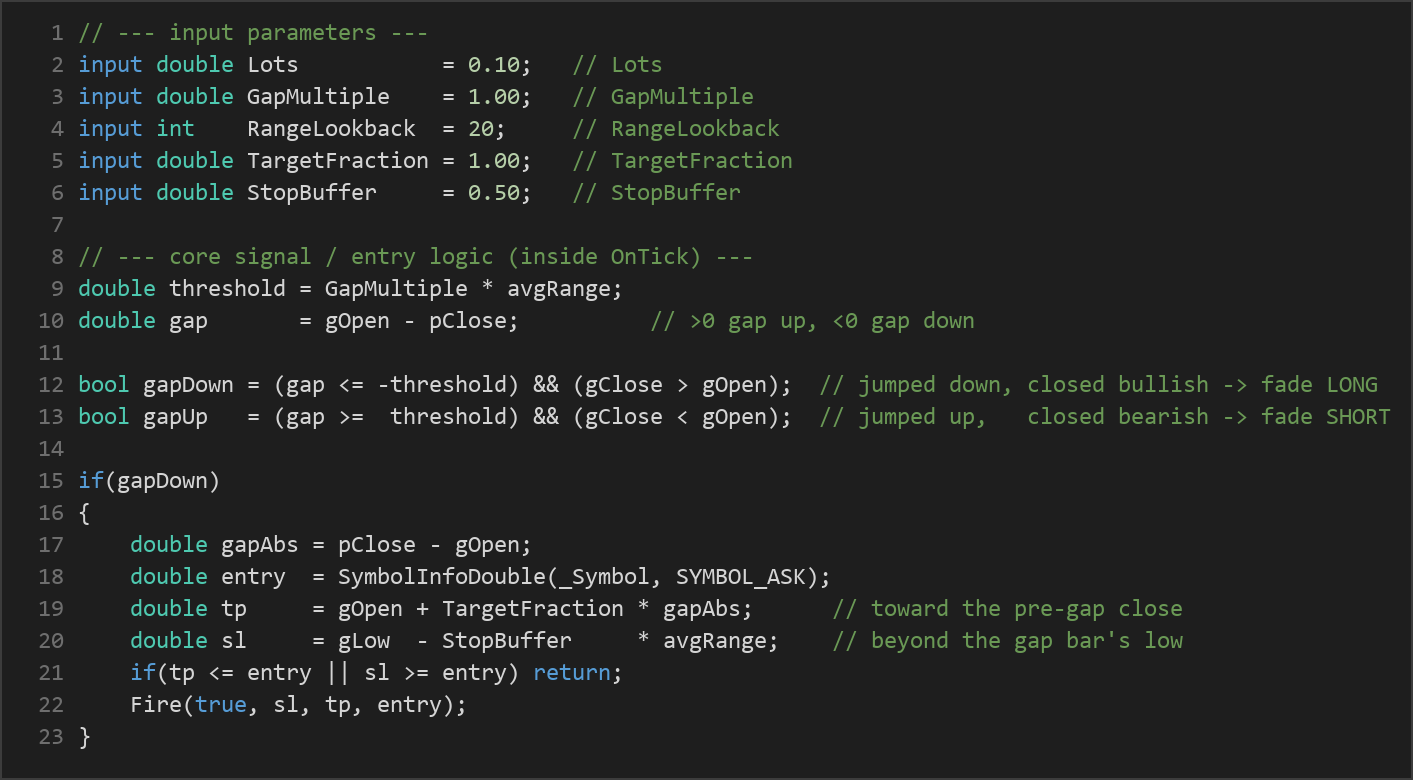
RangeLookback. This average range becomes the unit of measurement for how "big" a gap needs to be — adapting automatically to quiet or volatile conditions. - It defines a gap threshold. The threshold equals
GapMultiple × average range. Only gaps larger than this count as meaningful; small overnight or rollover gaps are ignored. - The strategy signals a long (fade) trade when: the gap bar opens below the prior close by more than the threshold (a gap down), and the gap bar closes bullish (its close is above its open). This rejection close suggests the downward impulse is being absorbed, so the strategy buys, expecting price to rise and fill the gap.
- The strategy signals a short (fade) trade when: the gap bar opens above the prior close by more than the threshold (a gap up), and the gap bar closes bearish (its close is below its open). The strategy sells, expecting price to drop back toward the pre-gap level.
- Entry is a market order placed at the open of the new bar, immediately on confirmation — a Buy at the Ask for gap-down setups, a Sell at the Bid for gap-up setups.
- Take-profit targets the gap-fill level. The strategy scales the target by
TargetFraction: a value of 1.00 aims for the full pre-gap close, while lower values aim for a partial fill, which can resolve more reliably than chasing the last tick of a gap. - Stop-loss sits just beyond the gap bar's far extreme — below the gap bar's low for long trades, above its high for short trades — buffered by
StopBuffer × average rangeto give the trade breathing room past the rejection candle. - Trade hygiene keeps things disciplined: only one position is open at a time, the logic acts only once per freshly completed bar, and every entry is sanity-checked so that the stop-loss and take-profit sit on the correct side of the entry price. If the geometry does not make sense, the signal is skipped.
This combination — a meaningful gap, a rejection close, a volatility-scaled threshold, and a defined gap-fill target — is what separates this approach from a continuation gap play. It is mean-reversion that fades the jump back toward its origin.
Strategy Parameters
| Parameter | Default | Min | Max | Description |
|---|---|---|---|---|
| Lots | 0.10 | 0.01 | 1.00 | Fixed trade size in lots for each position. Adjust to suit your account size and risk tolerance. |
| GapMultiple | 1.00 | 0.30 | 4.00 | How large a gap must be, expressed as a multiple of the average bar range, to qualify as a tradable gap. Higher values demand bigger, rarer gaps. |
| RangeLookback | 20 | 5 | 60 | Number of bars used to compute the average high-to-low range — the volatility yardstick that scales the gap threshold and stop buffer. |
| TargetFraction | 1.00 | 0.40 | 1.00 | How far toward the pre-gap close to place the take-profit. 1.00 targets a full fill; lower values target a partial fill. |
| StopBuffer | 0.50 | 0.10 | 2.00 | Extra distance, as a multiple of average range, placed beyond the gap bar's extreme for the stop-loss. Larger values give more room but increase risk per trade. |
The expert advisor also exposes a Magic number (default 1001), an internal identifier MT5 uses to distinguish this EA's positions from other trades on the same account. It does not affect the trading logic.
Recommended Chart Settings
The Gap Fill Fade Reversal was designed to run on a single symbol and a single timeframe at a time, using completed bars only. Because gaps are most meaningful on instruments and timeframes where genuine price discontinuities occur, it is typically studied on higher intraday timeframes such as the H1 (1-hour) chart, where session boundaries and news events can produce clean, measurable gaps. Markets that gap regularly — such as indices and certain forex pairs around session opens — give the logic more to work with than continuously traded, gap-free instruments.
Keep in mind that gap behavior varies enormously across symbols, sessions, and market regimes. A setting that produces frequent signals on one instrument may produce almost none on another. Results will vary across different market conditions, and you should test any configuration on your specific symbol and timeframe before drawing conclusions.
How to Install on MetaTrader 5
- Download the .ex5 file from the link below
- Copy it to your MT5
MQL5\Expertsfolder - Restart MetaTrader 5 or refresh the Navigator panel
- Drag the EA onto a chart matching the recommended symbol and timeframe
- Configure the input parameters and enable Algo Trading
What to Consider Before Using This EA
The strengths of this approach are its simplicity and transparency. With no indicators to lag or repaint, every decision traces directly to candle geometry you can verify by eye: the size of the gap, the direction of the rejection close, and the placement of the stop and target. The volatility-scaled threshold means the strategy adapts to changing conditions rather than relying on a fixed pip distance, and the one-position-at-a-time rule keeps exposure contained.
The limitations are equally important to understand. Mean-reversion strategies, by design, fade momentum — which means a gap that keeps running instead of filling will hit the stop. Some gaps are "breakaway" gaps that signal the start of a strong move and never fill; the rejection-close filter reduces but does not eliminate these false signals. The strategy may underperform in strongly trending markets, during major news shocks where volatility expands far beyond the recent average, and on instruments that rarely gap. It also depends on accurate bar data: thinly traded symbols or unusual broker feeds can produce gaps that behave differently than expected. As with any single-pattern system, it is best viewed as one tool for studying a specific market behavior — not a complete trading plan.
Risk Management Tips
Sound risk management matters more than any single strategy setting. Consider these general principles as you study this EA:
- Size positions conservatively. A common guideline is to risk no more than 1–2% of account equity on any single trade. Use the
Lots,StopBuffer, and your account size together to estimate the worst-case loss per trade before you enable live trading. - Start on a demo account. Run the strategy on a demo or simulated environment first to observe how it behaves across different sessions and market regimes without putting capital at risk.
- Understand drawdown. Even a logically sound strategy can experience losing streaks. Know how a series of stop-outs would affect your account, and decide in advance how much drawdown you are willing to tolerate.
- Diversify your study. Avoid relying on a single instrument, timeframe, or parameter set. Observing the strategy across varied conditions builds a more honest picture of its behavior.
- Keep expectations grounded. Backtests and demo results are learning aids, not predictions. Market conditions change, and no configuration performs the same forever.
Risk Warning
Trading foreign exchange, CFDs, and other leveraged financial instruments involves substantial risk of loss and is not suitable for all investors. The strategies and tools discussed on this page are provided for educational purposes only and do not constitute financial advice, investment recommendations, or solicitation to trade. Always consult a qualified financial adviser before making trading decisions. Past backtest performance is not indicative of future results.
Downloads
- Expert Advisor: GapFillFadeReversal.ex5 (45 downloads)
- Source Code: GapFillFadeReversal.mq5 (48 downloads)
- Documentation: GapFillFadeReversal.pdf (51 downloads)