Disclaimer: This article is for educational and informational purposes only. It does not constitute financial or investment advice. Trading forex and CFDs carries significant risk of loss. Past performance of any strategy — including backtests — does not guarantee future results. Never trade with money you cannot afford to lose.
What Is This Strategy?
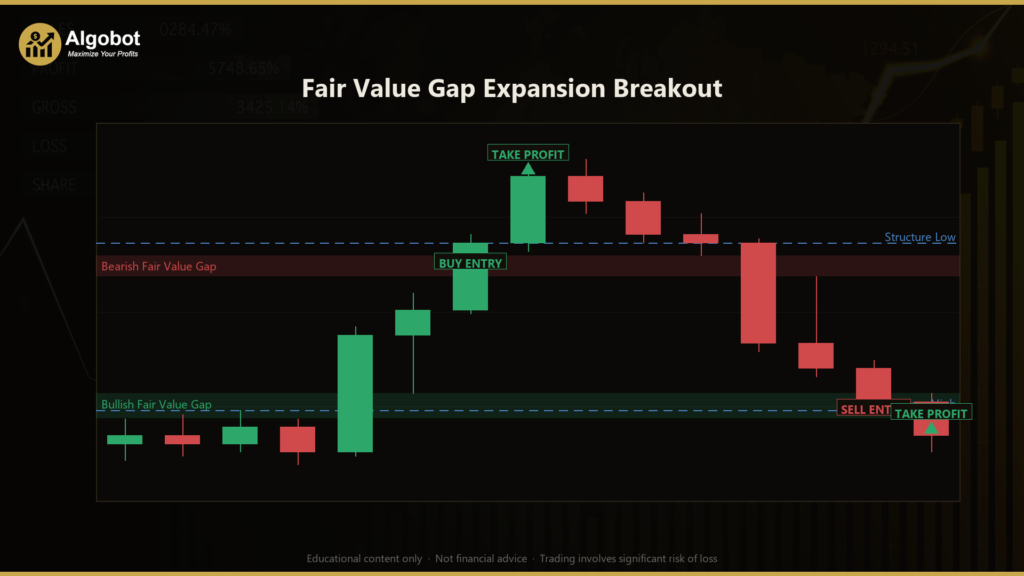
The Fair Value Gap Expansion Breakout is a pure price-action expert advisor (EA) built around the Fair Value Gap (FVG) — a three-candle imbalance pattern — combined with a momentum-continuation breakout entry. There are no traditional indicators anywhere in this strategy: no moving averages, no RSI, no ATR. Every threshold is measured directly from raw candle geometry (highs, lows, candle bodies, and a simple mean candle range used only to scale buffers). If you are studying how institutional-style "smart money" concepts can be translated into mechanical, rule-based code, this is a clean example to learn from.
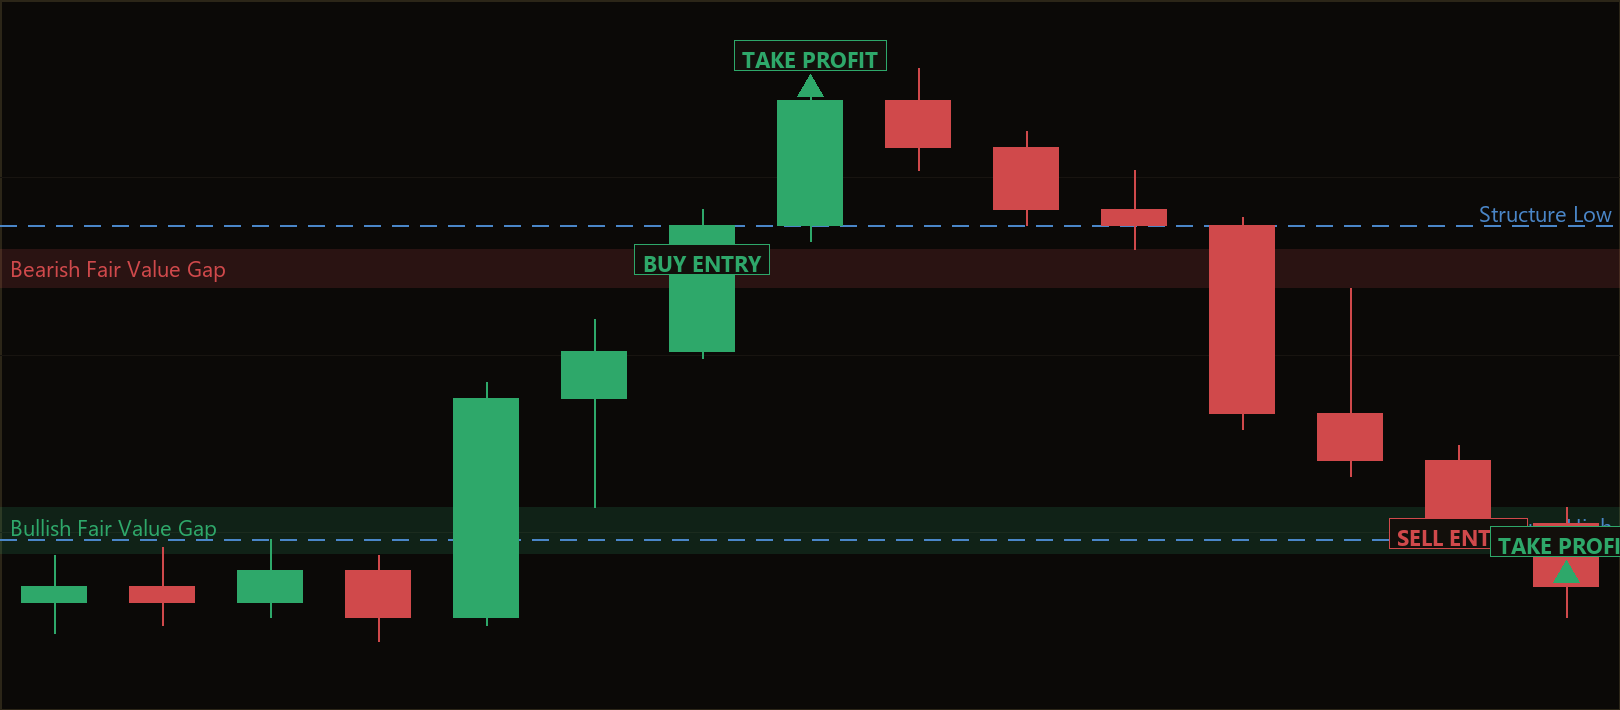
A Fair Value Gap is the footprint of a fast, one-sided move. When a strong displacement candle travels so quickly that the wick of the candle before it and the wick of the candle after it never overlap, an untraded "void" of price is left behind. Most traders use FVGs to predict a pullback — they place a limit order at the 50% line of the gap and wait for price to retrace back into the imbalance. The Fair Value Gap Expansion Breakout does the opposite. It assumes that in a genuine runaway expansion, the retrace often never comes, and the strongest moves leave their imbalance unmitigated and keep going.
This makes it a price-action momentum / displacement-continuation breakout strategy. It is designed for trending, expansive market conditions rather than quiet, range-bound sessions. As a learning tool, it suits intermediate traders who already understand candlestick structure and want to see how concepts like displacement, market structure breaks, and stop-entry orders fit together into a single, self-contained system. It is best treated as a study in mechanical rule design — not as a shortcut to results.
How It Works
The strategy acts once per newly closed bar on the chart's timeframe and only ever manages one setup at a time. Here is the logic in plain English.
Building the context:
- The EA keeps a rolling history of closed bars and calculates a mean candle range (average high-to-low distance) over a recent window. Every distance threshold in the strategy is expressed as a fraction of this average, so it adapts to whatever symbol or timeframe you run it on.
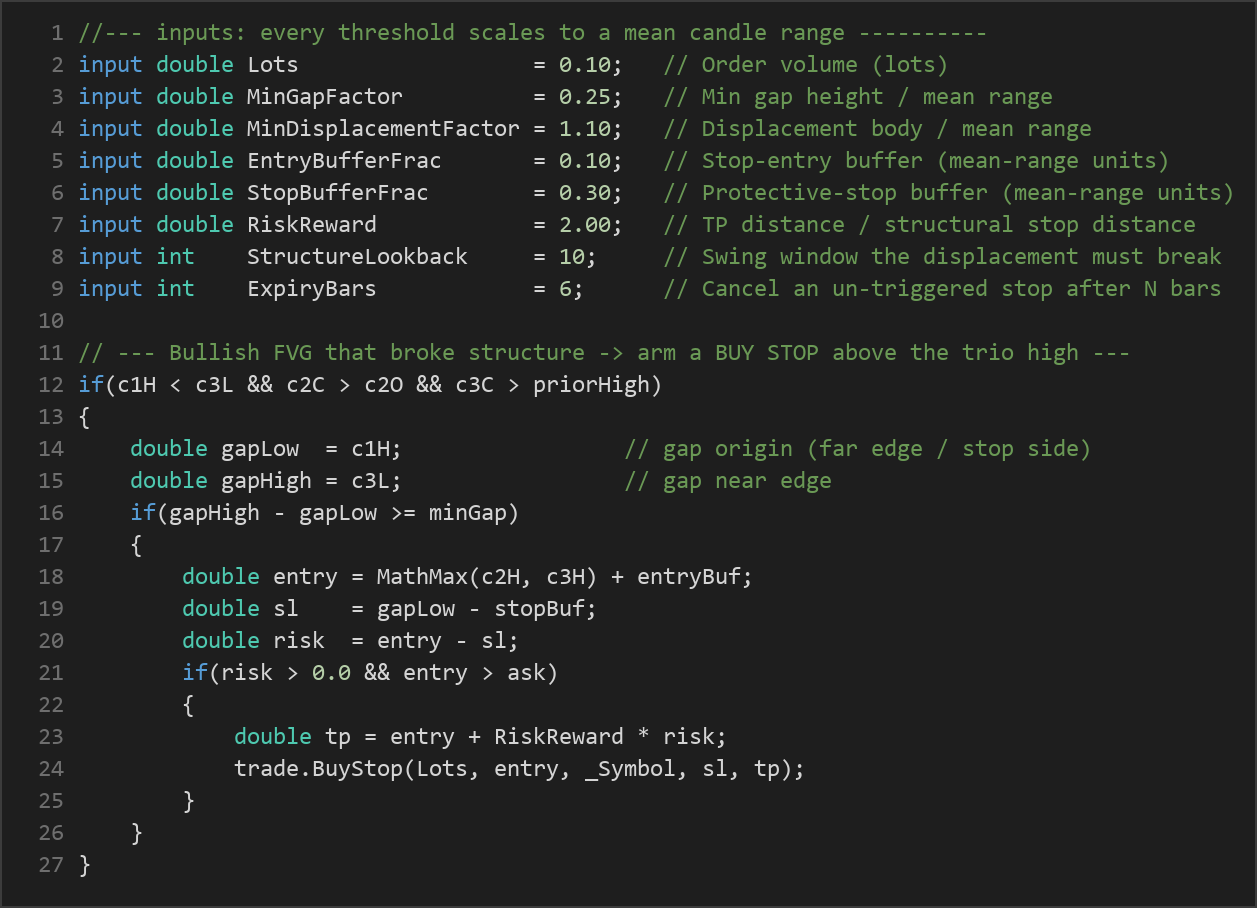
Bullish entry conditions — the strategy arms a Buy Stop order when all of the following are true:
- A fresh up-gap has formed: the high of the oldest candle in the trio sits below the low of the newest candle (a true three-candle imbalance).
- The middle displacement candle is bullish and its body is large — at least
MinDisplacementFactortimes the mean range — confirming a violent thrust. - The displacement broke structure: the newest candle closes above the highest high of the prior lookback window (a swing-high break).
- The gap is tall enough to matter — at least
MinGapFactortimes the mean range. - A Buy Stop is then placed a small buffer above the trio's high. It only triggers if price makes a new high in the breakout direction, filtering out gaps that immediately stall.
Bearish entry conditions are the exact mirror: a fresh down-gap, a strong bearish displacement candle, a close below the prior swing low, a gap of sufficient height, and a Sell Stop armed a buffer below the trio's low.
Stop-loss logic:
- The gap itself is the thesis. The protective stop sits just beyond the gap's far (origin) edge — below the gap origin for longs, above it for shorts, plus a small buffer. If price collapses back and fills the imbalance, the idea is considered dead and the trade is closed for a small, structural loss.
Take-profit logic:
- The take-profit is placed a fixed multiple of the stop distance away, set by the
RiskRewardparameter. With the default of 2.0, the target sits twice as far from entry as the stop — a 1:2 risk-to-reward structure.
Order management:
- If a resting stop order is never triggered, it is cancelled after
ExpiryBarsbars, or the moment a bar closes back through the gap (invalidation). - Once a stop order fills and becomes a live position, any stray pending orders are pulled and the position is left to its stop-loss and take-profit to manage the exit.
Strategy Parameters
| Parameter | Default | Min | Max | Description |
|---|---|---|---|---|
| Lots | 0.10 | 0.01 | 1.00 | Order volume in lots. Controls position size per trade. |
| MinGapFactor | 0.25 | 0.05 | 1.50 | Minimum gap height as a fraction of the mean candle range. Higher values demand a more meaningful imbalance. |
| MinDisplacementFactor | 1.10 | 0.50 | 3.00 | Required displacement candle body size relative to the mean range. Higher values demand a more violent thrust. |
| EntryBufferFrac | 0.10 | 0.00 | 1.00 | Stop-entry buffer beyond the trio's extreme, in mean-range units. Avoids triggering on the exact tick. |
| StopBufferFrac | 0.30 | 0.00 | 1.50 | Protective-stop buffer beyond the gap's far edge, in mean-range units. Gives the stop breathing room. |
| RiskReward | 2.00 | 1.00 | 6.00 | Take-profit distance as a multiple of the structural stop distance. |
| StructureLookback | 10 | 3 | 50 | Number of bars before the trio whose swing high/low the displacement must break. |
| ExpiryBars | 6 | 1 | 30 | Cancel an un-triggered stop order after this many bars. |
| RangeWindow | 20 | 8 | 60 | Window for the mean candle range that scales every threshold. |
| Magic | 9207 | 0 | 9,999,999 | Magic number used to identify this EA's own orders and positions. |
Recommended Chart Settings
Because every threshold scales to a mean candle range rather than a fixed point value, the Fair Value Gap Expansion Breakout is symbol-agnostic. It is designed to run on liquid instruments — major forex pairs such as EUR/USD, metals such as XAU/USD (gold), and major stock indices — on intraday timeframes from M5 through H1. These timeframes tend to produce frequent, clearly defined displacement candles while still leaving room for follow-through.
As with any breakout approach, results will vary considerably across different market conditions. The same parameter set that suits a trending session may behave very differently during quiet, choppy, or news-driven periods. Always test a configuration on the specific symbol and timeframe you intend to study before drawing any conclusions.
How to Install on MetaTrader 5
- Download the
FairValueGapExpansionBreakout.ex5file from the link below. - Copy it to your MT5
MQL5\Expertsfolder. - Restart MetaTrader 5 or refresh the Navigator panel.
- Drag the EA onto a chart matching the recommended symbol and timeframe.
- Configure the input parameters and enable Algo Trading.
What to Consider Before Using This EA
Every strategy involves trade-offs, and an honest assessment is more useful than a sales pitch.
Strengths of this approach:
- It is rule-based and fully mechanical, removing emotional decision-making and making behavior easy to study.
- The stop-entry design means the strategy only engages when price confirms continuation, sidestepping gaps that immediately reverse.
- Risk is structurally defined: the stop sits at a logical invalidation point (the gap origin), not at an arbitrary distance.
- Because thresholds scale to recent volatility, the same logic adapts across instruments and timeframes.
Known limitations:
- Breakout-continuation systems can suffer in range-bound or low-volatility markets, where false breakouts (price triggering the stop order then reversing) are common.
- The strategy trades only one setup at a time, so it may sit idle for long stretches and can miss simultaneous opportunities.
- Fixed-ratio take-profits do not adapt to changing momentum; a strong move may reverse before reaching target, while a weak one may stop out early.
- Slippage and spread on stop orders can meaningfully affect outcomes, particularly on fast-moving instruments like gold or during news events.
Historically, momentum-continuation strategies tend to perform best when a market is genuinely expanding and worst when it is consolidating. No parameter set will suit every regime, and the strategy signals should be understood as conditional, not predictive.
Risk Management Tips
Risk management is the part of trading you can actually control. Consider these general principles as you study any EA:
- Position sizing: Size each trade so that a single loss is a small fraction of your account, not a threat to it.
- The 1–2% rule: Many educators suggest risking no more than 1–2% of account equity on any one trade, so that a string of losses does not cause serious damage.
- Use a demo account first: Test the EA thoroughly in a risk-free demo environment before ever considering live capital. This lets you observe behavior across different conditions.
- Understand drawdown: Every strategy experiences losing streaks. Know the historical drawdown of any configuration you study and ask whether you could tolerate it emotionally and financially.
- Account for costs: Spread, commission, and slippage are real and compound over many trades. Factor them into any evaluation.
- Never over-leverage: Leverage magnifies losses just as much as gains. Use it conservatively.
Risk Warning
Trading foreign exchange, CFDs, and other leveraged financial instruments involves substantial risk of loss and is not suitable for all investors. The strategies and tools discussed on this page are provided for educational purposes only and do not constitute financial advice, investment recommendations, or solicitation to trade. Always consult a qualified financial adviser before making trading decisions. Past backtest performance is not indicative of future results.
Downloads
- Expert Advisor: FairValueGapExpansionBreakout.ex5 (64 downloads)
- Source Code: FairValueGapExpansionBreakout.mq5 (53 downloads)
- Documentation: FairValueGapExpansionBreakout.pdf (57 downloads)