Disclaimer: This article is for educational and informational purposes only. It does not constitute financial or investment advice. Trading forex and CFDs carries significant risk of loss. Past performance of any strategy — including backtests — does not guarantee future results. Never trade with money you cannot afford to lose.
What Is This Strategy?
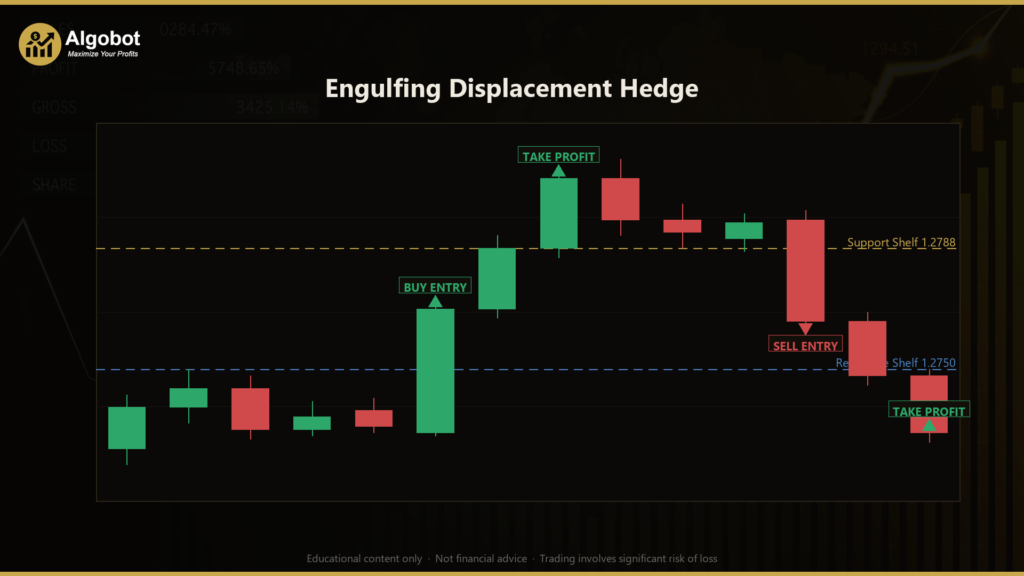
The Engulfing Displacement Hedge is a pure price-action, break-of-structure momentum strategy that combines three classic candlestick and market-structure concepts — the engulfing pattern, a break of structure (BOS), and a Fair Value Gap (FVG) — with a protective hedging layer designed to manage failed breakouts. Unlike many automated systems, it uses no technical indicators at all: there are no moving averages, no RSI, no ATR, and no VWAP calculations. Every decision is derived directly from the raw open-high-low-close (OHLC) data of each candle on your chosen timeframe.
The strategy is built for breakout-prone, trending conditions — moments when price decisively pushes through a recent support or resistance level with conviction rather than drifting sideways. An "engulfing pattern" is a two-candle formation where the most recent candle's body completely covers the prior candle's body in the opposite direction, often interpreted as a shift in short-term momentum. A "break of structure" simply means price has closed beyond a recent swing high or swing low, taking out a level that previously held. By requiring both to occur together, the strategy attempts to filter out weak, indecisive moves.
As a learning tool, the Engulfing Displacement Hedge is well suited to traders who want to study how raw price action, market structure, and risk-balancing concepts fit together in code. It is not a guaranteed system and should be treated as an educational case study in how breakout logic and hedging can be expressed programmatically — not as a shortcut to returns. Because it holds opposing positions at the same time, it requires a hedging-type trading account to function as intended.
How It Works
The strategy evaluates a new potential trade only on a freshly closed candle, and it requires three price-action conditions to align before it acts. Once in a trade, it manages a protective hedge on every incoming tick.
Entry conditions (all must align on the closed signal bar):
- Break of structure: The signal candle must close beyond a recent swing shelf — above the highest high of the last
StructureLookbackbars for a long, or below the lowest low for a short. This confirms the market has just taken out structure. - Engulfing pattern: The signal candle must fully engulf the prior candle's body in the breakout direction — a bullish engulfing candle for longs, a bearish engulfing candle for shorts. This is meant to represent a decisive momentum candle rather than a slow drift through the level.
- Displacement / Fair Value Gap: A three-bar imbalance must confirm an institutional-style thrust. For a long, the high of the bar three back sits below the low of the signal bar, leaving an unfilled gap on the way up (mirrored for shorts). This filter can be toggled on or off with the
RequireFvgsetting. - Momentum filter: The signal candle's body must exceed
MomentumBodyFactortimes the recent average candle range, so only decisive bars are considered.
Direction:
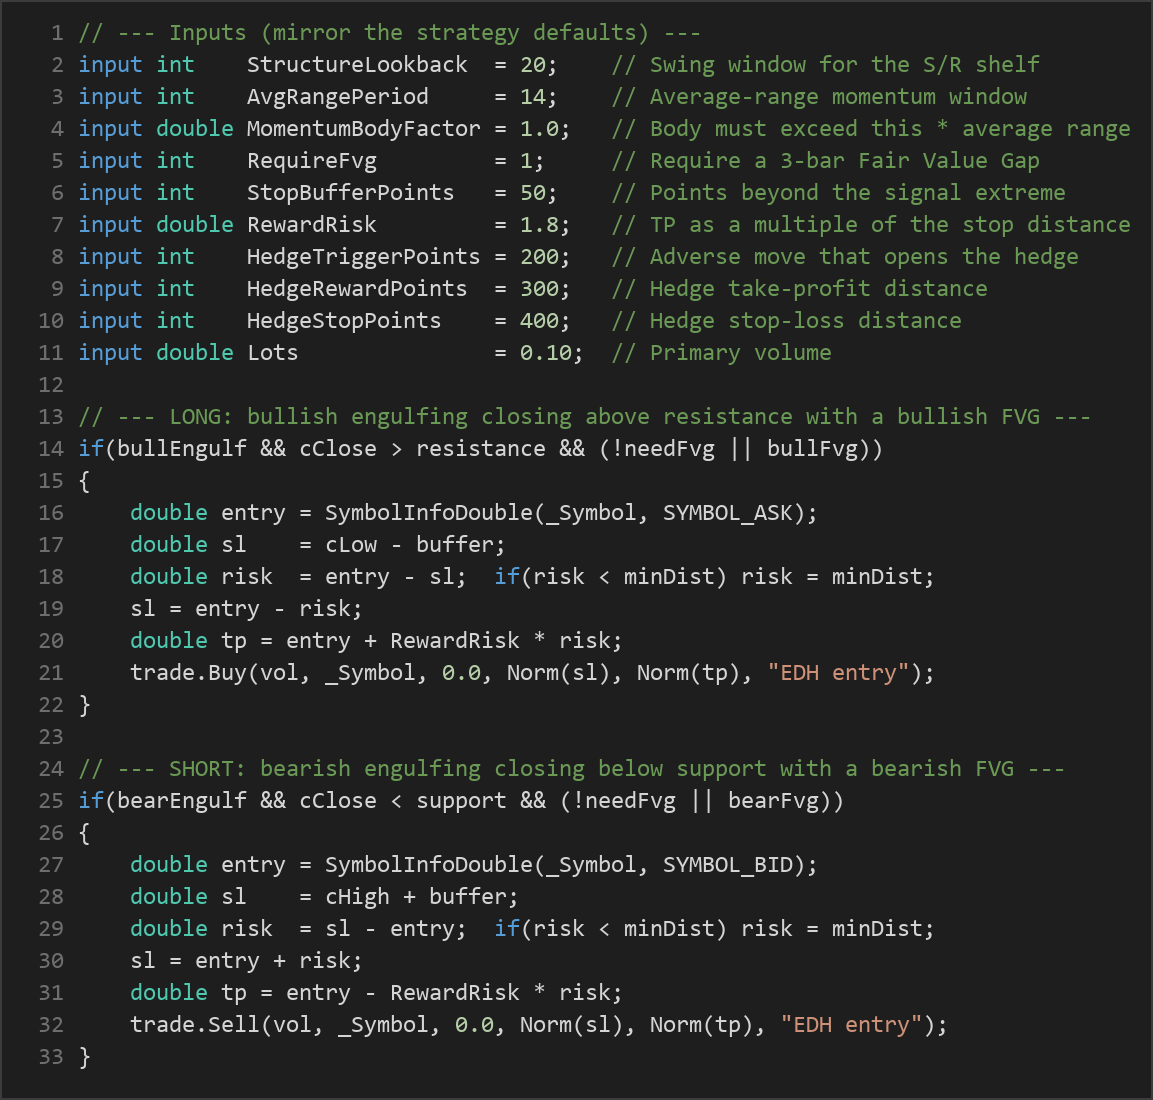
- A long signals when a bullish engulfing candle closes above the resistance shelf with a bullish FVG beneath it.
- A short is the exact mirror — a bearish engulfing candle closing below the support shelf with a bearish FVG above it.
Stop-loss and take-profit logic (structure-based and fixed, no ATR):
- The stop is placed just beyond the signal candle's far extreme (its low for a long, its high for a short), plus a cushion of
StopBufferPoints. This represents the level the breakout must hold to remain valid. - The take-profit is set at
RewardRiskmultiplied by the stop distance, giving a fixed reward-to-risk ratio.
The hedge (the distinctive layer):
- Breakouts sometimes fail. If price reverses back against an open primary position by
HedgeTriggerPoints, the strategy treats the breakout as failing and opens an opposite position — the hedge — sized atHedgeLots. - The hedge carries its own fixed take-profit (
HedgeRewardPoints) and stop-loss (HedgeStopPoints). Once it is active, the basket becomes closer to market-neutral: the primary's open loss is partly offset while the hedge aims to capture the reversal. - Only one hedge is opened per trade lifecycle. When the primary position finally closes on its own stop or target, any surviving hedge is flattened so the account always returns flat — one clean trade lifecycle at a time.
The strategy also skips new entries whenever the spread is wider than MaxSpreadPoints, helping to avoid entering during illiquid or volatile spread spikes.
Strategy Parameters
| Parameter | Default | Min | Max | Description |
|---|---|---|---|---|
| StructureLookback | 20 | 8 | 60 | Swing window (bars) used to define the support/resistance shelf that must be broken. |
| AvgRangePeriod | 14 | 5 | 40 | Window for the average bar range used by the momentum-body filter. |
| MomentumBodyFactor | 1.0 | 0.3 | 3.0 | The signal candle's body must exceed this multiple of the average range to qualify. |
| RequireFvg | 1 | 0 | 1 | Require a 3-bar Fair Value Gap to confirm displacement (1 = on, 0 = off). |
| StopBufferPoints | 50 | 0 | 500 | Extra points placed beyond the signal candle's extreme for the protective stop. |
| RewardRisk | 1.8 | 0.5 | 5.0 | Take-profit as a multiple of the stop distance (reward-to-risk ratio). |
| HedgeTriggerPoints | 200 | 20 | 2000 | Adverse move (points) against the primary that triggers the hedge. |
| HedgeRewardPoints | 300 | 20 | 3000 | Hedge take-profit distance in points. |
| HedgeStopPoints | 400 | 20 | 5000 | Hedge stop-loss distance in points. |
| MaxSpreadPoints | 80 | 5 | 400 | Skip new entries while the spread is wider than this. |
| HedgeLots | 0.10 | 0.01 | 1.0 | Hedge volume (a full-size hedge is closer to market-neutral; smaller is a partial hedge). |
| Lots | 0.10 | 0.01 | 1.0 | Primary position volume. |
| Magic | 8423 | 0 | 9,999,999 | Unique identifier for the EA's trades (hedge legs use Magic + 1). |
Recommended Chart Settings
The Engulfing Displacement Hedge was designed with liquid, breakout-prone instruments in mind — for example a major forex pair such as GBPUSD, or an index like US30 (the Dow). It is intended to run on lower-to-mid intraday timeframes, typically M5 to M15, where engulfing breakouts and displacement gaps occur frequently enough to produce signals.
Importantly, the strategy reads only the timeframe of the chart it is attached to — it never references a hardcoded higher timeframe — so the chart period you select directly defines its behaviour. Because every market behaves differently, results will vary considerably across instruments, sessions, and volatility regimes. Always study how the logic responds to your chosen symbol and timeframe in a testing environment before drawing any conclusions.
How to Install on MetaTrader 5
- Download the .ex5 file from the link below.
- Copy it to your MT5
MQL5\Expertsfolder. - Restart MetaTrader 5 or refresh the Navigator panel.
- Drag the EA onto a chart matching the recommended symbol and timeframe.
- Configure the input parameters and enable Algo Trading.
Because this strategy opens opposite positions simultaneously, make sure your broker account is a hedging account rather than a netting account, or the hedge logic will not operate as designed.
What to Consider Before Using This EA
Every strategy involves trade-offs, and an honest assessment helps you study it more effectively.
Strengths of this approach:
- It relies on transparent, well-understood price-action concepts — structure, engulfing candles, and gaps — making its logic easy to follow and audit.
- Using no indicators means there are no lagging calculations or repainting concerns; every decision comes straight from closed-candle OHLC data.
- The hedging layer is a structured attempt to cap the damage from a failed breakout, a common failure mode for momentum systems.
Known limitations:
- Breakout strategies are prone to false breakouts ("fakeouts"), where price pierces a level only to snap back. The hedge is designed to address this, but hedging adds complexity and its own costs, and it does not eliminate losses.
- In range-bound or choppy markets, the strategy may generate signals that quickly reverse, leading to frequent hedging cycles.
- Fixed point-based hedge distances may not adapt well across instruments with very different volatility or pricing scales, so parameters that suit one symbol may behave poorly on another.
- Holding two positions at once ties up additional margin and exposes you to two sets of spread and commission costs.
The Engulfing Displacement Hedge is best viewed as a framework for learning how breakout detection and risk-balancing interact — not as a finished, set-and-forget system.
Risk Management Tips
Sound risk management matters far more than any single entry signal. As you study this strategy, keep these general principles in mind:
- Risk only a small fraction per trade. Many educational sources suggest risking no more than 1–2% of your account on any single position so that a string of losses does not threaten your capital.
- Size positions deliberately. Set
LotsandHedgeLotsaccording to your account size and risk tolerance, not by default values. Remember that a full-size hedge doubles your exposure while open. - Test on a demo account first. Run the EA on a demo or in the Strategy Tester across different market conditions before considering any live use, so you understand how it behaves during both trends and ranges.
- Understand drawdown. Even a well-constructed strategy can experience extended losing streaks. Know the maximum drawdown you are prepared to tolerate, and stop to reassess if it is reached.
- Account for costs. Spreads, commissions, and swap fees all reduce net outcomes, and hedging multiplies some of these costs — factor them into any evaluation.
Risk Warning
Trading foreign exchange, CFDs, and other leveraged financial instruments involves substantial risk of loss and is not suitable for all investors. The strategies and tools discussed on this page are provided for educational purposes only and do not constitute financial advice, investment recommendations, or solicitation to trade. Always consult a qualified financial adviser before making trading decisions. Past backtest performance is not indicative of future results.
Downloads
- Expert Advisor: EngulfingDisplacementHedge.ex5 (57 downloads)
- Source Code: EngulfingDisplacementHedge.mq5 (53 downloads)
- Documentation: EngulfingDisplacementHedge.pdf (62 downloads)