Disclaimer: This article is for educational and informational purposes only. It does not constitute financial or investment advice. Trading forex and CFDs carries significant risk of loss. Past performance of any strategy — including backtests — does not guarantee future results. Never trade with money you cannot afford to lose.
What Is This Strategy?
The Displacement Order Block Retest is a pure price-action expert advisor (EA) built around the Inner Circle Trader (ICT) concept of the "order block," and it trades in an anticipatory, limit-order style rather than chasing momentum. There are no traditional indicators anywhere in its logic — no moving averages, no RSI, no oscillators. Every decision is made from raw candle geometry: the location of swing highs and lows, the size of an impulsive candle relative to recent volatility, and the body of the candle that preceded the move.
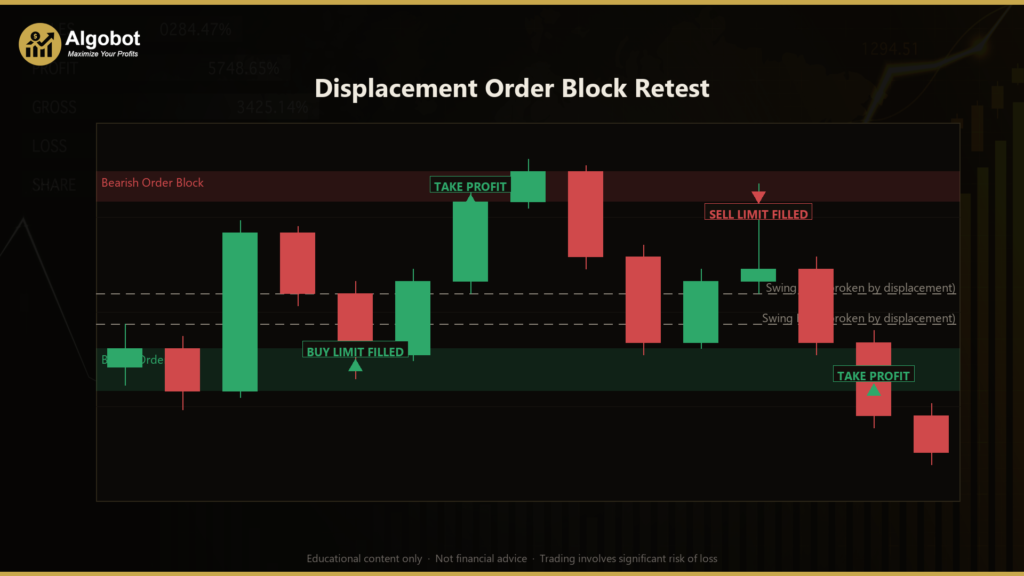
The core idea comes from how institutional order flow is often described in ICT material. The theory suggests that large players accumulate positions inside the last opposing candle before a strong, structure-breaking move — that candle is called the order block. When price later returns ("retraces") into that zone, it is said to be filling resting institutional orders before the trend continues. This EA tries to anticipate that retrace by parking a limit order inside the block, so a fill comes with tight, structure-defined risk instead of entering late after the move has already extended.
As a learning tool, this strategy is best suited to traders who want to study market structure, displacement (impulsive expansion), and order-block mechanics in a rules-based, repeatable way. Because it waits for a clean break of structure followed by a controlled pullback, it is designed for trending or impulsive market conditions rather than tight, directionless ranges. It is an analytical framework for understanding how price-action concepts can be coded into objective conditions — not a shortcut to results.
How It Works
The strategy evaluates the chart once per newly closed bar and never acts on the still-forming candle. Each step below describes what the strategy signals, not what you will earn.
- Volatility baseline: The EA first measures an average candle range over the most recent
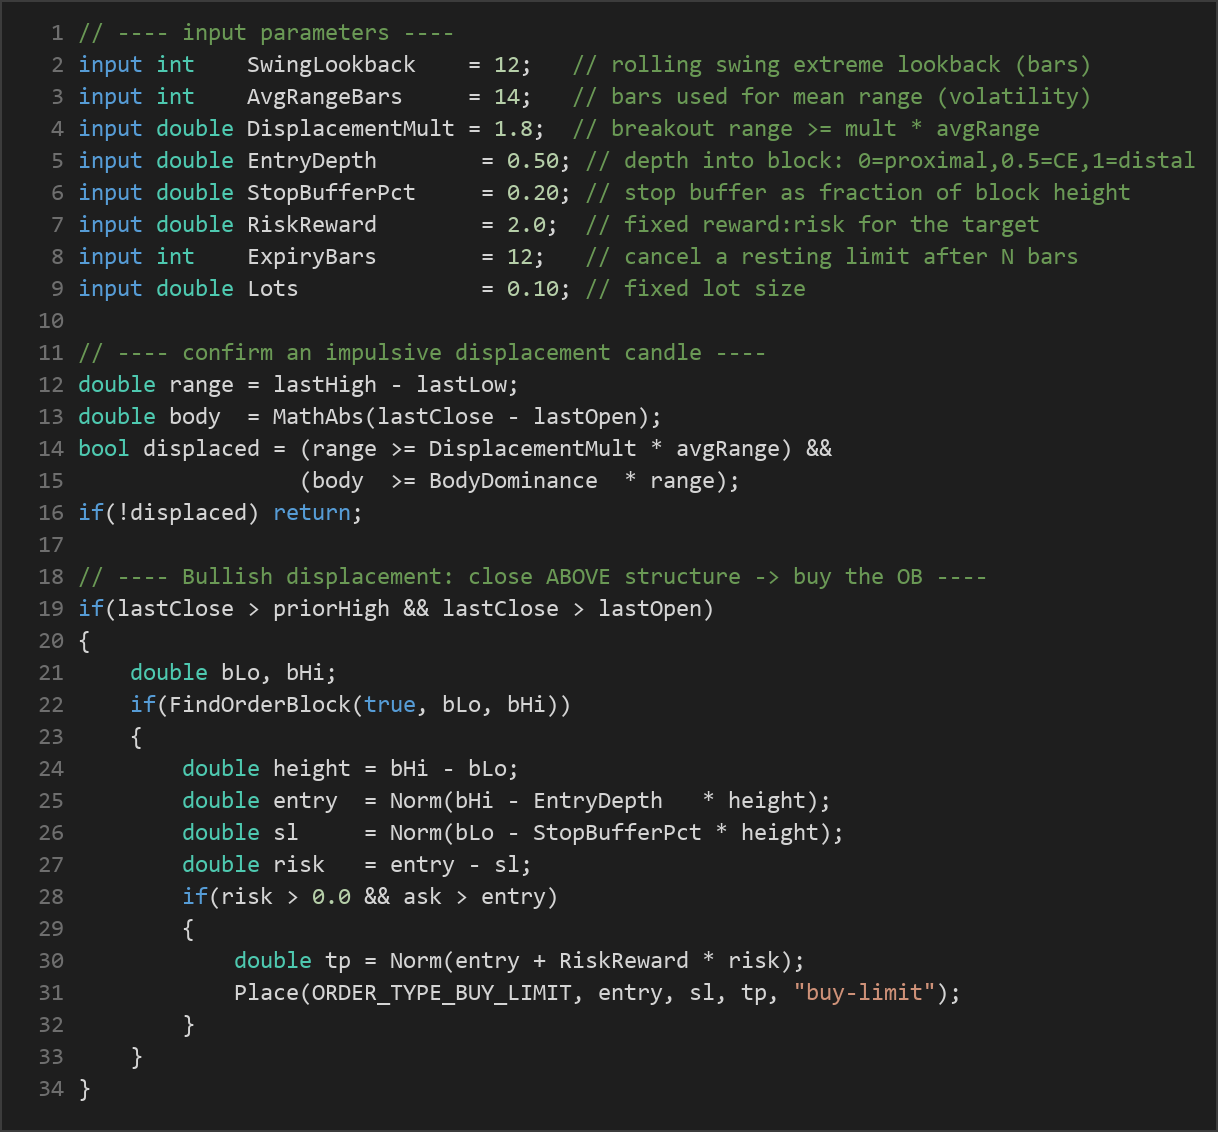
AvgRangeBarsbars (excluding the just-closed bar). This plain mean range — not an indicator — sets the yardstick for what counts as "impulsive." - Structure reference: It then finds the highest high and lowest low over the last
SwingLookbackbars (again excluding the just-closed bar). These are the rolling swing extremes that define current market structure. - Displacement filter: The just-closed candle is treated as a possible displacement candle. It qualifies only if its total range is at least
DisplacementMulttimes the average range and its body makes up at least 50% of its range. This two-part check screens out weak, wicky breaks and keeps only genuinely impulsive candles. - Break of structure (long): If that displacement candle closes above the prior swing high and closes up, the strategy looks for the most recent down-close candle within the search window. The body of that candle (open-to-close) becomes the bullish order block.
- Break of structure (short): The mirror image applies. If the displacement candle closes below the prior swing low and closes down, the strategy marks the body of the most recent up-close candle as the bearish order block.
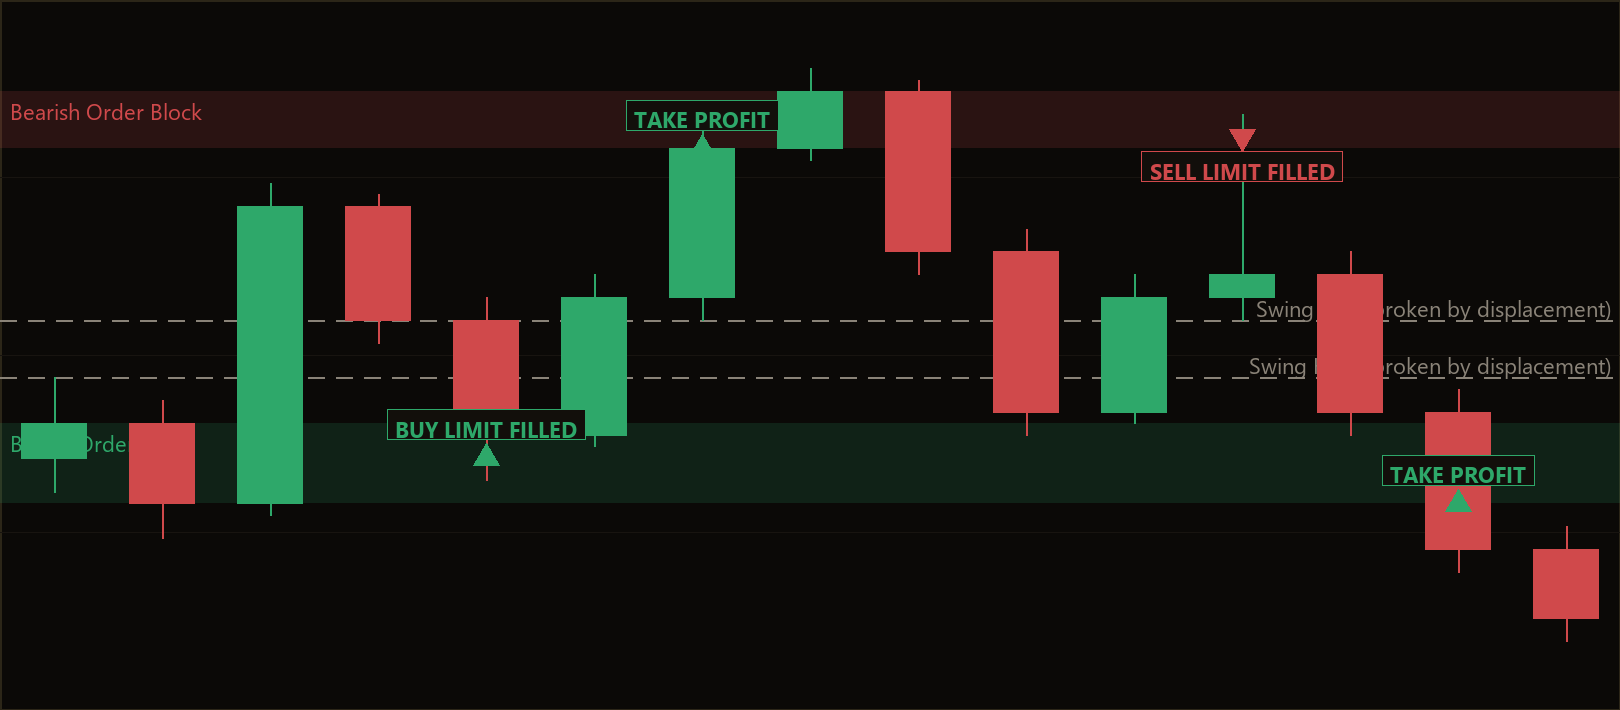
- Entry placement: A buy-limit (for longs) or sell-limit (for shorts) is rested inside the block at a tunable depth set by
EntryDepth—0sits at the proximal (near) edge,0.5at the 50% midpoint (consequent encroachment), and1.0at the distal (far) edge. The order is only placed if the current market price has not already entered the block. - Stop-loss logic: The stop is placed just beyond the far edge of the block, offset by
StopBufferPctof the block's height. This keeps risk anchored to the structure that defined the setup. - Take-profit logic: The target is set at a fixed reward-to-risk multiple defined by
RiskReward. With the default of2.0, the target distance is twice the stop distance. - Order expiry: If a resting limit is not filled within
ExpiryBarsnewly closed bars, it is cancelled. The strategy never stacks a second order while one is pending, and it clears stray pending orders once a position is open.
Strategy Parameters
| Parameter | Default | Min | Max | Description |
|---|---|---|---|---|
| SwingLookback | 12 | 5 | 40 | Number of bars used to define the rolling swing high/low that structure must break. |
| AvgRangeBars | 14 | 5 | 40 | Number of bars used to compute the mean candle range (the volatility baseline). |
| DisplacementMult | 1.8 | 1.0 | 4.0 | Breakout candle range must be at least this multiple of the average range to count as displacement. |
| EntryDepth | 0.50 | 0.0 | 1.0 | Depth of the limit inside the block: 0 = proximal edge, 0.5 = midpoint, 1 = distal edge. |
| StopBufferPct | 0.20 | 0.0 | 1.0 | Extra stop buffer beyond the block's far edge, as a fraction of block height. |
| RiskReward | 2.0 | 1.0 | 6.0 | Fixed reward-to-risk ratio used to set the take-profit distance. |
| ExpiryBars | 12 | 3 | 50 | Number of bars after which an unfilled resting limit order is cancelled. |
| Lots | 0.10 | 0.01 | 1.0 | Fixed trade volume in lots. |
Recommended Chart Settings
This strategy is symbol- and timeframe-agnostic in code, but its logic — break of structure followed by an order-block retrace — tends to be studied on intraday timeframes such as M15, M30, or H1, where displacement candles and structural shifts are frequent enough to generate setups. Liquid instruments like major forex pairs (for example EUR/USD or GBP/USD) or major indices are common testing grounds because their candle ranges are relatively consistent, which helps the volatility baseline behave predictably.
Because the EA uses a fixed lot size and a fixed reward-to-risk target, its behavior will vary considerably across symbols, sessions, and volatility regimes. There is no single "best" setting. Treat the defaults as a starting point for study, and remember that results will differ across different market conditions and brokers.
How to Install on MetaTrader 5
- Download the .ex5 file from the link below
- Copy it to your MT5
MQL5\Expertsfolder - Restart MetaTrader 5 or refresh the Navigator panel
- Drag the EA onto a chart matching the recommended symbol and timeframe
- Configure the input parameters and enable Algo Trading
What to Consider Before Using This EA
Strengths. The strategy is fully rules-based, which makes it an excellent tool for learning how ICT concepts — displacement, break of structure, and order blocks — can be turned into objective, repeatable conditions. Its limit-entry approach means trades are entered at structure-defined prices with stops anchored to the block, giving a clear, asymmetric reward-to-risk framework. Refining the order block to the candle body (rather than the full wick range) produces a tighter zone and a more precise entry footprint.
Known limitations. Order-block theory is interpretive, and reducing it to fixed rules necessarily simplifies a discretionary concept. Not every structural break is followed by a clean retrace; price may continue without returning to the block, in which case the limit simply expires unfilled. The displacement filter helps screen weak breaks, but no filter is perfect, and false breaks still occur.
When it may underperform. In choppy, range-bound markets, swing extremes are repeatedly broken by small candles that do not represent genuine displacement, which can lead to setups that fail to follow through. During high-impact news, fast gaps may skip past a resting limit or fill it just before an adverse spike. Because the EA uses a fixed lot size, it does not adapt position size to changing volatility or account equity. None of these traits make the strategy "good" or "bad" — they are characteristics to study and account for.
Risk Management Tips
Sound risk management matters far more than any single entry technique. Consider these general principles as part of your education:
- Risk a small, fixed fraction per trade. Many educational sources suggest risking no more than 1–2% of account equity on any single position. The fixed
Lotsinput does not do this automatically, so size your trades to your own account and stop distance. - Test on a demo account first. Run the EA on a demo account across different symbols, sessions, and volatility conditions before considering anything else. This lets you observe behavior without financial exposure.
- Understand drawdown. Every strategy experiences losing streaks. Study the depth and duration of drawdown so you understand the emotional and financial tolerance required to follow a system through difficult periods.
- Mind costs and conditions. Spreads, commissions, slippage, and broker execution all affect outcomes, especially for limit-based entries near fast-moving structure.
- Keep expectations grounded. A fixed reward-to-risk target does not guarantee a fixed outcome — win rate and average result depend entirely on how often setups follow through, which varies with the market.
Risk Warning
Trading foreign exchange, CFDs, and other leveraged financial instruments involves substantial risk of loss and is not suitable for all investors. The strategies and tools discussed on this page are provided for educational purposes only and do not constitute financial advice, investment recommendations, or solicitation to trade. Always consult a qualified financial adviser before making trading decisions. Past backtest performance is not indicative of future results.
Downloads
- Expert Advisor: DisplacementOrderBlockRetest.ex5 (2 downloads)
- Source Code: DisplacementOrderBlockRetest.mq5 (5 downloads)
- Documentation: DisplacementOrderBlockRetest.pdf (2 downloads)