Disclaimer: This article is for educational and informational purposes only. It does not constitute financial or investment advice. Trading forex and CFDs carries significant risk of loss. Past performance of any strategy — including backtests — does not guarantee future results. Never trade with money you cannot afford to lose.
What Is This Strategy?
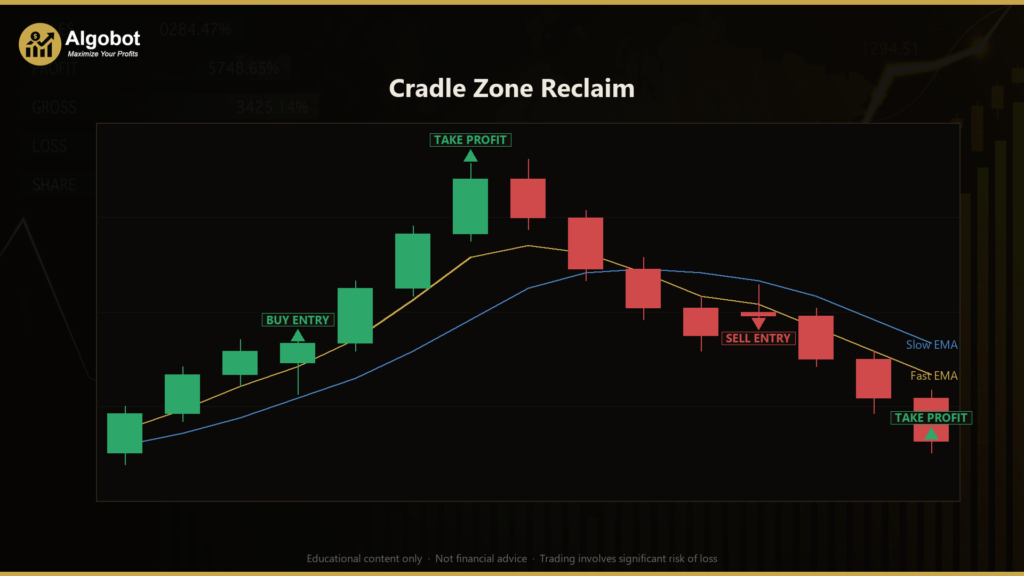
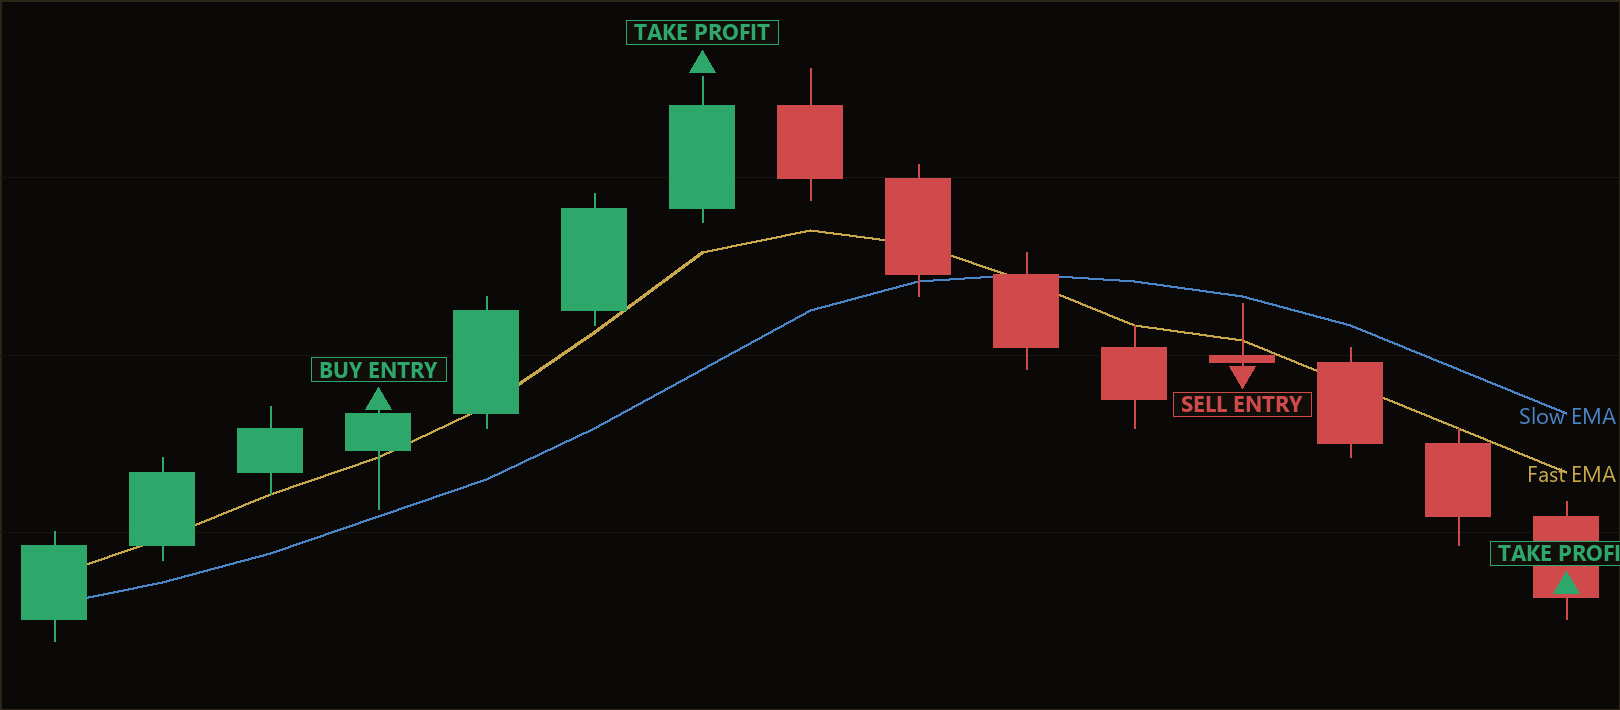
Cradle Zone Reclaim is a trend-following continuation strategy built around the classic "EMA cradle" — the price zone between a fast exponential moving average (EMA) and a slow EMA. An EMA is a moving average that weights recent prices more heavily than older ones, so it reacts faster to new price action than a simple average. When these two EMAs fan apart and price rides above or below them, the market is trending. The narrow band between the two lines forms the "cradle," and this strategy is designed to trade the shallow pullbacks that dip back into that band during an established trend.
Rather than chasing breakouts, Cradle Zone Reclaim waits for price to retrace into the cradle, checks that the trend structure is still intact, and then looks for a same-direction candle that reclaims the fast EMA. This is the textbook "buy the dip / sell the rip" approach that trend traders use to enter with tight, clearly defined risk. The strategy is fully symmetric, meaning it trades both long and short opportunities using mirror-image logic.
As a learning tool, this strategy is well suited to traders who want to study how multi-condition trend filters and structural stop placement work together. It is not a signal-chasing system — it is a study in selectivity, only acting when a defined regime, a defined pullback pattern, and a defined candle confirmation all align. That makes it a useful example for understanding how disciplined continuation setups are constructed and why they aim to keep drawdown contained.
How It Works
The strategy evaluates conditions once per completed bar and never acts on a bar that is still forming. It first establishes a trend "regime," then waits for a specific pullback pattern before signaling an entry.
Regime gate (the strategy never trades counter-trend):
- Uptrend regime is confirmed when the fast EMA is above the slow EMA, the slow EMA is rising by at least
SlopeAtrMin × ATRper bar, and the fast EMA is also rising. - Downtrend regime is the exact mirror: fast EMA below slow EMA, slow EMA falling at the same minimum slope, and the fast EMA also falling.
- ATR (Average True Range) measures recent volatility, so scaling the slope requirement by ATR keeps the trend filter consistent whether the market is quiet or volatile.
Long entry — the strategy signals a buy when all of these hold:
- The market is in an uptrend regime.
- The just-closed bar's low dipped into the cradle — its low reached down to or below the fast EMA (the pullback tagged the zone).
- The slow EMA "floor" was not breached — the bar's low stayed at or above the slow EMA, so the trend structure held.
- The bar closed bullishly (close above open) and back above the fast EMA, reclaiming the cradle top.
- Entry is placed at the Ask price.
Short entry — the mirror image:
- The market is in a downtrend regime.
- The just-closed bar's high pushed up into the cradle (reached the fast EMA).
- The slow EMA "ceiling" was not breached — the high stayed at or below the slow EMA.
- The bar closed bearishly and back below the fast EMA.
- Entry is placed at the Bid price.
Stop-loss logic (structural):
- For longs, the stop is placed just below the cradle floor (the slow EMA), buffered by
StopBufferAtr × ATR. Shorts mirror this above the ceiling. - Because the entry hugs the fast EMA, the distance to this structural stop is naturally small.
- The strategy ignores "degenerate" setups where the calculated risk is less than 10% of ATR, avoiding stops that are too tight to be meaningful.
Take-profit logic:
- The target is set as a reward-to-risk multiple (
RewardRatio) of the structural stop distance. This lets the larger trend winners help offset the many small break-even scratches that a selective continuation system tends to produce.
Trade management (the low-drawdown engine):
- Break-even lock: once price advances
BreakevenAtr × ATRin favor of the position, the stop is pulled up to the entry price. A renewed pullback can then no longer turn a good trade into a loss — this is the primary drawdown suppressor. - Regime exit: if the fast EMA crosses back through the slow EMA, the trend premise is gone and the position is closed immediately.
- One position per Magic number: the strategy never pyramids or averages down; it holds at most one open trade at a time.
Strategy Parameters
| Parameter | Default | Min | Max | Description |
|---|---|---|---|---|
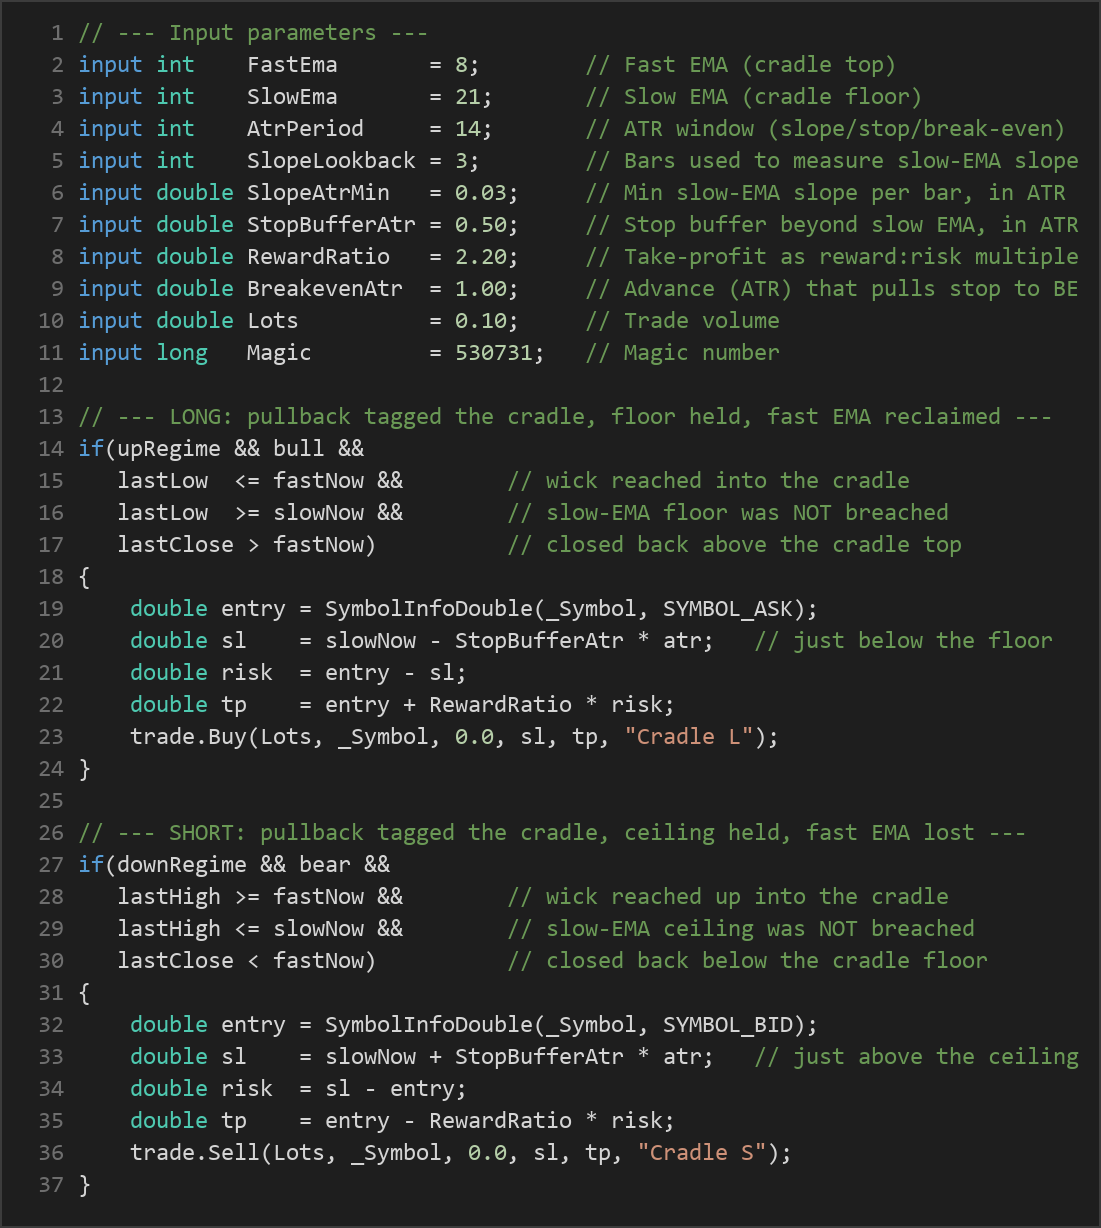
| FastEma | 8 | 3 | 25 | Period of the fast EMA that forms the cradle top. |
| SlowEma | 21 | 10 | 80 | Period of the slow EMA that forms the cradle floor/ceiling. |
| AtrPeriod | 14 | 5 | 40 | ATR window used for slope normalization, the stop buffer, and the break-even trigger. |
| SlopeLookback | 3 | 1 | 20 | Number of bars used to measure the slow-EMA slope. |
| SlopeAtrMin | 0.03 | 0.0 | 0.40 | Minimum slow-EMA rise/fall per bar, in ATR units, required to confirm a trend. |
| StopBufferAtr | 0.50 | 0.10 | 2.00 | Stop-loss buffer placed beyond the cradle floor/ceiling (slow EMA), in ATR units. |
| RewardRatio | 2.20 | 1.00 | 6.00 | Take-profit target expressed as a reward:risk multiple of the structural stop distance. |
| BreakevenAtr | 1.00 | 0.20 | 3.00 | Advance in favor (in ATR) after which the stop is pulled to break-even. |
| Lots | 0.10 | 0.01 | 1.00 | Trade volume (position size in lots). |
| Magic | 530731 | 0 | 9,999,999 | Unique identifier so the EA manages only its own positions. |
Recommended Chart Settings
Cradle Zone Reclaim was designed with a trending forex major or metal in mind — for example EURUSD or XAUUSD (gold) — on intermediate timeframes such as M30 through H4. These instruments and timeframes tend to produce the sustained, orderly trends that a cradle-pullback system relies on.
Importantly, the strategy uses a single timeframe throughout and never hardcodes one: every calculation runs on whatever chart period you attach it to. That makes it easy to test across timeframes, but you should expect results to vary considerably between different symbols, timeframes, and market conditions. A setting that behaves well in a strongly trending market may struggle in a choppy, range-bound one. Always evaluate the strategy on your own data before drawing conclusions.
How to Install on MetaTrader 5
- Download the .ex5 file from the link below.
- Copy it to your MT5
MQL5\Expertsfolder. - Restart MetaTrader 5 or refresh the Navigator panel.
- Drag the EA onto a chart matching the recommended symbol and timeframe.
- Configure the input parameters and enable Algo Trading.
What to Consider Before Using This EA
Strengths of this approach. The strategy is deliberately selective. By requiring a confirmed trend regime and a cradle-tag pullback and a candle that reclaims the fast EMA, it filters out many low-quality entries. The structural stop tucked just beyond the slow EMA keeps per-trade risk small and clearly defined, and the break-even lock is designed to limit how much a winning position can give back. The regime exit provides a logical way out when the trend structure breaks, rather than waiting passively for a stop.
Known limitations. Every moving-average system shares one weakness: EMAs lag price. In fast reversals, the cradle can be reclaimed only for the trend to fail immediately afterward. The strategy also assumes trends persist — in extended sideways markets, the fast and slow EMAs weave together, few clean cradle setups appear, and the regime gate may whipsaw. Because it takes only one position at a time and skips counter-trend moves, it can sit idle for long stretches, which requires patience and can be psychologically difficult.
Where it may underperform. Range-bound, low-volatility conditions and news-driven spikes are the natural enemies of a pullback-continuation system. Wide spreads or slippage can also erode the edge of a strategy that relies on tight, structurally placed stops. Treat this EA as a framework for studying trend-continuation logic, not as a finished, hands-off solution.
Risk Management Tips
Sound risk management matters more than any single entry rule. Consider these general principles as you study this strategy:
- Position sizing: size each trade so that a full stop-out costs only a small, predefined fraction of your account. Many educators suggest risking no more than 1–2% of account equity per trade.
- Use a demo account first: test the strategy thoroughly in a risk-free simulated environment before considering any live capital, so you understand its behavior across different markets.
- Understand drawdown: even a well-constructed selective system will string together losing trades. Know the maximum losing streak and equity dip you are prepared to tolerate before you start.
- Diversify and avoid over-leverage: concentrating risk in a single symbol or using excessive leverage can amplify losses quickly. Keep leverage conservative.
- Keep expectations realistic: no strategy wins every trade, and historical behavior may not repeat. Judge results over many trades, not a handful.
Risk Warning
Trading foreign exchange, CFDs, and other leveraged financial instruments involves substantial risk of loss and is not suitable for all investors. The strategies and tools discussed on this page are provided for educational purposes only and do not constitute financial advice, investment recommendations, or solicitation to trade. Always consult a qualified financial adviser before making trading decisions. Past backtest performance is not indicative of future results.
Downloads
- Expert Advisor: CradleZoneReclaim.ex5 (49 downloads)
- Source Code: CradleZoneReclaim.mq5 (46 downloads)
- Documentation: CradleZoneReclaim.pdf (49 downloads)