Disclaimer: This article is for educational and informational purposes only. It does not constitute financial or investment advice. Trading forex and CFDs carries significant risk of loss. Past performance of any strategy — including backtests — does not guarantee future results. Never trade with money you cannot afford to lose.
What Is This Strategy?
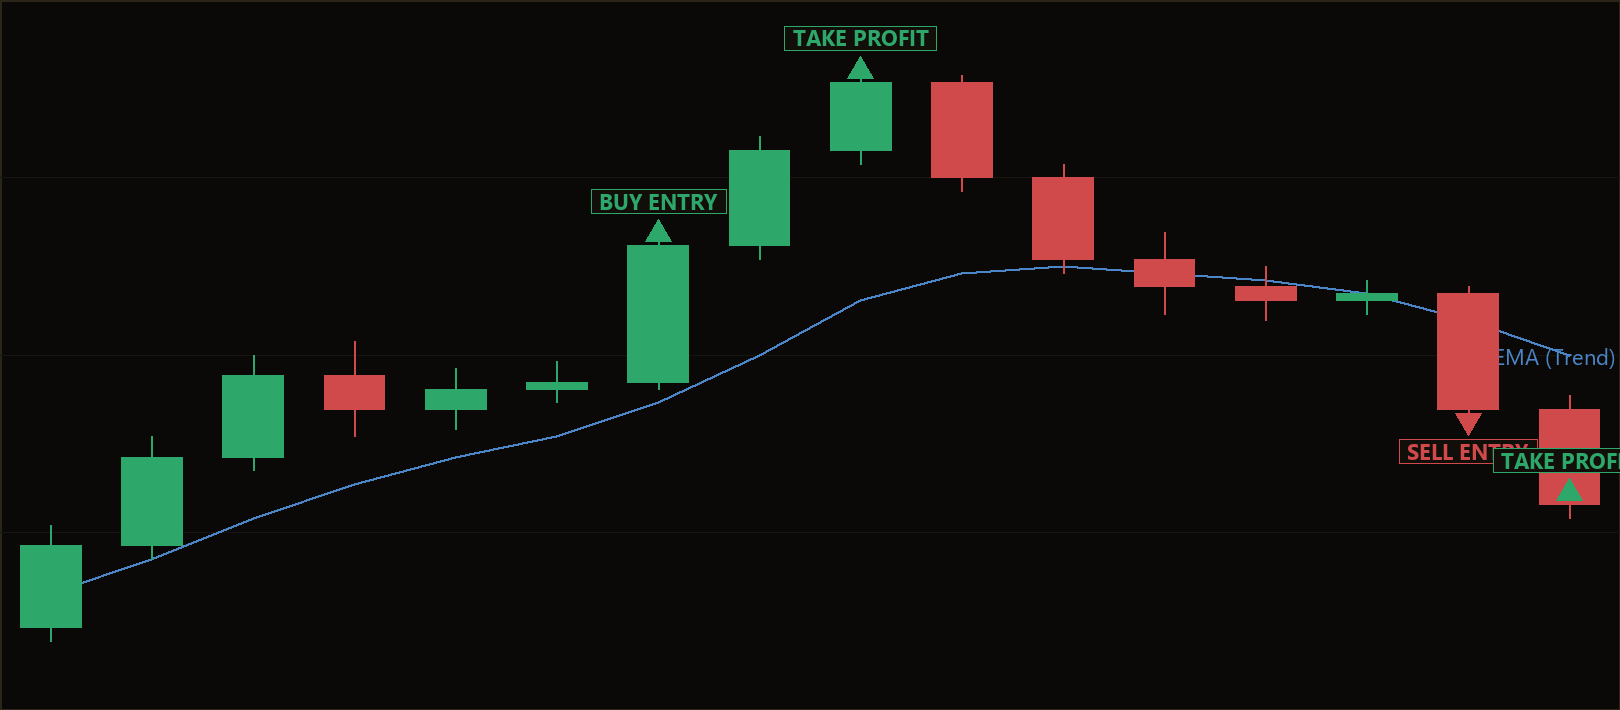
The Coil Tension Breakout strategy is a volatility-contraction breakout system that combines a coil pattern (a short sequence of successively narrowing price bars) with an Exponential Moving Average (EMA) trend filter and the Average True Range (ATR) volatility measure. Rather than reacting to a single quiet candle, it hunts for a very specific shape: a run of bars whose individual ranges shrink bar by bar, packed inside a tight ATR envelope — a miniature pennant, or "coil," winding up. The idea behind the pattern is that when volatility is systematically wrung out of a market, "tension" tends to build and later release with a directional thrust.
This is a trend-following breakout strategy, not a mean-reversion tool. The market condition it is designed for is a directional trend that pauses to consolidate before continuing. By requiring the coil to form and then break out with the prevailing slow-EMA trend, the strategy attempts to filter out the random, two-sided breakouts that so often trap traders. It only takes a signal when the compression resolves in the same direction the market was already leaning.
As a learning tool, the Coil Tension Breakout is well suited to traders who want to study volatility compression, breakout confirmation, and structural risk placement. It illustrates several important concepts at once: how to define a pattern in code, how to gate entries with a trend filter, and how to place a stop based on market structure rather than an arbitrary distance. It is best viewed as a case study in disciplined breakout design — something to test, dissect, and understand — not as a shortcut to results.
How It Works
The strategy processes one freshly-closed bar at a time (so it does not repaint) and manages a single position at a time, symmetrically for both long and short trades. Here is what happens step by step:
- The strategy builds a "coil" from the
CoilBarsbars ending just before the most recently closed bar (the "release bar"). To qualify as a coil, each bar's high-to-low range must be no wider than the previous bar's range multiplied by theContractionFactor. This enforces monotonic contraction — every bar is genuinely tighter than the one before it, like a spring winding up. - The coil must be tight overall. The full span of the cluster (highest high minus lowest low) must be no larger than
CoilAtrMaxmultiplied by the current ATR. This rejects loose consolidations that are still wide enough to hide a swing. The high and low of this cluster become the release boundaries. - The trend gate checks the slow EMA's slope. The strategy compares the EMA(
TrendPeriod) now against its valueSlopeLookbackbars ago. If the EMA is sloping up, only long breakouts are allowed; if it is sloping down, only short breakouts are allowed. - The strategy signals a long entry when the release bar closes above the coil high plus a margin of
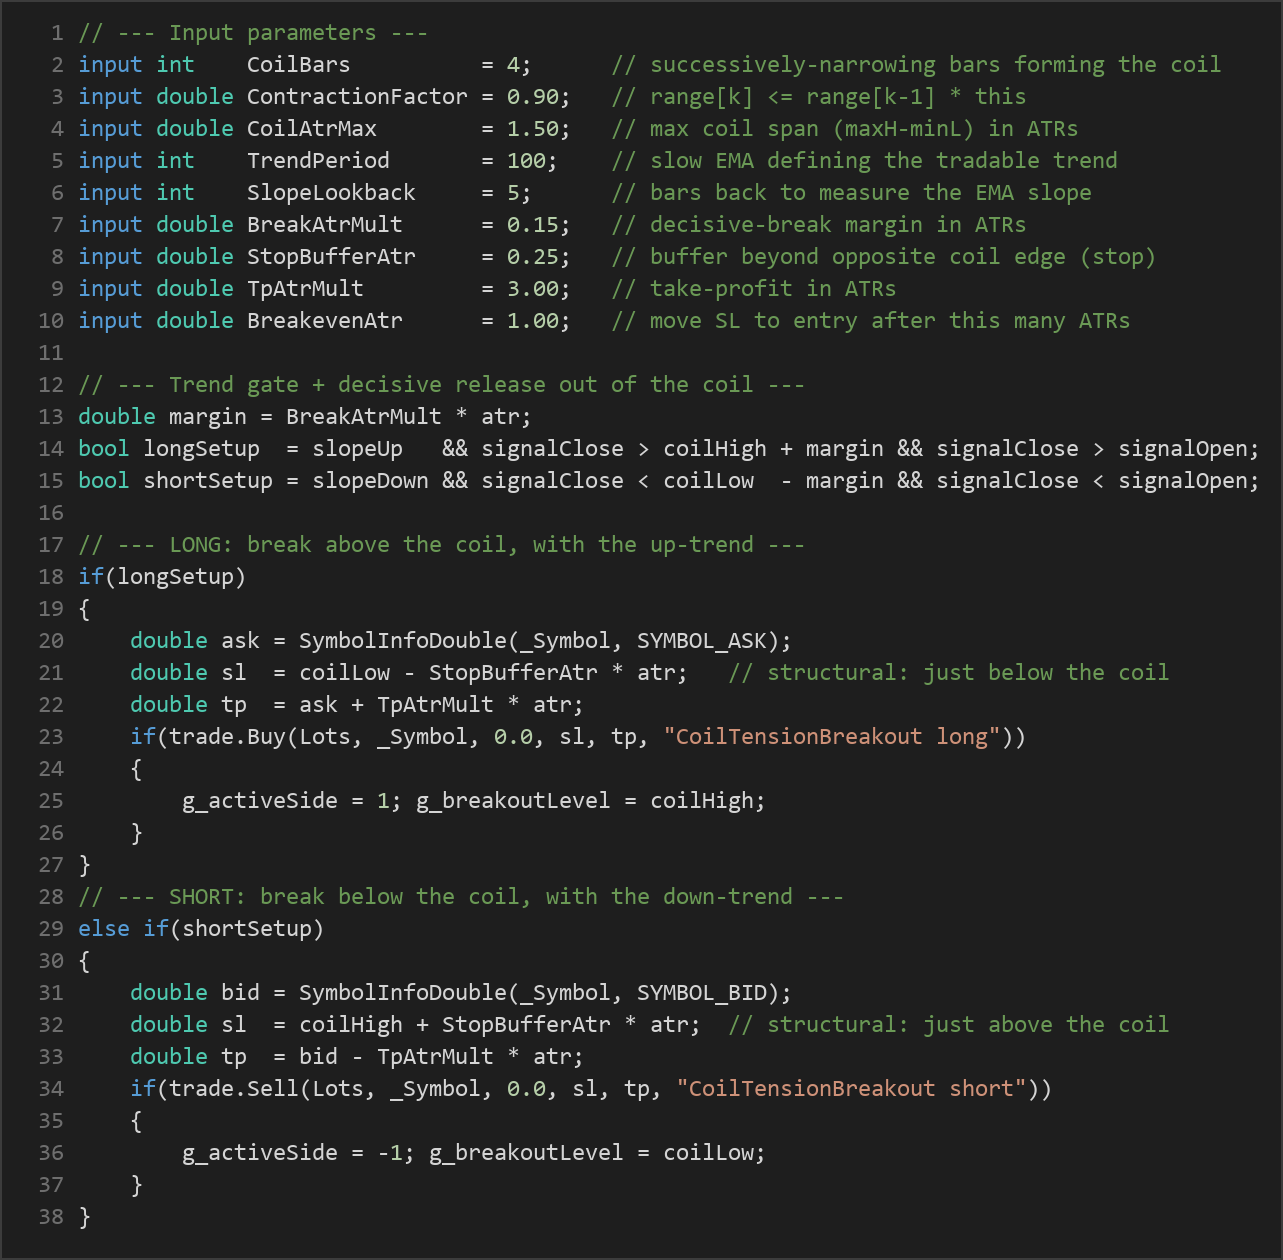
BreakAtrMult× ATR, the bar has a bullish body (close above open), and the EMA is sloping up. This is a decisive break with the trend. - The strategy signals a short entry under the mirror-image conditions: the release bar closes below the coil low minus the ATR margin, the bar has a bearish body, and the EMA is sloping down.
- Stop-loss is structural. For a long, the stop is placed just below the opposite coil edge (coil low minus
StopBufferAtr× ATR); for a short, just above the coil high. Because the coil is tight by construction, this stop sits close to entry, which keeps the risk on each trade small and bounded. - Take-profit is ATR-based. The target is set at
TpAtrMult× ATR away from entry — a measured "release" move. A tight stop paired with a roomier target aims for an asymmetric reward-to-risk profile. - A failed-breakout fast exit cuts the trade immediately if a later bar closes back through the release boundary (price falling back into the coil). This is designed to exit failed breaks well before the structural stop is reached.
- A breakeven ratchet moves the stop to the entry price once the trade has run
BreakevenAtr× ATR in your favour, so that a winning position is protected from turning back into a loss.
Strategy Parameters
| Parameter | Default | Min | Max | Description |
|---|---|---|---|---|
| CoilBars | 4 | 3 | 8 | Number of successively-narrowing bars that form the coil. |
| ContractionFactor | 0.90 | 0.60 | 1.00 | Each coil bar's range must be ≤ the previous bar's range × this value (contraction strictness). |
| CoilAtrMax | 1.50 | 0.50 | 3.00 | Maximum coil span (highest high − lowest low) expressed in ATRs — how tight the coil must be. |
| TrendPeriod | 100 | 20 | 250 | Period of the slow EMA that defines the tradable trend regime. |
| SlopeLookback | 5 | 2 | 20 | Number of bars back used to measure the slow EMA's slope. |
| BreakAtrMult | 0.15 | 0.00 | 1.00 | Decisive-break margin: the release close must clear the coil boundary by this × ATR. |
| AtrPeriod | 14 | 7 | 28 | Averaging period for the ATR volatility measure. |
| StopBufferAtr | 0.25 | 0.00 | 1.50 | Extra ATR buffer placed beyond the opposite coil edge for the structural stop. |
| TpAtrMult | 3.00 | 0.50 | 8.00 | Take-profit distance from entry, expressed in ATRs. |
| BreakevenAtr | 1.00 | 0.00 | 3.00 | Move the stop to entry after price runs this many ATRs in favour. |
| Lots | 0.10 | 0.01 | 1.00 | Position volume (lot size) per trade. |
| Magic | 5127 | 0 | 9,999,999 | Magic number used to identify and manage this EA's orders. |
Recommended Chart Settings
The Coil Tension Breakout was designed for a single primary timeframe and is well suited to a liquid FX major such as EUR/USD or GBP/USD, or a major stock index, on timeframes from M15 to H4. The pattern logic is timeframe-agnostic, so it can be explored on other instruments and periods, but liquid markets with clean, orderly ranges tend to produce cleaner coils. Keep in mind that results will vary substantially across different symbols, sessions, and market conditions — a setting that behaves well in a trending market may behave very differently in a choppy or news-driven one. Always test any configuration on your own data before drawing conclusions.
How to Install on MetaTrader 5
- Download the
.ex5file from the link below - Copy it to your MT5
MQL5\Expertsfolder - Restart MetaTrader 5 or refresh the Navigator panel
- Drag the EA onto a chart matching the recommended symbol and timeframe
- Configure the input parameters and enable Algo Trading
What to Consider Before Using This EA
Every strategy involves trade-offs, and being clear-eyed about them is part of learning. On the strengths side, the Coil Tension Breakout is highly selective: the requirement for a strictly narrowing sequence of bars and a tight ATR envelope and a with-trend breakout means it stays out of the market most of the time and only acts on a well-defined setup. Its structural stop is placed by market geometry rather than a fixed number of pips, and the failed-breakout exit and breakeven ratchet are designed to keep individual losses small and bounded.
On the limitations side, breakout strategies are vulnerable to false breaks — price clearing a boundary only to reverse. The trend filter and confirmation margin reduce these, but no filter eliminates them. Because the strategy is so selective, it may produce relatively few trades, which means it can take a long time to gather a meaningful sample and can sit idle during periods that do not form qualifying coils. It may underperform in ranging, directionless markets where coils repeatedly form but breakouts fail to follow through, and in violently gapping or news-driven conditions where the structural stop may be exceeded by slippage. Historically, trend-continuation breakout systems tend to do better in persistently trending environments and worse in whipsaw conditions — so the market regime matters a great deal.
Risk Management Tips
Sound risk management is what separates disciplined testing from gambling. Consider these general principles:
- Risk only a small, fixed fraction of your account per trade — many educators suggest no more than 1–2%. Size your
Lotsso that the distance to the structural stop represents that fraction, rather than trading a fixed lot size blindly. - Always start on a demo account. Run the EA in simulation until you understand how it behaves across different market conditions before considering any live capital.
- Understand drawdown. Even a strategy with a favourable reward-to-risk profile will experience losing streaks. Know the maximum drawdown you are willing to tolerate before you begin.
- Do not over-optimize. Tuning parameters until a backtest looks perfect (curve-fitting) usually produces results that fail to hold up on unseen data. Prefer robust settings that work reasonably across a range of conditions.
- Diversify and stay informed. Avoid concentrating all risk in a single instrument or strategy, and be aware of scheduled economic events that can cause sudden volatility.
Risk Warning
Trading foreign exchange, CFDs, and other leveraged financial instruments involves substantial risk of loss and is not suitable for all investors. The strategies and tools discussed on this page are provided for educational purposes only and do not constitute financial advice, investment recommendations, or solicitation to trade. Always consult a qualified financial adviser before making trading decisions. Past backtest performance is not indicative of future results.
Downloads
- Expert Advisor: CoilTensionBreakout.ex5 (42 downloads)
- Source Code: CoilTensionBreakout.mq5 (50 downloads)
- Documentation: CoilTensionBreakout.pdf (79 downloads)