Disclaimer: This article is for educational and informational purposes only. It does not constitute financial or investment advice. Trading forex and CFDs carries significant risk of loss. Past performance of any strategy — including backtests — does not guarantee future results. Never trade with money you cannot afford to lose.
What Is This Strategy?
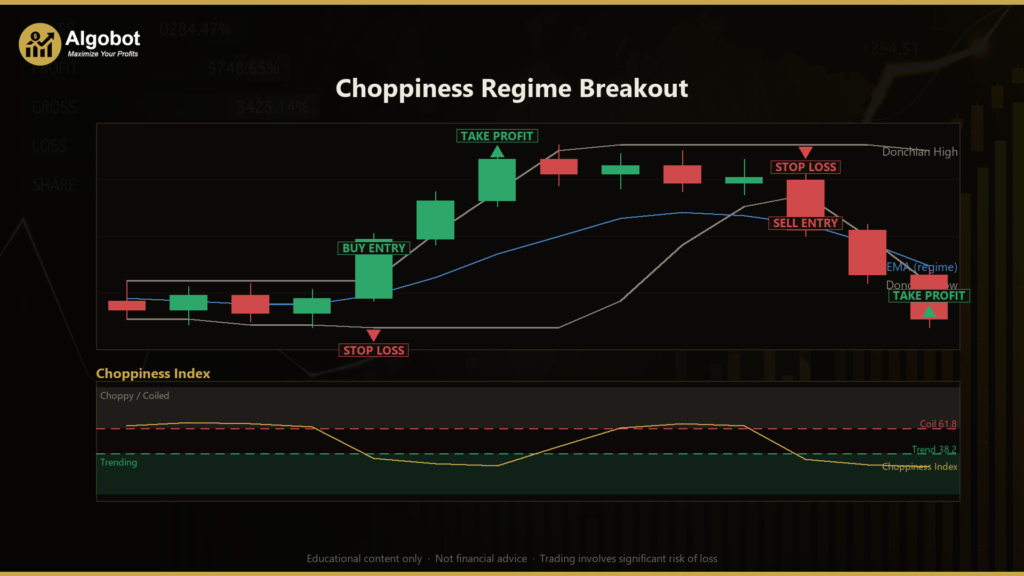
The Choppiness Regime Breakout is a rule-based MetaTrader 5 expert advisor built around the Choppiness Index (CI) — a bounded, non-directional oscillator that measures how a market is moving rather than which way it is moving. The trading style is a volatility-regime breakout: instead of buying every level break, the strategy waits for the market to shift from a choppy, range-bound state into a clean directional trend, and only then acts on a structural break.
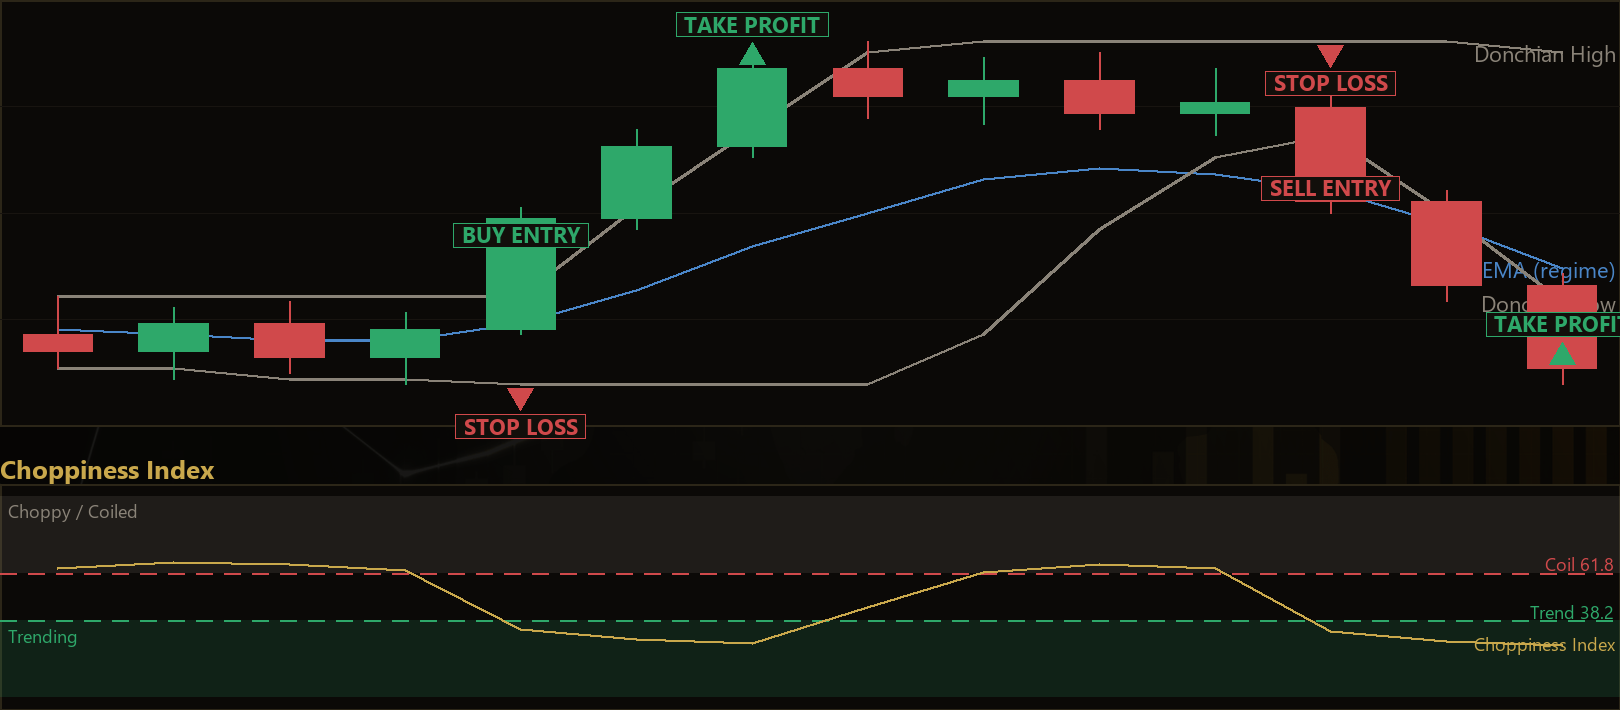
The core idea is that the most reliable breakouts are born from coils. When price whipsaws sideways inside a range, energy is effectively stored; when that range finally resolves, the release often produces a decisive directional thrust. The Choppiness Index quantifies this behaviour. Readings near the upper end (around 61.8 and above) indicate the market is coiling or whipsawing inside a range, while readings near the lower end (around 38.2 and below) indicate price is travelling efficiently in one direction. By requiring a transition between these two states — not just a price level being crossed — the strategy tries to filter out the aimless drift-throughs that trap many simple breakout systems.
This EA is best understood as a learning tool for studying regime-based breakout logic. It is suitable for traders who already understand basic MetaTrader 5 concepts and who want to explore how multiple confirmation filters — momentum regime, market structure, trend agreement, and volume participation — can be combined into a single, non-repainting, automation-ready framework. It is not a shortcut, and it is not tuned to any particular account size or promise.
How It Works
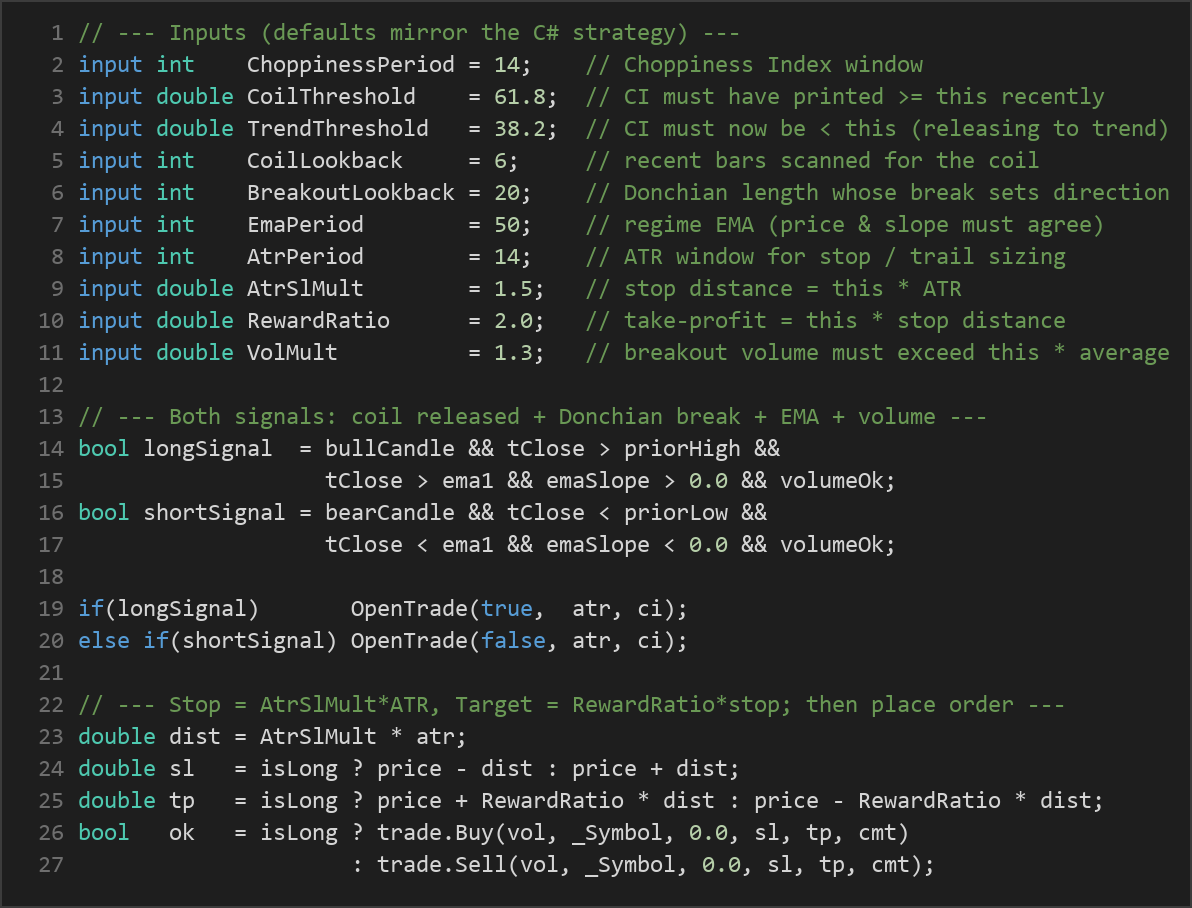
The strategy evaluates every condition only on closed bars (it acts on the just-finished candle when a new bar opens), so its signals do not repaint. A long trade requires all five bullish conditions to align; a short trade requires the fully symmetric bearish set. In plain English, the strategy signals a potential entry when:
- Regime shift — recently coiled: The Choppiness Index printed above the
CoilThresholdat some point within the lastCoilLookbackbars, meaning the market was genuinely range-bound and storing energy. - Regime shift — now releasing: The Choppiness Index has just dropped below the
TrendThreshold, indicating the coil is resolving into a trend. - Structure break: The just-closed candle closes beyond the Donchian high (for longs) or Donchian low (for shorts) of the prior
BreakoutLookbackbars. This defines both the break and its direction. - Regime agreement: Price is on the correct side of an Exponential Moving Average (EMA — a moving average that weights recent prices more heavily), and that EMA's slope over the last few bars also agrees with the direction. This helps filter counter-trend fakeouts.
- Participation: The breakout bar's tick volume expands above its own moving average by the
VolMultfactor. Genuine breakouts tend to carry volume; quiet drift-throughs usually do not.
Only when all five agree — plus the trigger candle itself closes in the signal direction (a bullish candle for longs, bearish for shorts) — does the strategy open a position.
For exits and risk control, the logic is deliberately mechanical and volatility-aware:
- Stop-loss: Placed at
AtrSlMult× ATR away from entry. ATR (Average True Range) measures recent volatility, so the stop automatically widens in fast markets and tightens in calm ones. - Take-profit: Set at
RewardRatio× the stop distance, giving a fixed reward-to-risk ratio (2.0 by default means the target is twice the risk). - Trailing stop: An optional chandelier-style ATR trail that only ever tightens toward price — it never loosens — helping lock in open profit as a trend extends.
- Position control: One position per magic number at a time (no stacking), a spread ceiling that skips entries when costs are high, and a warm-up guard so no trade fires before enough history exists to compute every indicator.
Position sizing is fixed-fractional: a base lot is scaled up or down with account balance relative to a reference balance, then clamped to a hard ceiling so size cannot run away.
Strategy Parameters
| Parameter | Default | Min | Max | Description |
|---|---|---|---|---|
| ChoppinessPeriod | 14 | 8 | 30 | Lookback window for the Choppiness Index calculation. |
| CoilThreshold | 61.8 | 50.0 | 75.0 | CI must have printed at or above this level recently (the market was coiled). |
| TrendThreshold | 38.2 | 25.0 | 50.0 | CI must now be below this level (the coil is releasing into a trend). |
| CoilLookback | 6 | 2 | 20 | How many recent bars to scan for the coil that preceded the release. |
| BreakoutLookback | 20 | 10 | 50 | Donchian channel length whose break defines the breakout and its direction. |
| EmaPeriod | 50 | 20 | 200 | Period of the regime EMA; price and its slope must agree with the break. |
| AtrPeriod | 14 | 7 | 30 | ATR window used for stop-loss and trailing-stop sizing. |
| AtrSlMult | 1.5 | 0.5 | 4.0 | Stop distance as a multiple of ATR. |
| RewardRatio | 2.0 | 1.0 | 5.0 | Take-profit distance as a multiple of the stop distance (reward:risk). |
| TrailAtrMult | 2.5 | 0.0 | 6.0 | Chandelier trailing distance as a multiple of ATR (0 disables trailing). |
| VolMaPeriod | 20 | 5 | 60 | Averaging window for the volume participation filter. |
| VolMult | 1.3 | 1.0 | 3.0 | Breakout volume must exceed this multiple of its average (1.0 turns the filter off). |
| MaxSpreadPoints | 40 | 5 | 300 | Skip entries when the spread (in points) exceeds this ceiling. |
| BaseLots | 0.10 | 0.01 | 1.0 | Base lot size, fixed-fractionally scaled by account growth. |
| MaxLots | 5.0 | 0.1 | 50.0 | Hard ceiling on the scaled lot size. |
Recommended Chart Settings
The Choppiness Regime Breakout is a single-timeframe strategy: every calculation uses the chart's own timeframe, so it runs on whatever period you attach it to. Breakout-from-consolidation logic tends to be studied most naturally on the H1 or H4 timeframes of liquid instruments such as major forex pairs (for example EUR/USD or GBP/USD) or major indices, where consolidation-then-expansion cycles are common and spreads are typically tight.
That said, no single setting is universally optimal. The Choppiness Index, Donchian length, and ATR multipliers all interact with the volatility character of the instrument and session. Results will vary meaningfully across different symbols, timeframes, and market conditions, so treat any configuration as a starting point for your own testing rather than a fixed recommendation.
How to Install on MetaTrader 5
- Download the .ex5 file from the link below.
- Copy it to your MT5
MQL5\Expertsfolder. - Restart MetaTrader 5 or refresh the Navigator panel.
- Drag the EA onto a chart matching the recommended symbol and timeframe.
- Configure the input parameters and enable Algo Trading.
What to Consider Before Using This EA
The strengths of this approach lie in its discipline. Requiring a genuine regime shift — coiled, then released — before acting is more selective than a naked breakout rule, and the layered filters (structure, trend, volume) are designed to reduce false starts. Because every indicator is computed on closed bars, signals are stable and non-repainting, which makes the behaviour you see in a backtest closer to what you would see live. The ATR-based stops, fixed reward-to-risk target, and spread ceiling also give the system a coherent, automation-ready risk framework rather than ad-hoc exits.
The limitations are equally important to understand. The Choppiness Index is a lagging, non-directional measure; it confirms that a regime has changed only after the change has begun, so entries are inherently late by design. Multi-filter breakout systems are also prone to whipsaw in false breakouts — markets that poke beyond a range, satisfy every condition, and then reverse. In persistently choppy or news-driven conditions, the strategy may signal into failed moves, and in strongly trending markets that never coil, it may sit on the sidelines and produce few trades at all. The many parameters create a real risk of over-fitting: a configuration that looks impressive on historical data can simply be tuned to noise. This EA is a framework for studying that trade-off, not a solved answer to it.
Risk Management Tips
Sound risk management matters more than any single entry rule. As general educational principles:
- Risk a small, fixed fraction per trade — many educators suggest no more than 1–2% of account equity on any single position — so that a losing streak cannot do outsized damage.
- Size positions deliberately. Understand how the
BaseLots,MaxLots, and ATR-based stop interact before increasing exposure, and know your worst-case loss per trade in advance. - Always test on a demo account first. Run the strategy in a risk-free simulated environment across varied market conditions until you understand its typical behaviour, trade frequency, and drawdown character.
- Study drawdown, not just outcomes. The depth and duration of losing periods often determine whether a strategy is psychologically and financially survivable, regardless of any other figure.
- Account for real costs. Spread, slippage, swap, and commission all erode results, especially on shorter timeframes and around news.
No configuration removes risk. These tools are for learning how a rule-based system behaves — not a substitute for your own judgement and testing.
Risk Warning
Trading foreign exchange, CFDs, and other leveraged financial instruments involves substantial risk of loss and is not suitable for all investors. The strategies and tools discussed on this page are provided for educational purposes only and do not constitute financial advice, investment recommendations, or solicitation to trade. Always consult a qualified financial adviser before making trading decisions. Past backtest performance is not indicative of future results.
Downloads
- Expert Advisor: ChoppinessRegimeBreakout.ex5 (56 downloads)
- Source Code: ChoppinessRegimeBreakout.mq5 (58 downloads)
- Documentation: ChoppinessRegimeBreakout.pdf (62 downloads)