Disclaimer: This article is for educational and informational purposes only. It does not constitute financial or investment advice. Trading forex and CFDs carries significant risk of loss. Past performance of any strategy — including backtests — does not guarantee future results. Never trade with money you cannot afford to lose.
What Is This Strategy?
The Central Pivot Range Breakout is a price-action breakout strategy built around the Central Pivot Range (CPR) — a three-line pivot band that floor traders have used for decades to gauge whether a session is more likely to trend or to range. Unlike most automated systems, this approach uses no technical indicators at all: no moving averages, no RSI, no ATR. It works purely from raw price levels and candle structure, which makes it a clean, transparent example for learning how pivot-based price action behaves.
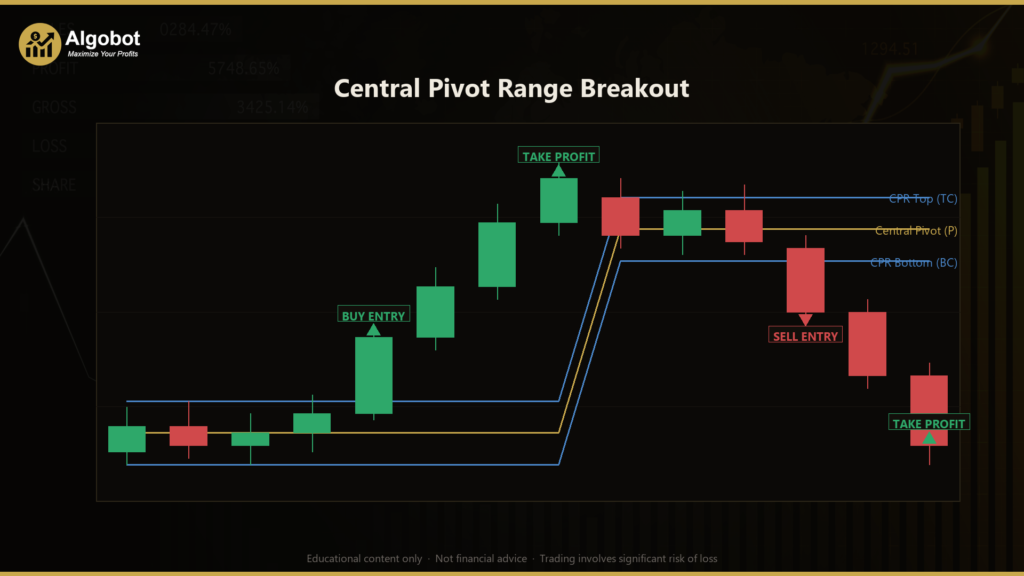
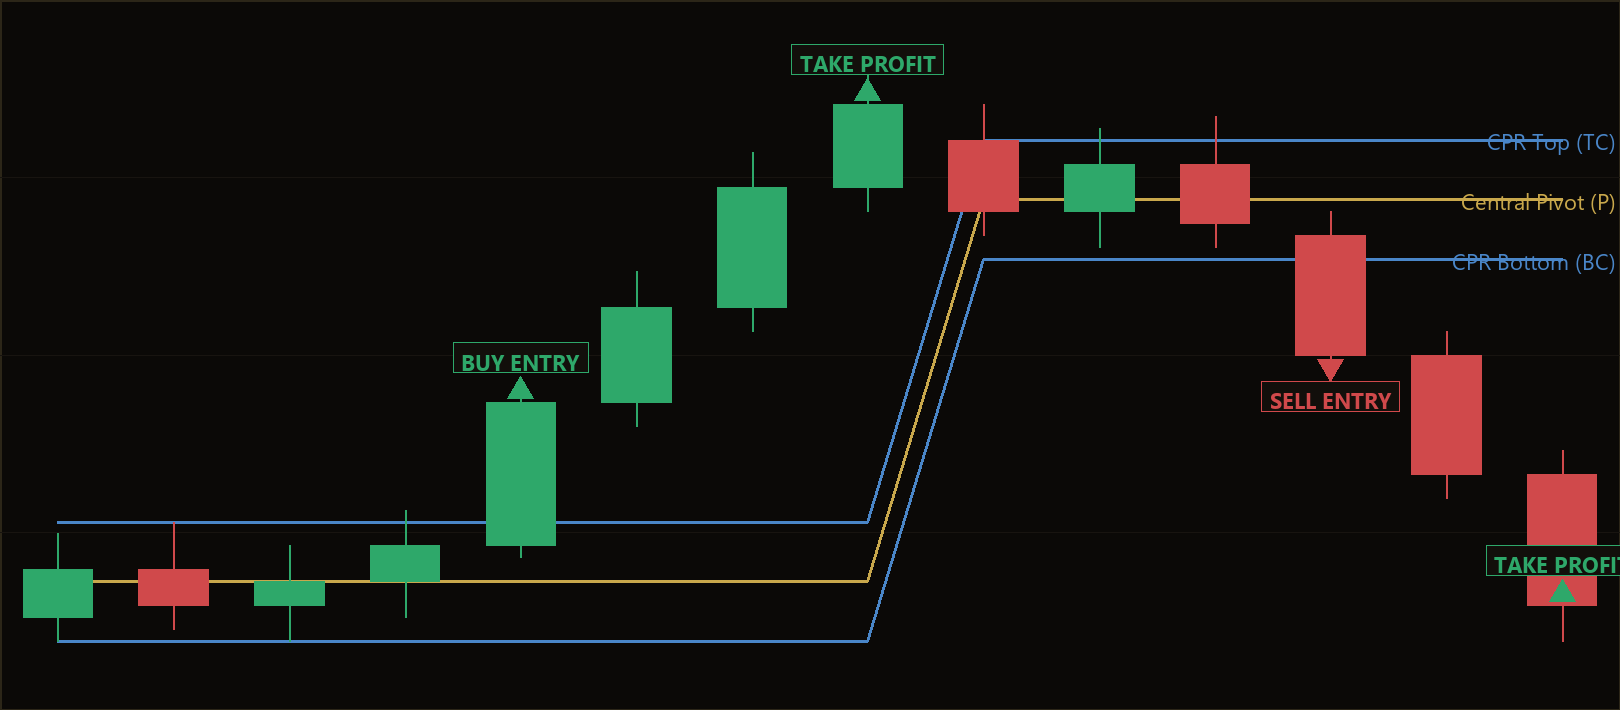
The Central Pivot Range is made up of three reference lines calculated from a recent session's High, Low, and Close: the central pivot (P), the bottom central line (BC), and the top central line (TC). The distance between the two outer lines — the CPR width — is the heart of the idea. A narrow CPR signals that traders found little agreement on fair value, which historically often precedes a trending or breakout session. A wide CPR signals a balanced, two-sided market that tends to range. This particular strategy is a narrow-CPR breakout: it only arms itself when the band is narrow, then waits for a decisive candle to break clear of the band.
This makes the strategy most suitable as a learning tool for traders who want to understand regime filtering — the practice of only trading when market conditions match the setup — and how to combine a structural price level with a price-action confirmation. It is framed here as a strategy analysis, not a money-making opportunity, and it is designed to be studied on a demo account first.
How It Works
The strategy processes one completed bar at a time on a single timeframe. It continuously builds a rolling "session" from a fixed number of bars, computes a fresh CPR when that session completes, then holds those levels static (non-repainting) while it looks for a breakout. Here is the full logic in plain English:
- Building the session: The strategy accumulates the highest High, the lowest Low, and the latest Close across
SessionBarsconsecutive bars. When that count is reached, it finalizes one CPR and resets to build the next session. - Calculating the CPR: From the completed session it computes
P = (H + L + C) / 3,BC = (H + L) / 2, andTC = 2P − BC. The two edges are then ordered so TC is always the higher line and BC the lower. The CPR width isTC − BC, and the session's full range (High − Low) becomes the "distance unit" used to scale every threshold. - The regime gate: The strategy only arms when the CPR is narrow — specifically, when the width is no greater than
NarrowFracmultiplied by the session range. If the band is wider than that, it stands aside, because a wide band historically points to a ranging session rather than a breakout. - Demanding a conviction candle: A breakout candle must be "strong," meaning its body (open-to-close distance) is at least
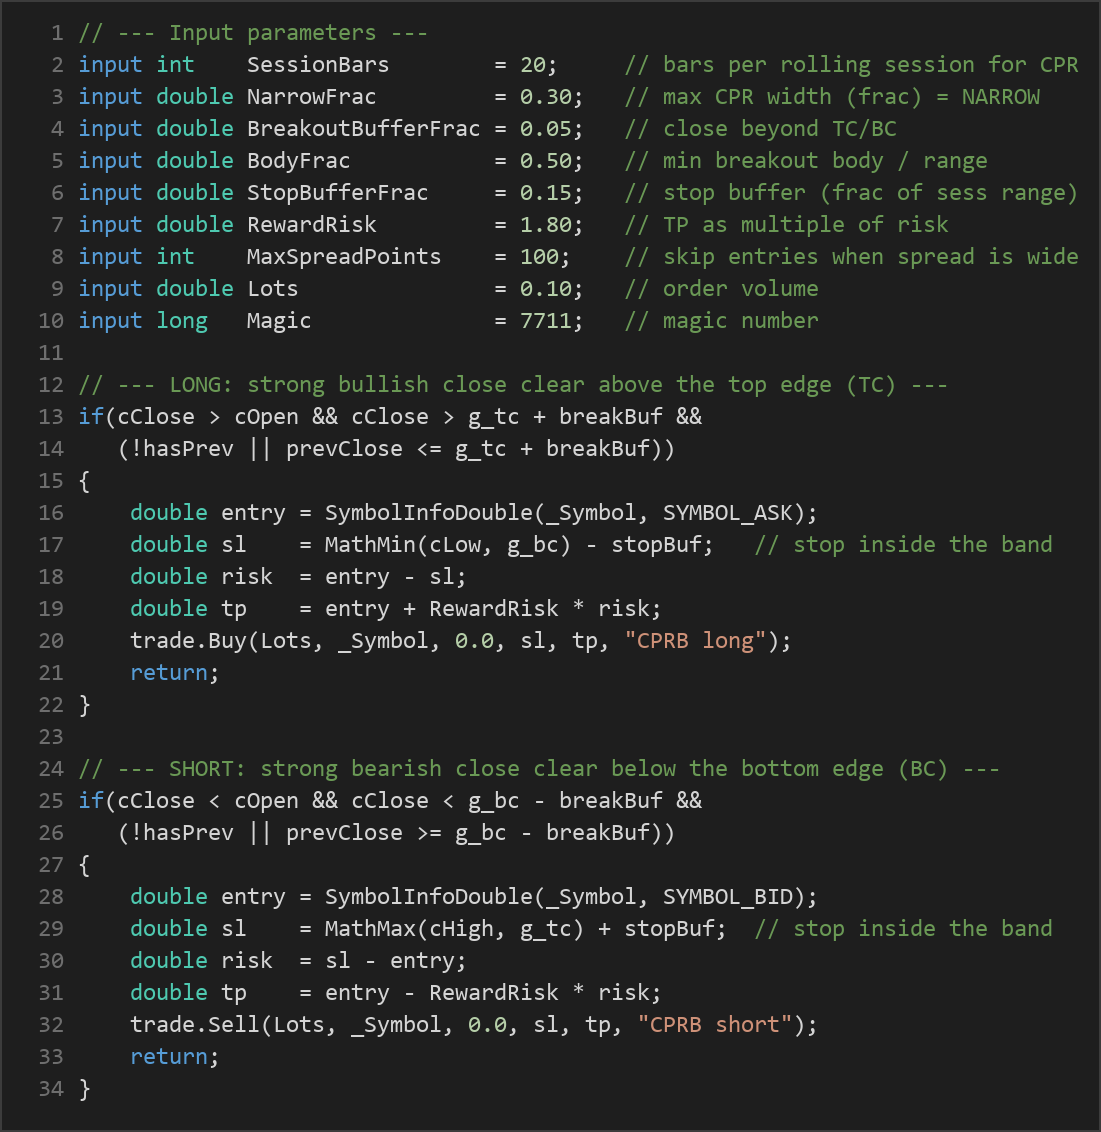
BodyFracof its total range. This filters out long-wicked indecision candles and favors decisive closes. - The strategy signals a LONG when a strong bullish candle closes clear above the top line — above
TCplus a breakout buffer — and the prior closed bar was still inside or at the band. This "fresh break" rule avoids chasing a move that already happened. - The strategy signals a SHORT when a strong bearish candle closes clear below the bottom line — below
BCminus the breakout buffer — and the prior closed bar was still inside or at the band. - Stop-loss logic: For a long, the stop is placed just below the lower of the breakout candle's Low and the BC line, minus a stop buffer — in other words, back inside the band. For a short, the stop sits just above the higher of the candle's High and the TC line, plus the buffer. The idea is that if price falls back into the band, the breakout has failed.
- Take-profit logic: The target is set at a multiple of the structural risk (the entry-to-stop distance), defined by
RewardRisk. With the default of 1.80, the take-profit aims for 1.8 times the distance risked. - Trade discipline: Only one position per magic number is allowed at a time, and the strategy skips new entries whenever the current spread is wider than
MaxSpreadPoints. Exits are handled entirely by the stop-loss and take-profit — there is no separate trailing logic.
Because every distance (breakout buffer, stop buffer, target) is scaled by the producing session's range rather than a fixed point value, the same settings adapt across symbols and volatility levels without manual tuning.
Strategy Parameters
| Parameter | Default | Min | Max | Description |
|---|---|---|---|---|
| SessionBars | 20 | 8 | 80 | Number of primary-timeframe bars that make up one rolling session from which the CPR is computed. |
| NarrowFrac | 0.30 | 0.10 | 0.80 | Maximum CPR width (as a fraction of the session's range) for the band to count as narrow and arm the strategy. |
| BreakoutBufferFrac | 0.05 | 0.00 | 0.30 | How far beyond TC/BC (fraction of session range) the candle must close for the break to be confirmed, filtering marginal pokes. |
| BodyFrac | 0.50 | 0.20 | 0.90 | Minimum breakout-candle body relative to its range — demands a conviction close rather than a wick. |
| StopBufferFrac | 0.15 | 0.02 | 0.60 | Stop buffer beyond the breakout candle extreme or band edge, as a fraction of the session range. |
| RewardRisk | 1.80 | 0.50 | 4.00 | Take-profit distance expressed as a multiple of the structural risk (entry to stop). |
| MaxSpreadPoints | 100 | 5 | 300 | Skip new entries when the current spread (in points) is wider than this value. |
| Lots | 0.10 | 0.01 | 1.00 | Order volume in lots. |
| Magic | 7711 | 0 | 9,999,999 | Magic number used to identify and manage this EA's positions. |
Recommended Chart Settings
The strategy was designed with a liquid FX major or index in mind on the M15 (15-minute) timeframe — classic Central Pivot Range territory, where intraday sessions are long enough to form meaningful pivot levels. That said, because all thresholds are scaled by session range rather than fixed points, the logic will run on whatever single timeframe you select at backtest time. It always uses the primary chart timeframe only and never references a higher timeframe.
Keep in mind that results will vary considerably across different symbols, brokers, and market conditions. A setting that looks well-behaved on one instrument may behave very differently on another, so any timeframe or symbol change should be re-tested independently.
How to Install on MetaTrader 5
- Download the .ex5 file from the link below
- Copy it to your MT5
MQL5\Expertsfolder - Restart MetaTrader 5 or refresh the Navigator panel
- Drag the EA onto a chart matching the recommended symbol and timeframe
- Configure the input parameters and enable Algo Trading
What to Consider Before Using This EA
The main strength of this approach is its transparency and regime awareness. By only arming during a narrow CPR, it deliberately sits out conditions where breakouts historically fail more often, and its reliance on raw price levels means there are no lagging indicators to second-guess. The fresh-break and conviction-body filters are sensible attempts to avoid chasing exhausted moves and trading indecision.
There are also real limitations worth understanding. Breakout systems are prone to false breakouts, where price pokes beyond a level only to reverse — and no filter eliminates these entirely. The narrow-CPR premise is a statistical tendency, not a certainty; a narrow band does not guarantee a trend will follow. Because the strategy takes only one position at a time and waits for a fresh break, it may trade infrequently and can endure long quiet stretches. In choppy, low-volatility markets, repeated marginal breaks can lead to a string of small stop-outs. The fixed reward-to-risk target also means strong moves may be cut short, while the absence of a trailing stop means giving back open profit if price stalls before the target. As with any single-timeframe price-action system, performance is sensitive to spread, slippage, and broker execution.
Risk Management Tips
Sound risk management matters far more than any single entry rule. Consider these general principles as you study this strategy:
- Position sizing: Size each trade so that a full stop-loss represents only a small, predefined slice of your account — many educators suggest risking no more than 1–2% per trade.
- Test on demo first: Run the EA on a demo account across varied market conditions before committing any real capital, so you can observe how it behaves through both trending and ranging periods.
- Understand drawdown: Every strategy experiences losing streaks. Know the maximum drawdown you are willing to tolerate and how it would feel in real terms before you begin.
- Don't over-leverage: Leverage magnifies losses as much as gains; keep it conservative relative to your account size.
- Keep records and review: Track your trades and review them periodically to understand whether the strategy's behavior matches your expectations.
Risk Warning
Trading foreign exchange, CFDs, and other leveraged financial instruments involves substantial risk of loss and is not suitable for all investors. The strategies and tools discussed on this page are provided for educational purposes only and do not constitute financial advice, investment recommendations, or solicitation to trade. Always consult a qualified financial adviser before making trading decisions. Past backtest performance is not indicative of future results.
Downloads
- Expert Advisor: CentralPivotRangeBreakout.ex5 (35 downloads)
- Source Code: CentralPivotRangeBreakout.mq5 (40 downloads)
- Documentation: CentralPivotRangeBreakout.pdf (40 downloads)