Disclaimer: This article is for educational and informational purposes only. It does not constitute financial or investment advice. Trading forex and CFDs carries significant risk of loss. Past performance of any strategy — including backtests — does not guarantee future results. Never trade with money you cannot afford to lose.
What Is This Strategy?
Breakout Retest Momentum is a price-action strategy that combines two classic concepts — support and resistance levels with the Relative Strength Index (RSI), a momentum oscillator that measures the speed and direction of recent price changes. Rather than buying the instant a price level breaks, this strategy waits for the market to confirm the break is genuine. It is built for trending conditions on liquid instruments and is best understood as a structured study in how breakouts, retests, and momentum confirmation fit together.
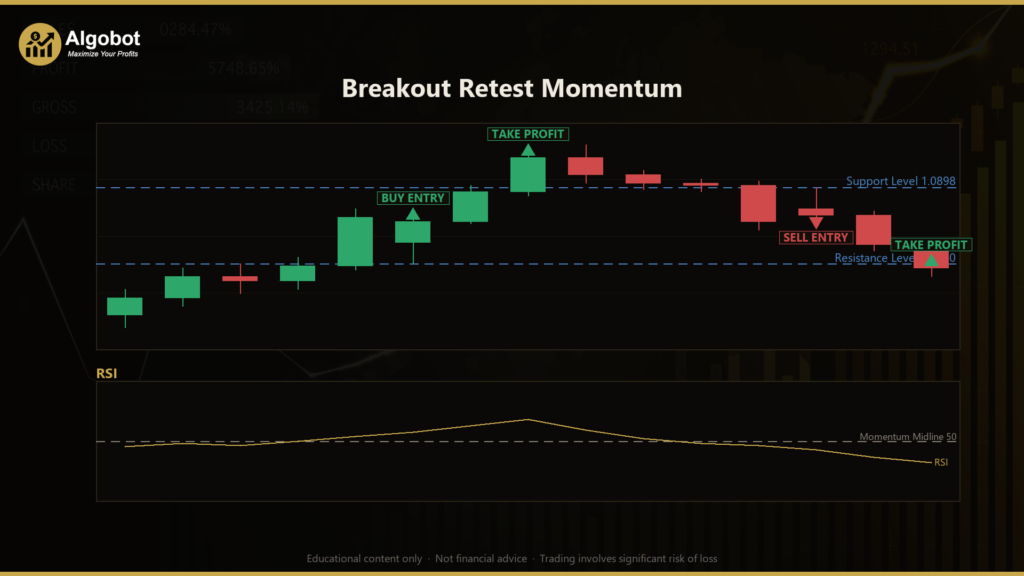
The core idea addresses a well-known weakness of naive breakout systems: many "breaks" are simply liquidity grabs that snap straight back, trapping traders who chase the move. To filter these out, Breakout Retest Momentum demands the textbook three-step structure that separates a real regime change from random noise — an established level, a decisive close beyond it, and then a successful retest where price returns to the level and holds. Only when momentum also agrees does the strategy signal an entry.
This makes it a useful learning tool for traders who want to understand confirmation-based breakout trading rather than impulsive entries. It is suited to anyone studying how the Average True Range (ATR) — a volatility measure — can be used to scale rules across different instruments, and how an RSI filter can be layered on top of structural price action. As always, this is a framework for analysis and education, not a shortcut to results.
How It Works
The strategy operates on a single timeframe and processes one signal per newly closed bar. It moves through a clear sequence of states. Here is how the strategy signals each step:
- Step 1 — Define the level. The strategy measures the highest high (resistance) and lowest low (support) over the previous
LevelLookbackclosed bars, excluding the current bar so the level reflects genuine prior structure. - Step 2 — Detect the breakout. A bar must close beyond that level by at least
BreakBufferAtr × ATR. Because the buffer is scaled by ATR, the same decisiveness filter works whether you trade EURUSD or XAUUSD without manual point calculations. A valid break "arms" the setup and freezes the broken level — a broken resistance is now expected to act as support (long bias); a broken support as resistance (short bias). - Step 3 — Wait for the retest. Within
RetestBarsbars, price must pull back toward the broken level. The strategy considers the level retested when the bar's wick reaches withinRetestTolAtr × ATRof it. - Step 4 — Confirm the hold and momentum. The retest bar must close back on the breakout side with a body pointing in the trade direction. RSI must also agree: at or above the midline and rising for longs, at or below the midline and falling for shorts. Only when all conditions align does the strategy signal an entry.
- Invalidation. If price closes decisively back through the level against the setup, or the retest window expires, the armed setup is discarded and the strategy returns to scanning.
For exits and risk, the logic is structural and self-scaling:
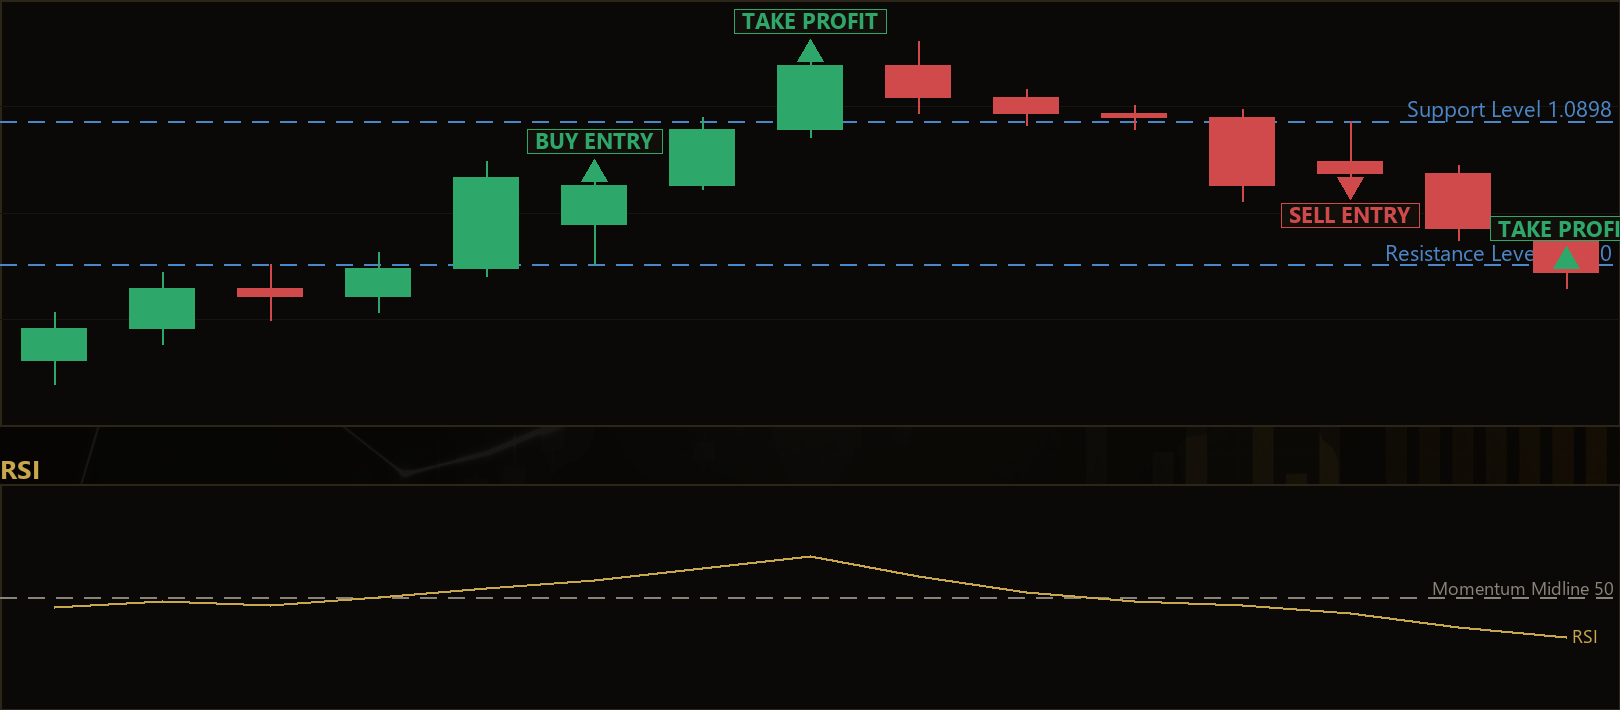
- Stop-loss. For longs, the stop sits below the retest candle's low, padded by
StopPadAtr × ATR— but never tighter thanSlAtrMult × ATRfrom entry. This floor prevents degenerate micro-stops on unusually small retest candles. Short trades mirror this above the retest high. - Take-profit. The target is placed at a fixed
RewardRiskRatiomultiple of the measured risk (the entry-to-stop distance). - Trailing stop. Once a trade advances
TrailStartAtr × ATRin profit, an ATR-based trailing stop engages atTrailAtrMult × ATRbehind price, helping lock in a running move. SettingTrailAtrMultto 0 disables trailing. - Position control. The strategy holds only one position per magic number — no stacking of trades — and skips entries when the spread is wider than
MaxSpreadPoints.
Strategy Parameters
| Parameter | Default | Min | Max | Description |
|---|---|---|---|---|
| LevelLookback | 24 | 8 | 80 | Number of prior closed bars whose swing extremes define the support/resistance levels. |
| RsiPeriod | 14 | 7 | 28 | Smoothing period for the RSI momentum gauge. |
| AtrPeriod | 14 | 7 | 28 | ATR period used for all volatility-scaled distances. |
| BreakBufferAtr | 0.25 | 0.00 | 1.50 | How far (in ATRs) a close must clear the level to count as a real break. |
| RetestTolAtr | 0.40 | 0.05 | 1.50 | How close (in ATRs) the retest wick must come to the broken level. |
| RetestBars | 8 | 2 | 30 | Number of bars allowed for the retest before the armed setup expires. |
| RsiMidline | 50.0 | 40.0 | 60.0 | The RSI midline the momentum confirmation must respect. |
| SlAtrMult | 1.5 | 0.5 | 4.00 | Minimum stop distance from entry, in ATRs (floor against micro-stops). |
| StopPadAtr | 0.5 | 0.00 | 2.00 | Extra padding beyond the retest candle's extreme, in ATRs. |
| RewardRiskRatio | 1.8 | 1.0 | 4.00 | Take-profit distance as a multiple of the measured risk. |
| TrailStartAtr | 1.0 | 0.0 | 5.00 | Profit (in ATRs) required before the trailing stop engages. |
| TrailAtrMult | 2.0 | 0.0 | 6.00 | Trailing stop distance behind price, in ATRs (0 disables trailing). |
| MaxSpreadPoints | 30 | 1 | 200 | Skip entries when the spread (in points) is wider than this. |
| Lots | 0.10 | 0.01 | 1.00 | Order volume in lots. |
| Magic | 4711 | 0 | 9,999,999 | Magic number used to identify and manage this EA's trades. |
Recommended Chart Settings
Breakout Retest Momentum is designed for a single, liquid trending instrument and reads every bar from whatever timeframe is selected at backtest time. It tends to suit a clean trender such as GBPUSD or XAUUSD (gold) on the M15, M30, or H1 timeframe, where breakouts and retests are frequent enough to study but not buried in noise.
Because the strategy scales all of its distances with ATR, the same parameter set adapts to different instruments and volatility regimes without manual point math. Even so, every market behaves differently. Results will vary across symbols, timeframes, and changing market conditions, so treat any chosen setting as a starting point for your own testing rather than a fixed recommendation.
How to Install on MetaTrader 5
- Download the .ex5 file from the link below
- Copy it to your MT5
MQL5\Expertsfolder - Restart MetaTrader 5 or refresh the Navigator panel
- Drag the EA onto a chart matching the recommended symbol and timeframe
- Configure the input parameters and enable Algo Trading
What to Consider Before Using This EA
The clearest strength of this approach is its discipline. By refusing to chase the initial break and instead requiring a retest plus momentum confirmation, the strategy filters out many of the false breakouts that punish simpler systems. Its ATR-scaled rules also mean the logic is portable across instruments, and the structural stop-loss ties risk directly to the chart rather than to an arbitrary fixed distance.
That same selectivity is also its main limitation. Demanding a clean break, a timely retest, and aligned RSI momentum means the strategy trades infrequently and will sit out many moves — including breakouts that run without ever retesting. In choppy, range-bound, or news-driven markets, levels can be broken and reclaimed repeatedly, generating armed setups that expire or invalidate without producing a trade. RSI, like any oscillator, can also give conflicting readings during sharp reversals.
It is worth remembering that the strategy holds only one position at a time and skips entries when spreads widen, which can mean missed signals during volatile sessions. None of this makes the approach better or worse than any other — it simply behaves like a trend-and-retest system, performing best when markets trend cleanly and struggling when they don't. Study it on a demo account to learn where those conditions occur.
Risk Management Tips
Sound risk management matters far more than any single entry rule. Consider these general principles as you study this or any strategy:
- Risk a small fraction per trade. Many educational sources suggest risking no more than 1–2% of account equity on any single position, so that a string of losses cannot do lasting damage.
- Size positions deliberately. Choose your lot size based on the distance to your stop-loss and your account size, not on a desire for larger swings.
- Test on a demo account first. Run the EA in a risk-free demo environment until you understand how it behaves across different conditions before considering any live use.
- Understand drawdown. Every strategy experiences losing streaks. Know the historical drawdown you might face and ask whether you could sit through it calmly.
- Keep expectations realistic. A strategy may indicate a high-quality setup, but no system wins every trade. Treat each trade as one outcome in a long series.
Risk Warning
Trading foreign exchange, CFDs, and other leveraged financial instruments involves substantial risk of loss and is not suitable for all investors. The strategies and tools discussed on this page are provided for educational purposes only and do not constitute financial advice, investment recommendations, or solicitation to trade. Always consult a qualified financial adviser before making trading decisions. Past backtest performance is not indicative of future results.
Downloads
- Expert Advisor: BreakoutRetestMomentum.ex5 (60 downloads)
- Source Code: BreakoutRetestMomentum.mq5 (64 downloads)
- Documentation: BreakoutRetestMomentum.pdf (63 downloads)