Disclaimer: This article is for educational and informational purposes only. It does not constitute financial or investment advice. Trading forex and CFDs carries significant risk of loss. Past performance of any strategy — including backtests — does not guarantee future results. Never trade with money you cannot afford to lose.
What Is This Strategy?
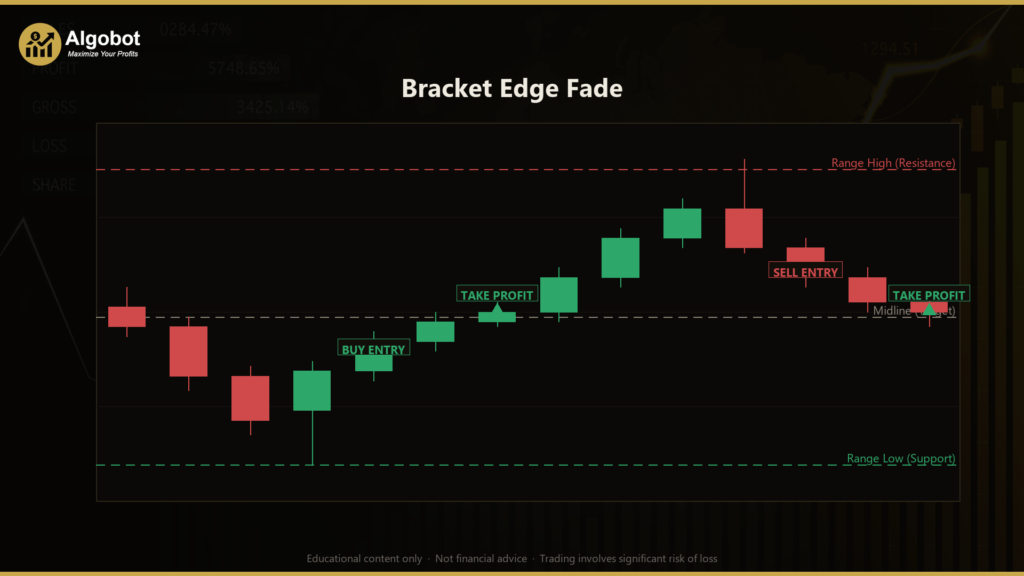
Bracket Edge Fade is a pure price-action, mean-reversion strategy that fades failed pushes into the edges of a horizontal trading range using nothing more than raw OHLC (open, high, low, close) candle data. There are no moving averages, oscillators, or volume tools involved — the entire decision process is built from support and resistance levels, candle wick rejection, and the geometry of a range (often called a "bracket"). In plain terms, mean reversion is the idea that price tends to snap back toward the middle of a range after stretching toward an extreme.
The strategy is designed for ranging markets — periods when price oscillates sideways between a recognizable ceiling (resistance) and floor (support) rather than trending in one direction. Markets spend a large share of their time inside these brackets, and pushes into the upper or lower edge are frequently rejected: price pokes the prior range extreme, fails to close beyond it, prints a long rejection wick, and then drifts back toward the midline. Bracket Edge Fade looks specifically for those rejection candles and trades against the failed push.
As a learning tool, this strategy is well suited to traders who want to study support/resistance behavior, candlestick rejection patterns, and disciplined mean-reversion logic without the noise of stacked indicators. Because every rule is derived from price alone, it is a clean teaching example of how market structure can be quantified. It is not a "set and forget" money machine, and it is best understood as an analytical framework for studying how ranges form and break.
How It Works
The strategy evaluates one signal per just-closed bar (it never acts on a half-formed candle). On each newly completed bar it rebuilds the range, checks the most recent closed candle for a rejection, and — if all conditions line up — places a single trade managed entirely by its stop-loss and take-profit.
Defining the bracket (support and resistance):
- The strategy scans a lookback window of recent candles (the
RangePeriod) that ends just before the signal candle. - The highest high in that window becomes the range high (resistance); the lowest low becomes the range low (support).
- The midpoint between them is the midline, which serves as the mean-reversion target.
- A range-width filter checks that the bracket is neither too tight (not worth clearing the spread) nor abnormally wide (which usually signals a trend rather than a range).
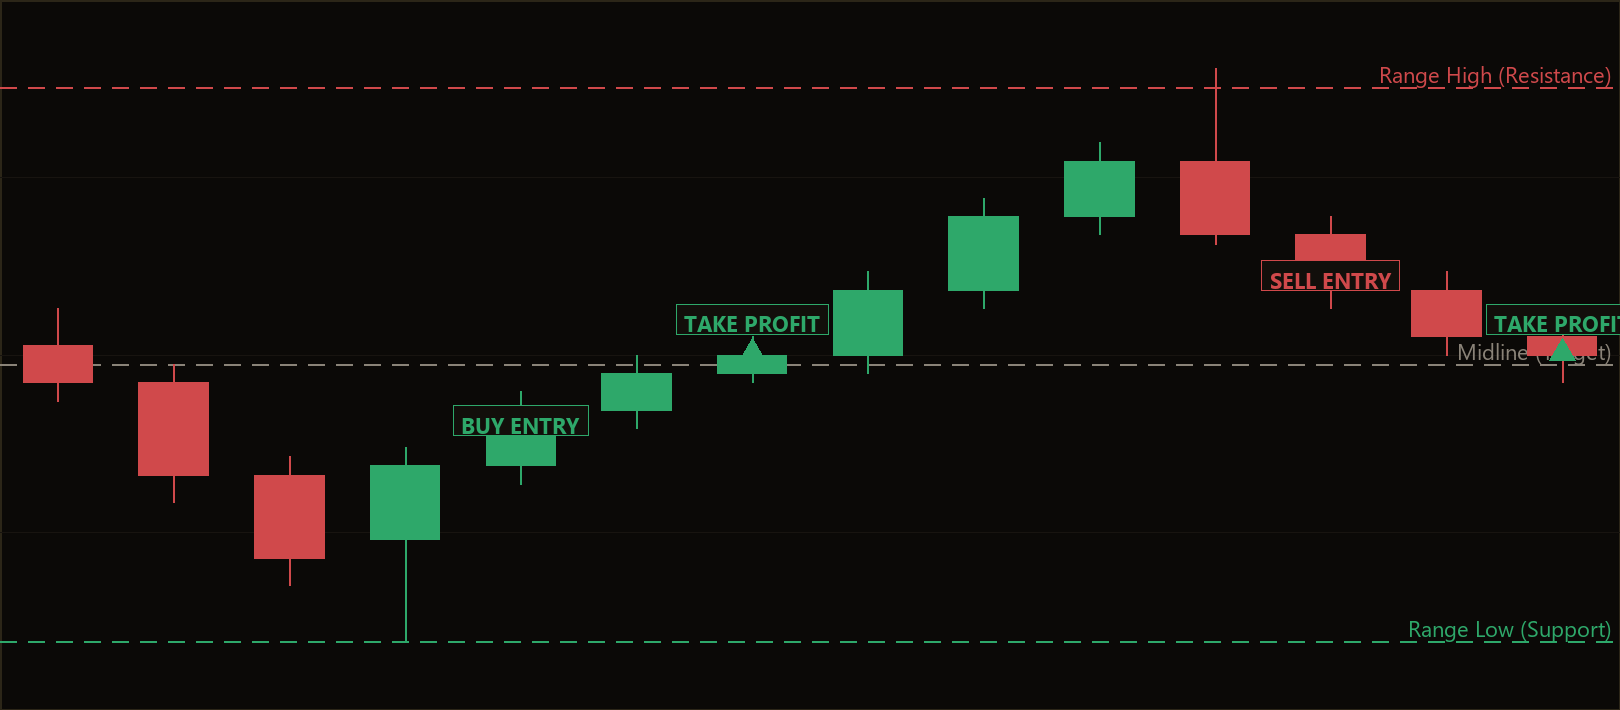
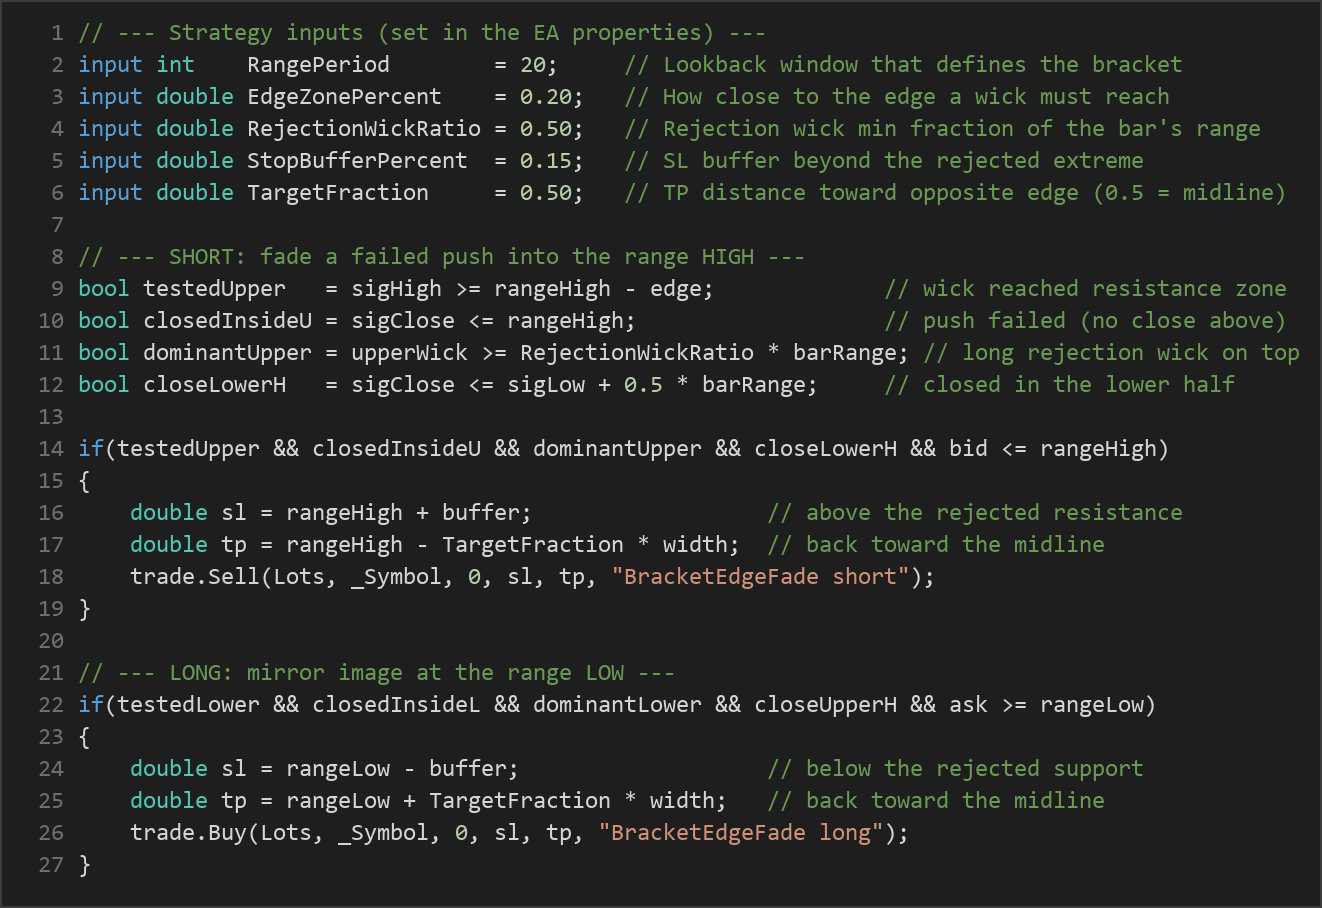
Short entry — fading a failed push into the range high: the strategy signals a sell when all of the following are true on the just-closed candle:
- The candle's high reached the resistance zone (within
EdgeZonePercentof the range high). - The candle closed at or below the range high — meaning the push failed and did not break out.
- The candle printed a dominant upper wick (at least
RejectionWickRatioof the total candle range), showing sellers rejected the higher prices. - The candle closed in the lower half of its own range.
- Current price is still inside the bracket, so the strategy is not chasing a breakout.
Long entry — fading a failed probe of the range low: this is the mirror image. The strategy signals a buy when the candle dips into the support zone, fails to close below the range low, prints a dominant lower wick, closes in the upper half of its range, and price remains inside the bracket.
Stop-loss logic: the stop is placed just beyond the rejected extreme — above the range high for shorts, below the range low for longs — offset by StopBufferPercent of the range width. The reasoning is simple: if the bracket genuinely breaks, the trade is exited rather than held against a developing trend.
Take-profit logic: the target is set a configurable fraction of the range back toward the opposite edge. With TargetFraction at the default 0.50, the target sits at the midline — the classic mean-reversion objective. Larger values aim deeper across the range.
Only one position per symbol is allowed at a time. Once a trade is open, the stop-loss and take-profit fully manage it; the strategy does not add, scale, or second-guess the position.
Strategy Parameters
| Parameter | Default | Min | Max | Description |
|---|---|---|---|---|
| RangePeriod | 20 | 10 | 60 | Number of candles in the lookback window used to define the bracket's support and resistance levels. |
| EdgeZonePercent | 0.20 | 0.05 | 0.50 | How close to an edge (as a fraction of range width) a wick must reach to count as "testing" that edge. |
| RejectionWickRatio | 0.50 | 0.30 | 0.80 | Minimum size of the rejection wick as a fraction of the signal candle's total range. |
| StopBufferPercent | 0.15 | 0.05 | 0.40 | Stop-loss buffer placed beyond the rejected extreme, expressed as a fraction of range width. |
| TargetFraction | 0.50 | 0.30 | 0.90 | Take-profit distance toward the opposite edge (0.5 = the range midline). |
| MinRangePercent | 0.10 | 0.02 | 0.50 | Minimum range width as a percent of price; filters out ranges too tight to be worthwhile. |
| MaxRangePercent | 2.00 | 0.50 | 5.00 | Maximum range width as a percent of price; filters out trend-like, abnormally wide ranges. |
| Lots | 0.10 | 0.01 | 1.00 | Fixed position size used for every trade. |
Recommended Chart Settings
Bracket Edge Fade was designed as a single-timeframe strategy: all of its logic runs on whichever timeframe the chart is set to. The internal range-and-rejection mechanics are best suited to the M15 to H1 timeframes on ranging FX pairs and metals (for example, EUR/USD, GBP/USD, or XAU/USD during quieter, sideways sessions). These conditions tend to produce the cleanest brackets and the most readable rejection wicks.
Keep in mind that no single setting works across all markets. The same parameters that perform well in a calm, range-bound session may behave very differently during high-impact news, trending phases, or low-liquidity periods. Results will vary across symbols, brokers, spreads, and market conditions, so treat the recommended settings as a starting point for your own study rather than a fixed prescription.
How to Install on MetaTrader 5
- Download the
.ex5file from the link below. - Copy it to your MT5
MQL5\Expertsfolder. - Restart MetaTrader 5 or refresh the Navigator panel.
- Drag the EA onto a chart matching the recommended symbol and timeframe.
- Configure the input parameters and enable Algo Trading.
What to Consider Before Using This EA
Strengths of the approach. Because Bracket Edge Fade uses only price action, it is transparent and easy to reason about — there are no lagging indicators to interpret, and every trade can be explained candle by candle. Its built-in filters are thoughtful: the range-width check avoids ranges that are too tight or too wide, the "close inside the range" requirement helps it avoid chasing genuine breakouts, and a defined stop beyond the rejected extreme gives each trade a clear invalidation point. Mean-reversion logic of this kind has historically suited sideways, consolidating markets.
Known limitations. The single greatest weakness of any range-fading strategy is a trending or breakout market. When price stops respecting the bracket and pushes through resistance or support, repeated fades can move against the position until the stop is hit. The strategy attempts to sidestep this with its width filter and breakout avoidance, but no filter is perfect, and false rejections do occur. Slippage, widening spreads, and the spread itself can also erode a strategy that targets only a fraction of a modest range. Because position size is fixed and only one trade runs at a time, the EA does not adapt its risk to changing volatility on its own.
Where it may underperform. Expect weaker behavior during strong directional trends, around major economic news releases, at session opens with thin liquidity, and on instruments that rarely form clean horizontal ranges. The strategy is an educational illustration of mean-reversion mechanics — it is neither guaranteed to work nor doomed to fail, and its real value is in helping you study how brackets, rejections, and breakouts interact.
Risk Management Tips
Sound risk management matters more than any single entry rule. Consider these general principles as you study this or any strategy:
- Risk only a small fraction per trade. A common educational guideline is to risk no more than 1–2% of your account on any single position, sizing your lots so that a stop-loss hit stays within that limit.
- Test on a demo account first. Run the EA on a demo or simulation environment until you understand how it behaves across different sessions and market conditions before considering any live use.
- Understand drawdown. Even a well-designed strategy will experience losing streaks. Know the maximum drawdown you are emotionally and financially prepared to tolerate, and stop if it is exceeded.
- Mind the spread and costs. Mean-reversion targets can be small, so account for spread, commissions, and potential slippage when evaluating whether a setup is worthwhile.
- Avoid over-leverage. Leverage magnifies losses as well as gains; conservative position sizing helps you stay in the game through inevitable rough patches.
- Keep a trading journal. Recording each trade and reviewing the strategy's behavior over time turns the EA into a genuine learning exercise rather than a black box.
Risk Warning
Trading foreign exchange, CFDs, and other leveraged financial instruments involves substantial risk of loss and is not suitable for all investors. The strategies and tools discussed on this page are provided for educational purposes only and do not constitute financial advice, investment recommendations, or solicitation to trade. Always consult a qualified financial adviser before making trading decisions. Past backtest performance is not indicative of future results.
Downloads
- Expert Advisor: BracketEdgeFade.ex5 (56 downloads)
- Source Code: BracketEdgeFade.mq5 (65 downloads)
- Documentation: BracketEdgeFade.pdf (60 downloads)