Disclaimer: This article is for educational and informational purposes only. It does not constitute financial or investment advice. Trading forex and CFDs carries significant risk of loss. Past performance of any strategy — including backtests — does not guarantee future results. Never trade with money you cannot afford to lose.
What Is This Strategy?
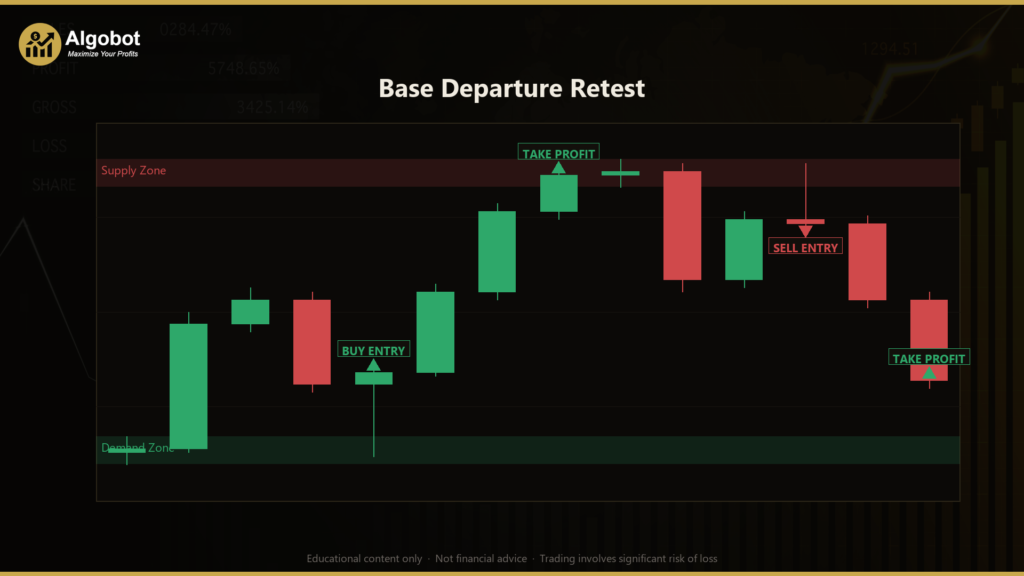
The Base Departure Retest strategy is a pure price-action supply and demand engine that trades the classic Rally-Base-Rally and Drop-Base-Drop pattern without using a single technical indicator. Instead of relying on moving averages or oscillators, it reads raw candle structure to map out zones — narrow price areas where a brief pause (the "base") was followed by an explosive move (the "departure"). This is a swing-style, mean-reversion-to-zone approach rooted in the supply and demand school of technical analysis, where the central idea is that institutions leave footprints when they accumulate or distribute large orders.
In plain terms, supply and demand trading assumes that when price leaves an area very quickly, it likely left unfilled orders behind. If price later returns to that same area, those resting orders may push it away again. The Base Departure Retest engine automates this logic: it identifies the originating base candle, remembers it as a demand zone (for buys) or a supply zone (for sells), and waits patiently for price to come back and show a rejection before entering in the original direction of the impulse.
This strategy is best suited to traders who want to learn how mechanical supply and demand systems are constructed. Because every rule is explicit — what counts as a base, what counts as an impulse, how a retest is confirmed — it is an excellent teaching tool for understanding zone-based entries, distal-edge stop placement, and fixed reward-to-risk targeting. It is designed for trending or impulsive market conditions where strong departures from consolidation are common, rather than choppy, directionless ranges.
How It Works
The engine processes one newly-closed candle at a time and performs two jobs on each bar: it looks for new zones to form, and it manages retests of existing zones. A "candle range" here simply means the distance from a candle's high to its low, and the strategy compares every candle against a rolling average range measured over the recent lookback window.
Zone formation — the strategy signals a new zone when:
- A base candle appears: its high-to-low range is small, no larger than
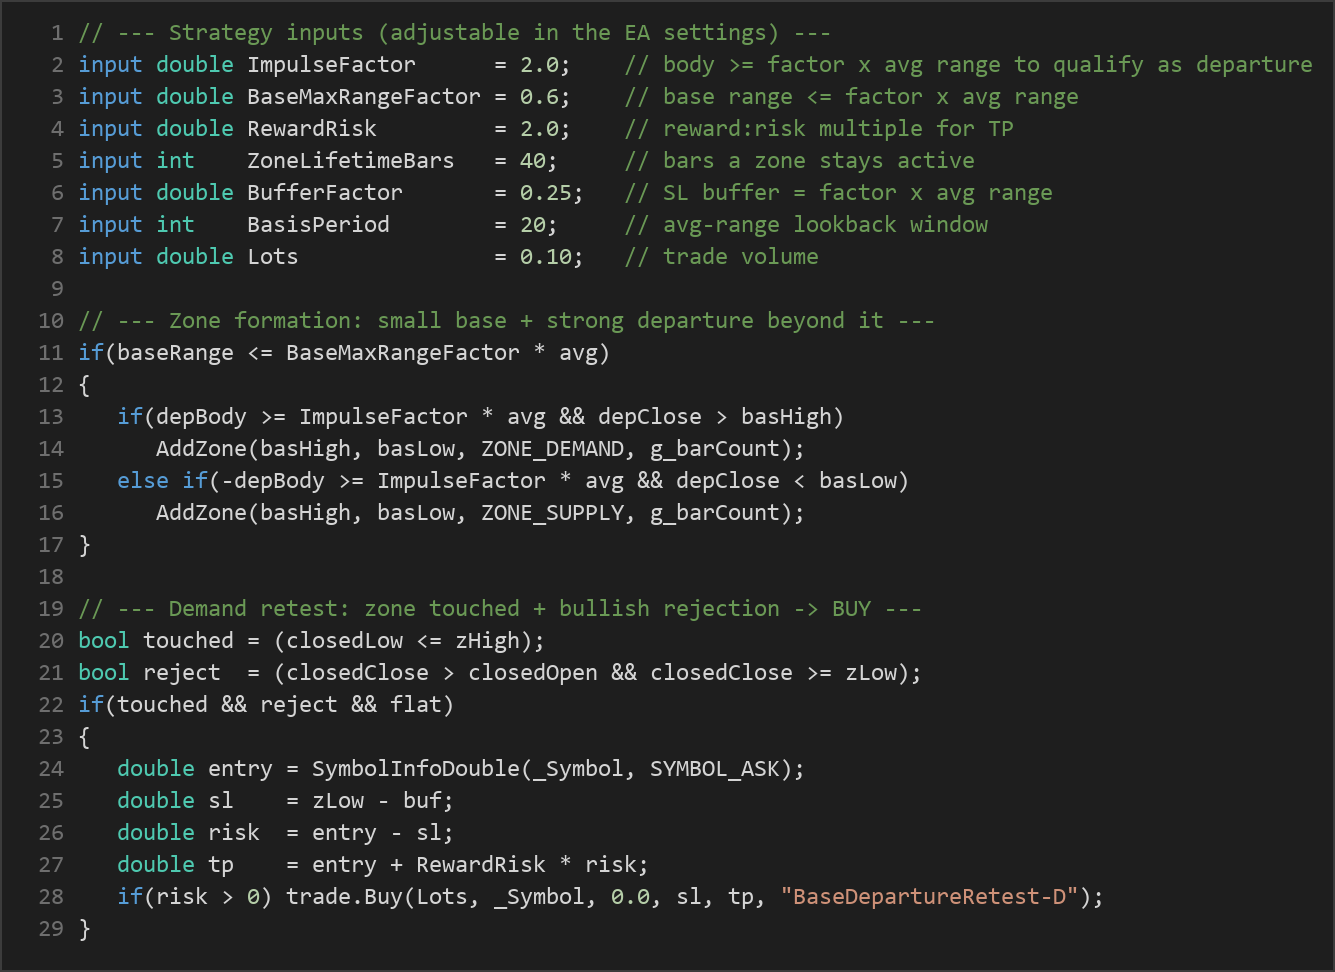
BaseMaxRangeFactortimes the average range. This represents a quiet consolidation pause. - The very next candle is a departure: a strong impulsive body (open-to-close distance) that is at least
ImpulseFactortimes the average range. - The departure closes beyond the base. If it closes above the base high, the base becomes a fresh demand zone (a potential buy area). If it closes below the base low, the base becomes a supply zone (a potential sell area).
Entry — the strategy signals a trade when price retests the zone:
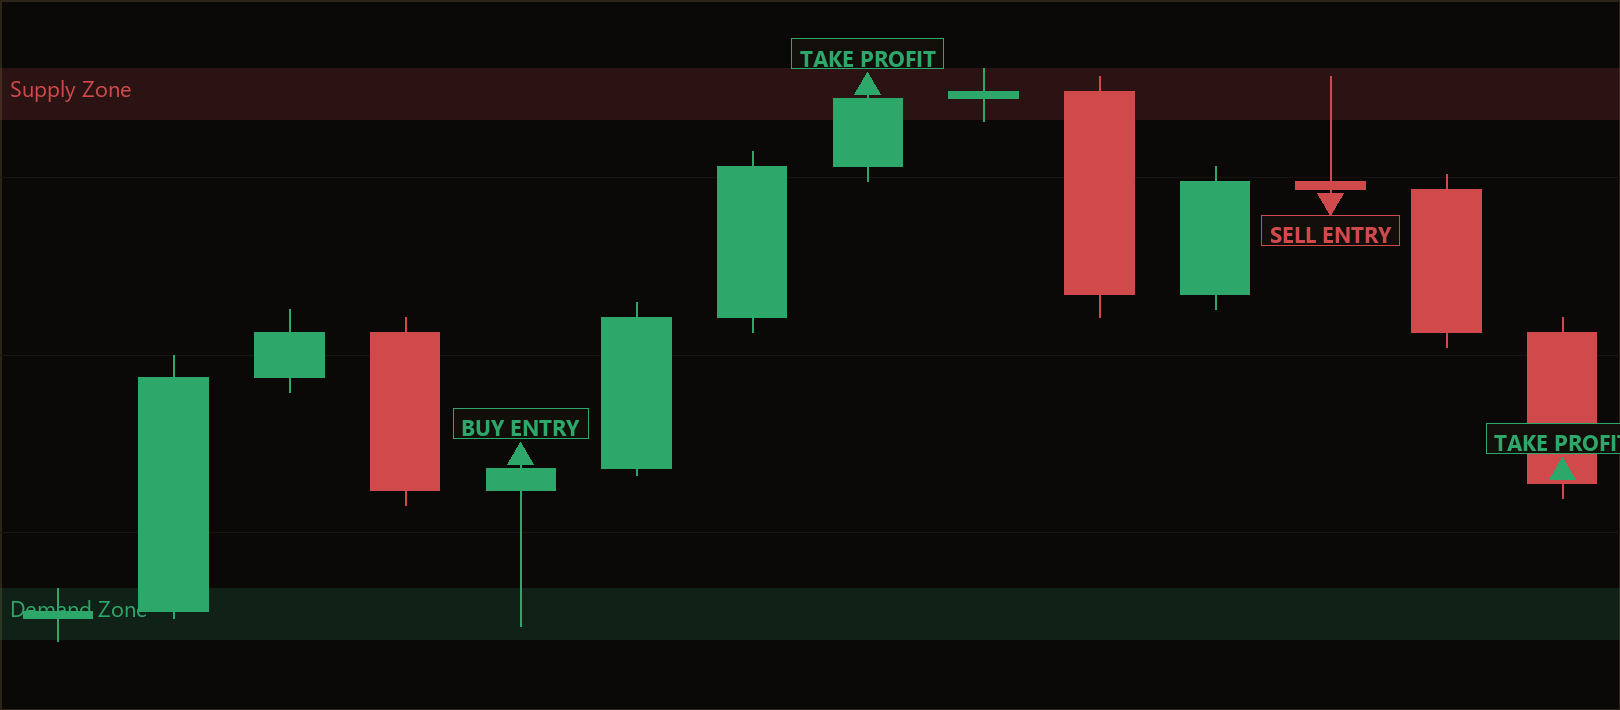
- For a demand zone, the strategy waits for a later candle whose low dips down into the zone (a "touch") and which then closes bullishly as a rejection candle — closing above its open and holding at or above the zone's low. When that retest-and-reject occurs and no position is open, it signals a buy at the current ask price.
- For a supply zone, it mirrors the logic: price must rally up to touch the zone and then print a bearish rejection candle closing below its open and at or below the zone's high, signalling a sell at the current bid.
Exit, stop-loss, and take-profit logic:
- Stop-loss sits just beyond the zone's distal (far) edge. For buys, the stop is placed below the zone low minus a small buffer; for sells, above the zone high plus a buffer. The buffer size is controlled by
BufferFactortimes the average range, giving the zone a little breathing room. - Take-profit is a fixed reward-to-risk multiple. The distance from entry to stop defines the risk, and the target is placed
RewardRisktimes that distance in the direction of the trade. - Zone invalidation: if price closes fully through a zone (below a demand low or above a supply high) before triggering, that zone is considered broken and discarded.
- Zone expiry: each zone is traded only once and automatically expires after
ZoneLifetimeBarscandles if it is never retested, keeping the strategy focused on the freshest structure.
Strategy Parameters
| Parameter | Default | Min | Max | Description |
|---|---|---|---|---|
| ImpulseFactor | 2.0 | 1.5 | 4.0 | How strong the departure candle's body must be, as a multiple of average range, to qualify as an impulse. Higher values demand more explosive moves. |
| BaseMaxRangeFactor | 0.6 | 0.3 | 1.2 | Maximum size of the base candle, as a fraction of average range. Lower values require a tighter, quieter consolidation. |
| RewardRisk | 2.0 | 1.0 | 4.0 | The reward-to-risk multiple used to set the take-profit relative to the stop-loss distance. |
| ZoneLifetimeBars | 40 | 10 | 120 | How many bars a zone remains active and tradeable before it expires unused. |
| BufferFactor | 0.25 | 0.0 | 1.0 | Extra padding behind the zone edge for the stop-loss, as a multiple of average range. |
| BasisPeriod | 20 | 10 | 50 | The lookback window used to calculate the average candle range that all comparisons are measured against. |
| Lots | 0.10 | 0.01 | 1.0 | The fixed trade volume in lots per position. |
Recommended Chart Settings
The Base Departure Retest strategy was designed as a general-purpose price-action engine and works on the concept of candle structure rather than any single market. As a starting point for study, many supply and demand traders apply zone systems like this to major forex pairs such as EUR/USD or GBP/USD on the H1 (1-hour) or H4 (4-hour) timeframes, where impulsive departures from consolidation are clean and zones are meaningful. The higher timeframes also produce fewer, higher-quality zones, which makes the logic easier to observe while learning.
Because the engine measures everything relative to a rolling average range, it adapts to different volatility regimes automatically. That said, results will vary considerably across symbols, timeframes, and market conditions. Always test any configuration on historical data and a demo account before drawing conclusions, and remember that a setting that behaves well in one market may behave very differently in another.
How to Install on MetaTrader 5
- Download the
BaseDepartureRetest.ex5file from the link below. - Copy it to your MT5
MQL5\Expertsfolder. - Restart MetaTrader 5 or refresh the Navigator panel.
- Drag the EA onto a chart matching the recommended symbol and timeframe.
- Configure the input parameters and enable Algo Trading.
What to Consider Before Using This EA
Like every approach, the Base Departure Retest engine has clear strengths and equally clear limitations, and understanding both is part of learning to evaluate any trading system.
Strengths of this approach:
- It is fully rules-based and indicator-free, so there is no lag from smoothing or repainting — entries are derived directly from candle structure.
- The fixed reward-to-risk target and distal-edge stop enforce a disciplined, pre-defined risk profile on every trade.
- Trading each zone only once and expiring stale zones helps avoid over-trading the same exhausted level.
Known limitations:
- Supply and demand zones are inherently discretionary concepts being mechanised, so the engine's strict definitions of "base" and "impulse" will sometimes miss zones a human would draw, and draw zones a human would skip.
- In ranging or choppy markets, departures are weak and retests are frequent, which can produce low-quality signals and repeated stop-outs as zones are broken shortly after forming.
- The strategy enters on the first valid retest only; if a strong zone is touched while a position from another zone is already open, the signal is skipped, so some opportunities are passed by design.
- A fixed lot size does not scale risk to account equity or to the varying stop distances between trades, which is something a thoughtful trader would address with position sizing.
This is a tool for studying how zone-based logic behaves, not a finished solution. Treat its signals as a structured way to observe supply and demand in action, and always validate behaviour yourself before relying on it.
Risk Management Tips
Sound risk management matters far more than any single entry rule. As you study this strategy, keep these general principles in mind:
- Risk only a small fraction per trade. A common educational guideline is to risk no more than 1–2% of account equity on any single position. Because this EA uses a fixed lot size, you may need to adjust the
Lotsinput to keep your per-trade risk within that band given the strategy's stop distance. - Understand drawdown. Even a well-designed strategy will experience losing streaks. Review the maximum historical drawdown before committing real capital, and ask yourself whether you could tolerate that decline emotionally and financially.
- Always start on a demo account. Run the EA in a simulated environment first so you can observe how zones form, how retests trigger, and how the stop and target behave — without risking real money.
- Size positions deliberately. Match your volume to your account size and to the distance of your stop, rather than using one fixed lot for every market and every setup.
- Keep a trading journal. Recording why each zone formed and how each trade resolved is one of the fastest ways to learn what the strategy does well and where it struggles.
Risk Warning
Trading foreign exchange, CFDs, and other leveraged financial instruments involves substantial risk of loss and is not suitable for all investors. The strategies and tools discussed on this page are provided for educational purposes only and do not constitute financial advice, investment recommendations, or solicitation to trade. Always consult a qualified financial adviser before making trading decisions. Past backtest performance is not indicative of future results.
Downloads
- Expert Advisor: BaseDepartureRetest.ex5 (64 downloads)
- Source Code: BaseDepartureRetest.mq5 (64 downloads)
- Documentation: BaseDepartureRetest.pdf (74 downloads)