Disclaimer: This article is for educational and informational purposes only. It does not constitute financial or investment advice. Trading forex and CFDs carries significant risk of loss. Past performance of any strategy — including backtests — does not guarantee future results. Never trade with money you cannot afford to lose.
What Is This Strategy?
Biweight Band Reversion is a mean-reversion trading strategy built around the Tukey biweight (bisquare) M-estimator of location — a robust-statistics method for finding a "fair value" price that is deliberately immune to spikes and outlier bars. Instead of anchoring to a moving average, a median, a VWAP, or a trimmed mean (all common tools, and all easily distorted by a few violent candles), the strategy computes an iteratively re-weighted centre in which each bar's influence shrinks with its distance from the middle and drops to exactly zero once it passes a statistically defined cut-off. The result is a centre line that reflects where the "normal" bars agree price belongs — which is precisely the level an over-stretched market tends to be pulled back toward.
The strategy is designed for calm, ranging markets rather than strong trends. It only looks to fade (trade against) a stretch when the robust centre is roughly flat, and it deliberately steps aside when price runs so far that it may be a genuine breakout rather than noise. This makes Biweight Band Reversion a useful case study for anyone learning how robust statistics — the mathematics of estimators that resist outliers — can be applied to price data.
As a learning tool, this EA is best suited to traders who already understand basic order mechanics (stop-loss, take-profit, spreads) and who want to explore how a spike-immune fair-value estimate differs from a conventional moving average. It is not a "set and forget" money tool; it is a transparent, parameter-driven example of one disciplined approach to mean reversion. Treat everything below as analysis, not a profit opportunity.
How It Works
The strategy rebuilds its picture of "fair value" once per newly closed bar, then checks whether the market has stretched far enough to justify a fade. Here is the logic in plain English.
Building the robust centre and bands:
- For the last
Windowclosed bars, it takes each bar's typical price — the average of high, low and close,(H+L+C)/3. - It finds the median of those typical prices, then the median absolute deviation (MAD) — a robust measure of how spread out the data is.
- It converts MAD into a robust standard deviation:
sigma = 1.4826 × MAD. - It then iterates the biweight centre
T: every bar gets a weight of(1 − u²)²whereuis its scaled distance from the current centre, and any bar beyond the cut-off distance (TuneC × sigma) is given a weight of exactly zero. Repeating this re-weighting a few times settles on a centre that ignores the outliers entirely. - Around that centre it draws a fade band at
T ± BandMult × sigma, and an outer guard fence atT ± GuardMult × sigma.
The flat-regime filter (why it stays out of trends):
- It measures the slope of the centre over the last
SlopeLookbackbars, expressed in sigma units. - If that slope is larger than
MaxSlope, the market is considered to be trending and no fade is taken. The strategy only engages when the centre is roughly flat.
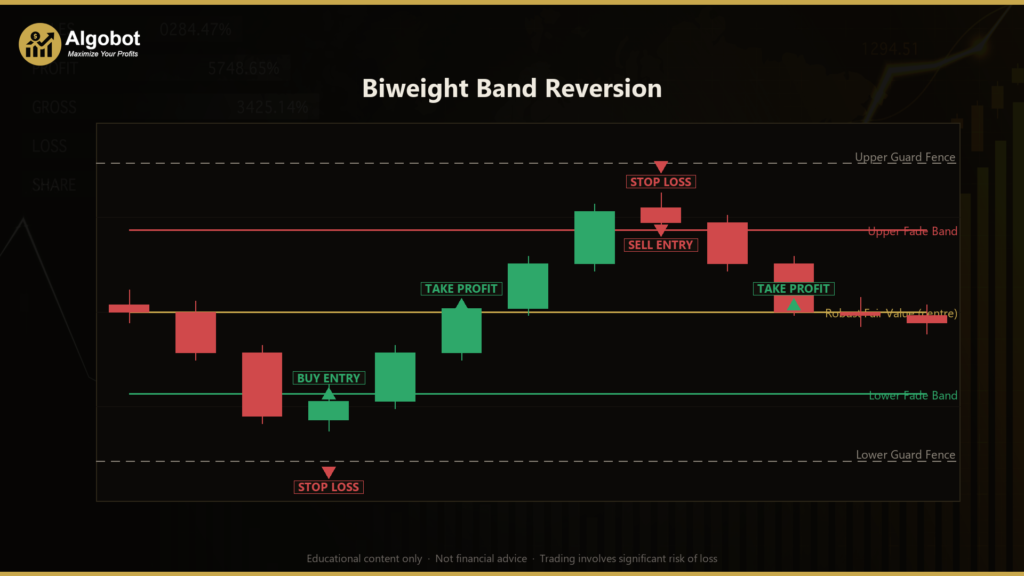
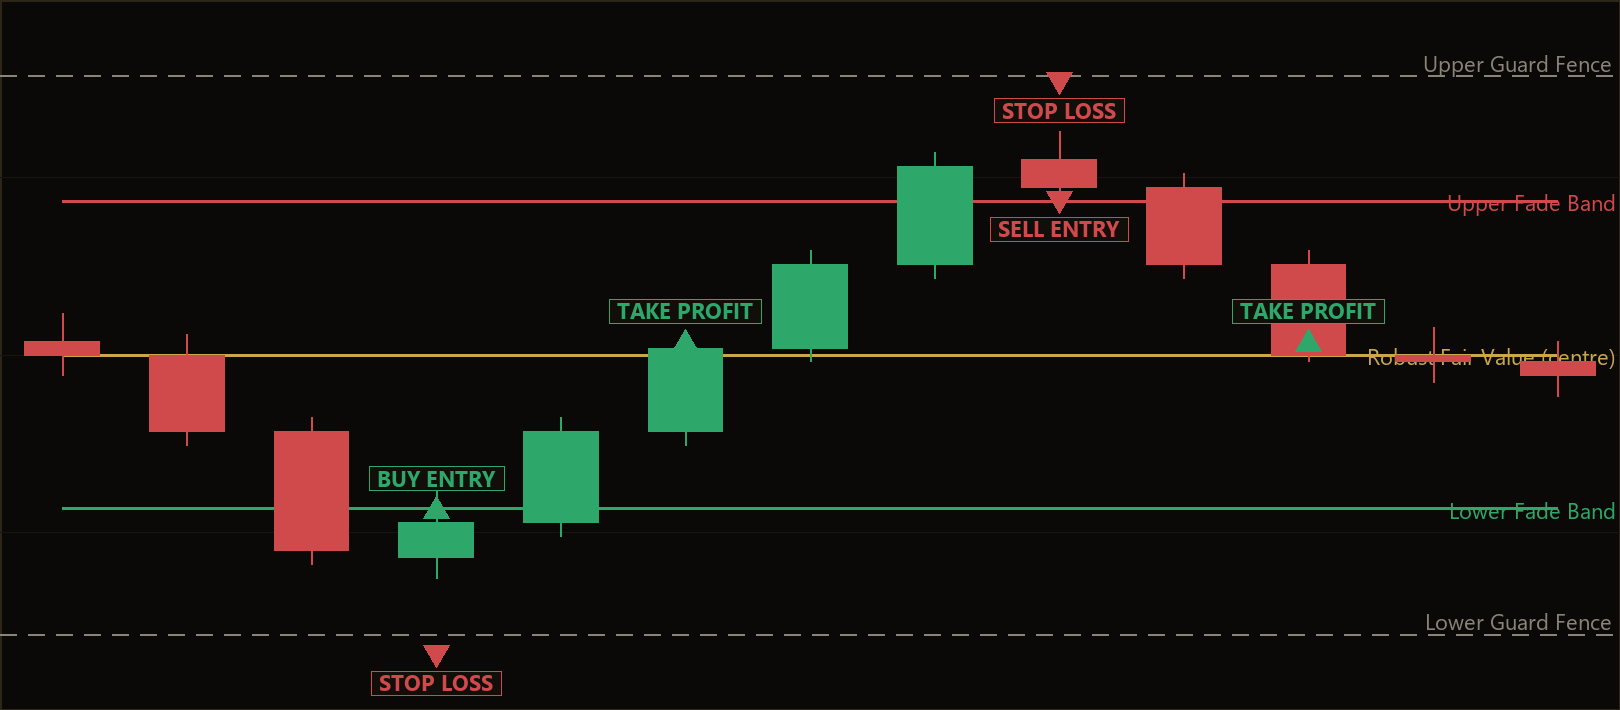
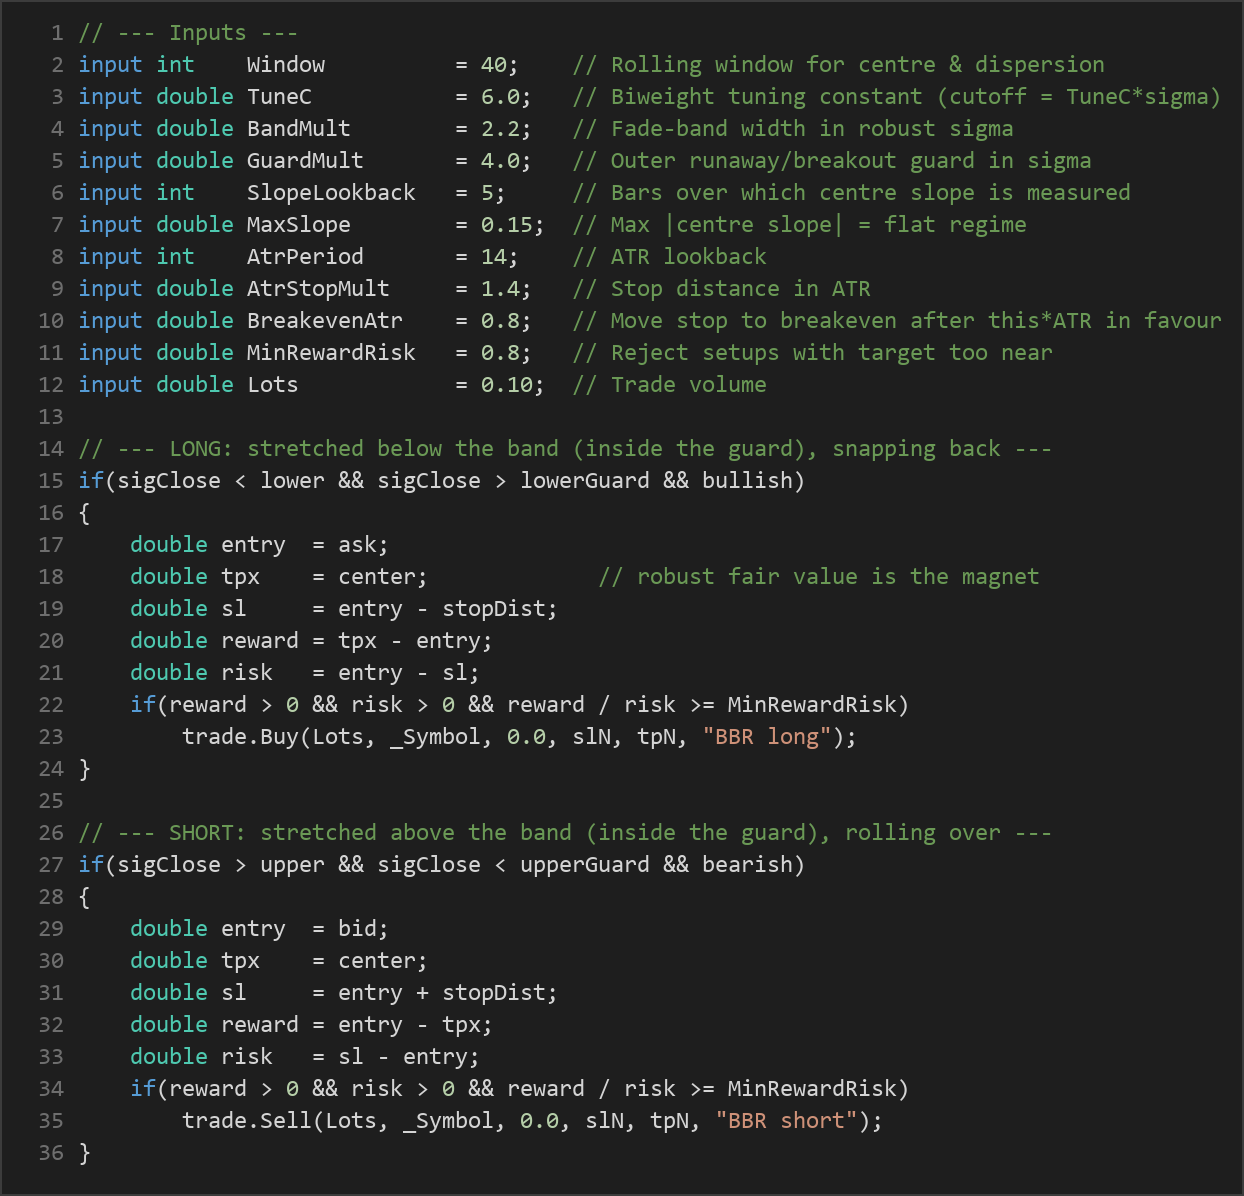
Long entry — the strategy signals a buy when:
- The just-closed bar closes below the lower band (stretched too far down), but above the lower guard fence (not a runaway breakout).
- The regime is flat, the spread is within
MaxSpreadPoints, and there is no existing position for this magic number. - The signal bar is bullish (closes above its open) — the first sign of a snap-back.
- Entry is at the Ask. The take-profit is the robust centre
Titself (the "magnet"), and the stop-loss is placedAtrStopMult × ATRbelow entry.
Short entry — the mirror image:
- The closed bar closes above the upper band but below the upper guard, the regime is flat, and the signal bar is bearish.
- Entry is at the Bid, take-profit is the centre
T, and the stop-loss isAtrStopMult × ATRabove entry.
Exit and risk logic:
- Take-profit is structural: it targets the robust centre, so the trade aims for reversion to fair value rather than a fixed pip goal.
- Stop-loss self-scales with volatility through ATR (Average True Range, a standard measure of typical bar range).
- Reward-to-risk filter: if price already sits too close to the centre — closer than
MinRewardRisktimes the stop distance — the setup is rejected as not worth the risk. - Breakeven lock: once price travels
BreakevenAtr × ATRin the trade's favour, the stop is moved to the entry price. A trade that half-works and then reverses is designed to cost nothing. - Only one position per magic number is allowed at a time.
Strategy Parameters
| Parameter | Default | Min | Max | Description |
|---|---|---|---|---|
| Window | 40 | 15 | 150 | Number of closed bars used to compute the biweight centre and its dispersion. |
| TuneC | 6.0 | 3.0 | 12.0 | Biweight tuning constant; the outlier cut-off is TuneC × sigma. Lower values reject outliers more aggressively. |
| BandMult | 2.2 | 1.0 | 4.0 | Width of the fade band as a multiple of robust sigma. |
| GuardMult | 4.0 | 2.5 | 8.0 | Outer guard fence in sigma units; a stretch beyond this is treated as a breakout and is not faded. |
| SlopeLookback | 5 | 2 | 25 | Number of bars over which the centre's slope is measured for the flat-regime gate. |
| MaxSlope | 0.15 | 0.02 | 0.60 | Maximum absolute centre slope (in sigma units) still counted as a flat, ranging regime. |
| AtrPeriod | 14 | 5 | 30 | Lookback period for the ATR used in stops, breakeven and reward:risk. |
| AtrStopMult | 1.4 | 0.5 | 4.0 | Stop-loss distance beyond entry, in multiples of ATR. |
| BreakevenAtr | 0.8 | 0.2 | 3.0 | Move the stop to breakeven once price travels this many ATR in favour. |
| MinRewardRisk | 0.8 | 0.3 | 3.0 | Reject setups whose target is closer than this multiple of the ATR stop distance. |
| MaxSpreadPoints | 80 | 5 | 300 | Skip new entries when the current spread (in points) exceeds this. |
| Lots | 0.10 | 0.01 | 1.0 | Trade volume in lots. |
| Magic | 4517 | 0 | 9,999,999 | Magic number identifying this EA's positions. |
Recommended Chart Settings
Biweight Band Reversion is intended for a liquid FX major or a metal (for example a pair like EUR/USD or an instrument like gold) on M5 to H1 timeframes, where robust reversion to a spike-immune fair value tends to be well behaved. The EA runs on whatever timeframe is selected at backtest or attach time — it uses only the primary chart timeframe.
Because the bands, the slope gate, the stop and the breakeven all self-scale (via sigma and ATR), the strategy adapts to changing volatility without manual re-tuning. That said, results will vary considerably across symbols, brokers, spreads and market conditions. A configuration that behaves one way in a quiet ranging period may behave very differently during high-impact news or a strong trend. Always test on the specific symbol and timeframe you intend to study.
How to Install on MetaTrader 5
- Download the .ex5 file from the link below
- Copy it to your MT5
MQL5\Expertsfolder - Restart MetaTrader 5 or refresh the Navigator panel
- Drag the EA onto a chart matching the recommended symbol and timeframe
- Configure the input parameters and enable Algo Trading
What to Consider Before Using This EA
Strengths of the approach. The headline idea — a fair-value line that mathematically discards outlier bars — is genuinely different from a moving average and worth studying. The biweight centre does not lurch after a single spike, so the reversion target is more stable than a mean-based one. The flat-regime slope gate and the outer guard fence are sensible attempts to keep the strategy out of trends and breakouts, which are historically where naive mean-reversion systems suffer their worst losses. The breakeven lock and the reward-to-risk filter show an emphasis on keeping individual losses contained.
Known limitations. Mean reversion is, by design, a strategy that "sells calm and buys panic," and its central risk is well known: when a range finally breaks into a real trend, a fade strategy can be caught on the wrong side. The guard fence reduces but does not eliminate this — price can slip through the band, trigger a fade, and then keep going before reaching the guard. The strategy also depends on the market actually being range-bound; in persistently trending or gappy conditions it may signal few trades or a run of losers. Robust estimators need enough data to be meaningful, so very short windows can produce noisy centres, while very long windows may lag regime changes.
Where it may underperform. Expect weaker behaviour around major news releases, during low-liquidity sessions with wide spreads, and in strong directional markets where "fair value" keeps moving. The MaxSpreadPoints filter helps avoid the worst spreads, but slippage and execution quality on your broker still matter. This EA is a structured example for learning, not a guarantee of any outcome.
Risk Management Tips
- Use a demo account first. Study how the strategy behaves in live-like conditions before risking real capital.
- Size positions conservatively. A widely taught guideline is to risk no more than 1–2% of account equity per trade. Adjust the
Lotsvalue to match your account size and the ATR-based stop distance, not the other way around. - Understand drawdown. Even a well-designed strategy will string together losing trades. Know the maximum drawdown you are willing to tolerate before you begin, and stop if it is reached.
- Respect the spread and session. Wide spreads erode a mean-reversion edge quickly; the
MaxSpreadPointsfilter exists for a reason. - Never over-optimise. Parameter values that look ideal on one historical stretch often fail on new data. Favour robust, sensible settings over curve-fitted ones.
- Only trade capital you can afford to lose, and treat this EA as an educational exploration of robust statistics in trading, not as a source of income.
Risk Warning
Trading foreign exchange, CFDs, and other leveraged financial instruments involves substantial risk of loss and is not suitable for all investors. The strategies and tools discussed on this page are provided for educational purposes only and do not constitute financial advice, investment recommendations, or solicitation to trade. Always consult a qualified financial adviser before making trading decisions. Past backtest performance is not indicative of future results.
Downloads
- Expert Advisor: BiweightBandReversion.ex5 (27 downloads)
- Source Code: BiweightBandReversion.mq5 (26 downloads)
- Documentation: BiweightBandReversion.pdf (28 downloads)