
Disclaimer: This article is for educational and informational purposes only. It does not constitute financial or investment advice. Trading forex and CFDs carries significant risk of loss. Past performance of any strategy — including backtests — does not guarantee future results. Never trade with money you cannot afford to lose.
What Is This Strategy?
The Self Exciting Momentum Cluster is a momentum and trend-following strategy for MetaTrader 5 built on a Hawkes self-exciting point process — the same branch of mathematics used to model earthquake aftershocks and bursts of order-flow in financial markets. Instead of measuring how big volatility is (the job of Bollinger Bands, Keltner Channels or a raw ATR expansion filter), it measures how clustered directional shocks have become, and it uses that clustering as both the trigger to enter and the direction to trade.
The core observation behind the strategy is that large directional moves are not independent of one another. One strong up-bar tends to make the next strong up-bar more likely — buying begets buying, protective stops cascade, and momentum-chasing participants pile in. In statistics, "an event that raises the probability of more same-kind events" is precisely the definition of a self-exciting process. The strategy tracks two directional "intensities," one for up-shocks and one for down-shocks. Each intensity jumps when a fresh shock fires and then decays geometrically between shocks, so the signal stays alive only while the herd behaviour is genuinely ongoing.
As a learning tool, this EA is well suited to traders who already understand basic indicators like the ATR (Average True Range, a measure of typical price movement) and the EMA (Exponential Moving Average, a trend baseline) and who want to explore a more advanced, research-flavoured way of thinking about momentum. It is designed for trending markets where directional bursts genuinely cluster, and it is best studied as an analysis of clustering behaviour rather than treated as a shortcut to results.
How It Works
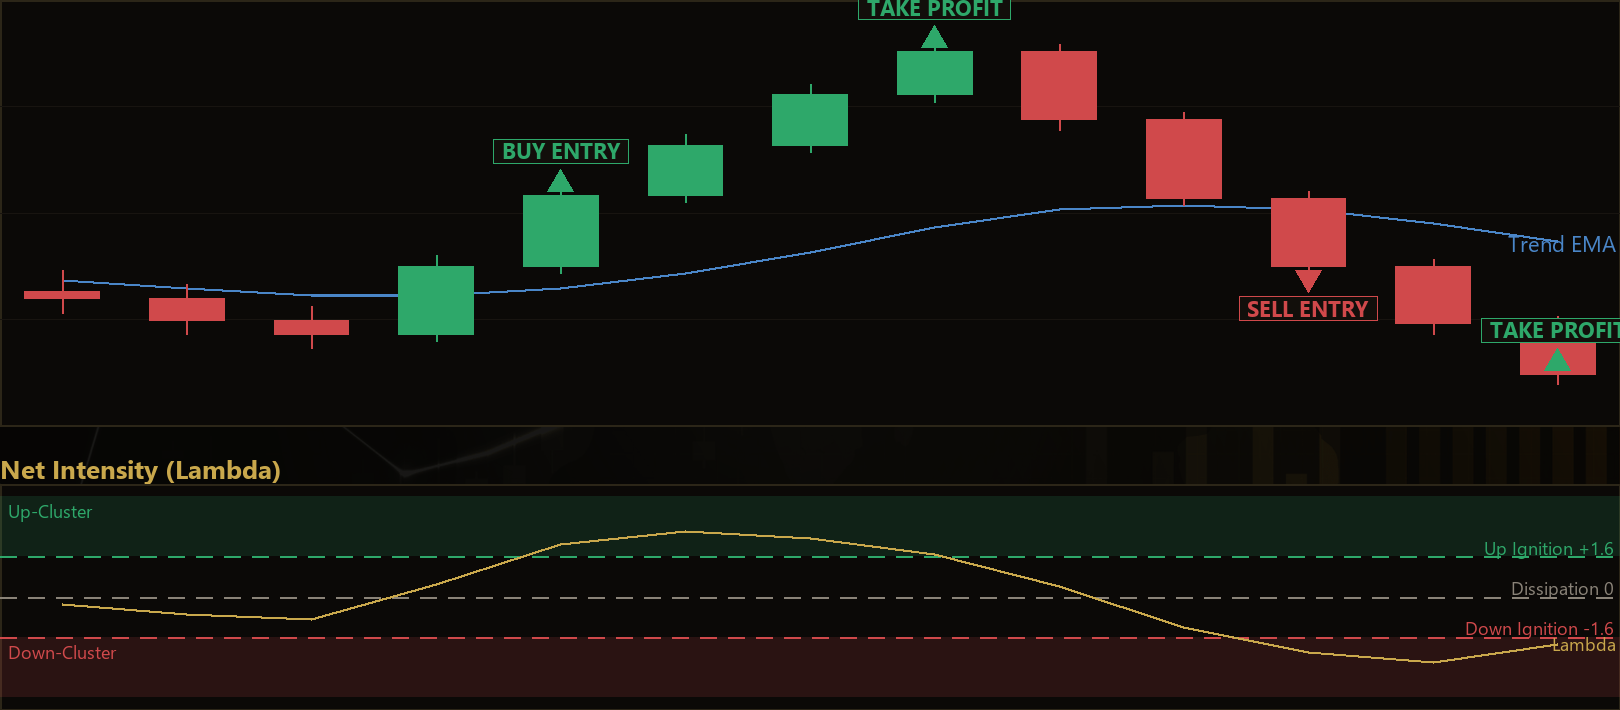
The strategy processes one completed bar at a time and maintains a running pair of intensities that together form a single net intensity, called Lambda (lambda_up − lambda_down). Here is the logic in plain English:
- Defining a shock. On each new bar, the strategy compares the bar's price change (
Close − PrevClose) against a volatility-normalised threshold,EventThreshold × ATR. If the move is larger than that threshold, the bar is treated as a directional "shock." Because the threshold scales with ATR, it automatically adapts to any symbol or timeframe. - Updating the intensities. Every bar, both intensities are first multiplied by the
Decayfactor (so they fade toward zero when nothing is happening). If a fresh up-shock fired,Excitationis added to the up-intensity; if a down-shock fired, it is added to the down-intensity. The difference between the two is the net intensity, Lambda. - Long entry signal. The strategy signals a long when Lambda makes a fresh cross above the
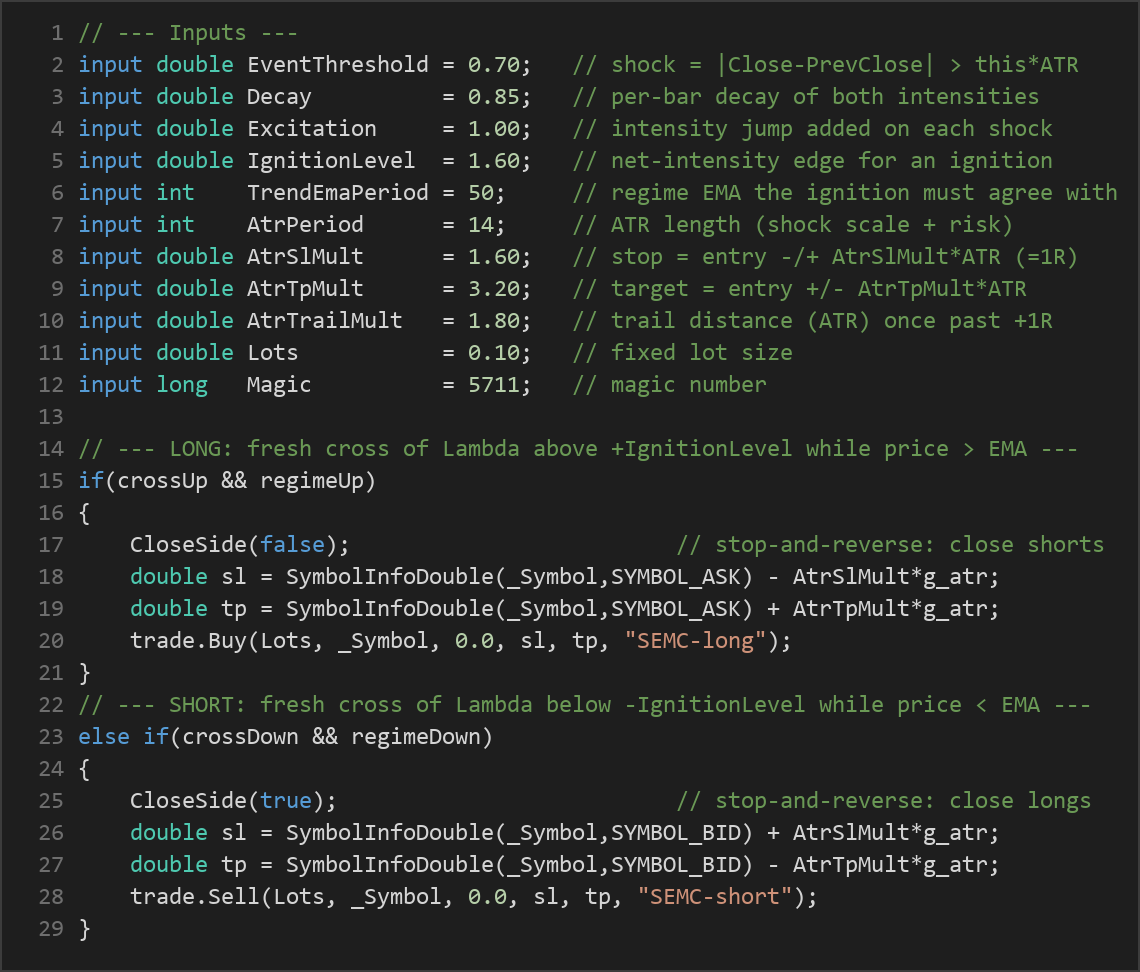
+IgnitionLevelband (an up-cluster has just ignited) and price is above the slower Trend-EMA, meaning the cluster agrees with the prevailing regime. - Short entry signal. The strategy signals a short when Lambda makes a fresh cross below the
−IgnitionLevelband and price is below the Trend-EMA. - Stop-and-reverse. If an opposite fresh ignition appears while a trade is open, the current position is closed and a trade in the new direction is opened.
- Dissipation exit. When the net intensity crosses back through zero against the open trade — meaning the self-excitation is spent — the position is flattened early, rather than waiting for a full opposite cluster to build.
- Stop-loss logic. Every trade is protected by an ATR-based stop placed at
AtrSlMult × ATRaway from entry. This distance also defines "1R," the strategy's basic unit of risk. - Take-profit logic. A fixed ATR target is set at
AtrTpMult × ATRfrom entry. - Break-even and trailing. Once a trade moves at least +1R in your favour, the stop is advanced to break-even and then trailed by
AtrTrailMult × ATRon every tick, which is designed to cap give-back near scratch and keep the equity curve shallow.
Strategy Parameters
| Parameter | Default | Min | Max | Description |
|---|---|---|---|---|
| EventThreshold | 0.70 | 0.30 | 2.00 | A bar counts as a directional shock when the price change exceeds this multiple of ATR. Lower values make more bars count as shocks. |
| Decay | 0.85 | 0.60 | 0.97 | Per-bar geometric decay of both intensities; effectively the memory length of a cluster. Higher values remember shocks longer. |
| Excitation | 1.00 | 0.30 | 2.00 | The size of the intensity jump added on each shock (the self-excitation strength). |
| IgnitionLevel | 1.60 | 0.60 | 4.00 | The net-intensity band edge that Lambda must cross to declare an ignition (entry trigger). |
| TrendEmaPeriod | 50 | 20 | 200 | Period of the slower EMA that defines the regime the ignition must agree with. |
| AtrPeriod | 14 | 7 | 30 | ATR length used for the shock threshold and for stop, target and trailing distances. |
| AtrSlMult | 1.60 | 0.50 | 4.00 | Stop-loss distance in ATR multiples; also defines the 1R risk unit. |
| AtrTpMult | 3.20 | 1.00 | 6.00 | Take-profit distance in ATR multiples. |
| AtrTrailMult | 1.80 | 0.50 | 4.00 | Trailing-stop distance in ATR multiples, applied once a trade is past +1R. |
| Lots | 0.10 | 0.01 | 1.00 | Fixed position size in lots. |
| Magic | 5711 | 0 | 9,999,999 | Unique identifier the EA uses to manage only its own trades. |
Recommended Chart Settings
The Self Exciting Momentum Cluster is timeframe-agnostic because every threshold is normalised by ATR, but it was designed with trending instruments in mind. A sensible starting playground is a trending FX major or a metal — for example EURUSD or XAUUSD (gold) — on the M30 or H1 timeframe, where directional bursts tend to cluster clearly enough for the Hawkes intensities to build meaningful signals.
Because the strategy runs on whichever timeframe you attach it to, you can experiment across different charts. Keep in mind that behaviour, signal frequency and results will vary considerably across symbols, timeframes and market conditions, so any settings that look reasonable on one instrument should be re-examined on another before you draw conclusions.
How to Install on MetaTrader 5
- Download the .ex5 file from the link below
- Copy it to your MT5
MQL5\Expertsfolder - Restart MetaTrader 5 or refresh the Navigator panel
- Drag the EA onto a chart matching the recommended symbol and timeframe
- Configure the input parameters and enable Algo Trading
What to Consider Before Using This EA
Like any approach, this strategy has genuine strengths and real limitations, and it is worth weighing both honestly.
Where the approach is interesting. The self-exciting design elegantly folds trigger and direction into a single number, so you are not stacking multiple oscillators that can disagree. Because shocks are ATR-normalised, the same parameter set behaves consistently across symbols and timeframes without manual retuning. The Trend-EMA filter helps avoid taking clusters that fight the larger regime, and the layered exits — dissipation exit, stop-and-reverse, break-even and ATR trail — are all aimed at keeping drawdown shallow rather than maximising any single trade.
Known limitations. Self-exciting momentum logic is, by construction, a trend-and-continuation tool. In choppy, range-bound or mean-reverting conditions, clusters can ignite and then dissipate quickly, producing whipsaw entries that the dissipation exit closes at a small loss. The strategy also acts once per closed bar for its signals, so it will not react intrabar to sudden reversals except through the tick-by-tick trailing stop. Parameters such as Decay and IgnitionLevel interact in subtle ways — a longer memory paired with a low ignition band can keep the strategy in trades longer than intended, while the opposite combination may rarely trigger at all.
When it may underperform. Expect weaker behaviour during low-volatility drift where no bar clears the shock threshold, during news-driven spikes that reverse immediately, and in sideways markets that repeatedly cross the EMA. This is a strategy to study and stress-test, not to assume will suit every environment.
Risk Management Tips
Sound risk management matters more than any single indicator. As general educational principles:
- Size positions conservatively. A common guideline is to risk no more than 1–2% of account equity on any single trade. Because this EA uses a fixed lot size, you should calculate what that lot represents in monetary risk given the ATR-based stop before trading it.
- Understand your drawdown. Even strategies designed for a shallow equity curve experience losing streaks. Know the maximum drawdown you are willing to tolerate and how the fixed-lot sizing behaves during a run of losses.
- Always demo first. Run the EA on a demo account for an extended period across different market conditions before considering any live use. This lets you observe how often it trades and how the exits behave without financial exposure.
- Diversify and don't over-optimise. Curve-fitting parameters to one historical period rarely holds up. Test on out-of-sample data and across multiple symbols.
- Keep expectations grounded. No indicator or point-process model removes uncertainty from markets. Treat this tool as a way to learn about momentum clustering, not as a substitute for disciplined risk control.
Risk Warning
Trading foreign exchange, CFDs, and other leveraged financial instruments involves substantial risk of loss and is not suitable for all investors. The strategies and tools discussed on this page are provided for educational purposes only and do not constitute financial advice, investment recommendations, or solicitation to trade. Always consult a qualified financial adviser before making trading decisions. Past backtest performance is not indicative of future results.
Downloads
- Expert Advisor: SelfExcitingMomentumCluster.ex5 (19 downloads)
- Source Code: SelfExcitingMomentumCluster.mq5 (24 downloads)
- Documentation: SelfExcitingMomentumCluster.pdf (27 downloads)