Disclaimer: This article is for educational and informational purposes only. It does not constitute financial or investment advice. Trading forex and CFDs carries significant risk of loss. Past performance of any strategy — including backtests — does not guarantee future results. Never trade with money you cannot afford to lose.
What Is This Strategy?
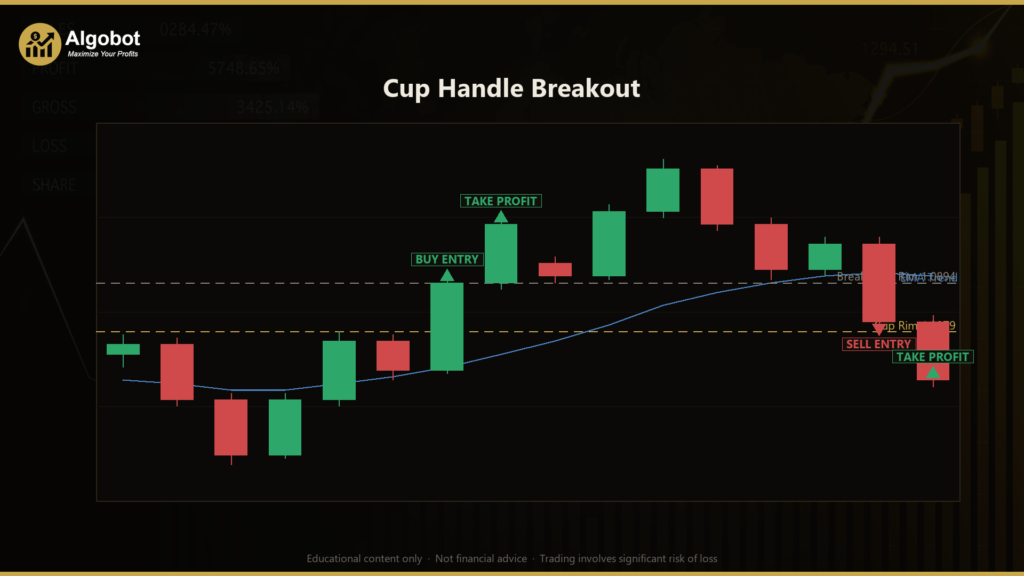
The Cup Handle Breakout is an automated pattern-recognition strategy built around one of the most famous chart formations in technical analysis: William O'Neil's cup-and-handle. Rather than relying on a single oscillator, it reads the geometry of price — a rounded base (the "cup") followed by a small, shallow drift-back consolidation (the "handle") — and uses an Exponential Moving Average (EMA) as a trend filter and the Average True Range (ATR) as its volatility yardstick. It is a breakout continuation strategy, meaning it looks to enter in the direction of the prevailing trend the moment price decisively clears a well-defined resistance level.
The cup-and-handle pattern describes a market that sells off in a smooth, saucer-shaped curve, recovers back to roughly the same level it left from, and then pauses in a tight, shallow pullback just below that recovered high (the "rim"). When price finally pushes through the rim, the theory holds that the accumulation built up during the base releases into a measured advance. This strategy encodes that story into strict, testable rules and trades it symmetrically — a normal rounded-bottom cup for long trades, and an inverted rounded-top cup for shorts.
As a learning tool, the Cup Handle Breakout is well suited to traders who want to understand how a subjective, hand-drawn chart pattern can be translated into objective, quantifiable conditions. It is designed for liquid markets — a major forex pair or an index — on intraday-to-swing timeframes such as M15 through H4. It is best viewed as a study in pattern structure and disciplined risk placement, not as a shortcut to returns.
How It Works
The strategy processes each freshly closed bar (it does not act on the still-forming bar, which avoids repainting). It measures a cup over the most recent CupBars bars before the handle, splits that window into equal left, middle, and right thirds, and then validates the handle and the breakout bar. Here is what the strategy checks, in plain English:
- A genuine cup shape (the saucer test). For a long, the lowest low must sit in the middle third and be below the lows of both the left and right thirds — a true U-shape, not a one-way slope. The short side mirrors this: the highest high must arch above both side highs (an inverted U).
- Sufficient depth. The cup depth (average rim minus the cup bottom) must exceed
MinDepthAtr× ATR. This rejects flat, shallow "cups" that are really just noise. - Level rims. The left rim and right rim must be roughly the same height — their difference cannot exceed
RimTolAtr× ATR — so the base is balanced rather than lopsided. - A shallow handle. Over the
HandleBarsbars immediately before the breakout, the pullback from the rim may retrace at mostHandleMaxDepthof the cup's depth. The handle must stay above the cup bottom and must not have already closed beyond the rim — the breakout must still lie ahead. - A decisive breakout bar. The just-closed bar must close past the rim by more than
BreakBufferAtr× ATR, have a same-direction body (bullish close for longs, bearish for shorts), be the first close beyond the rim, and agree with theTrendPeriodEMA trend context.
When all three groups of conditions align, the strategy signals an entry and manages the position as follows:
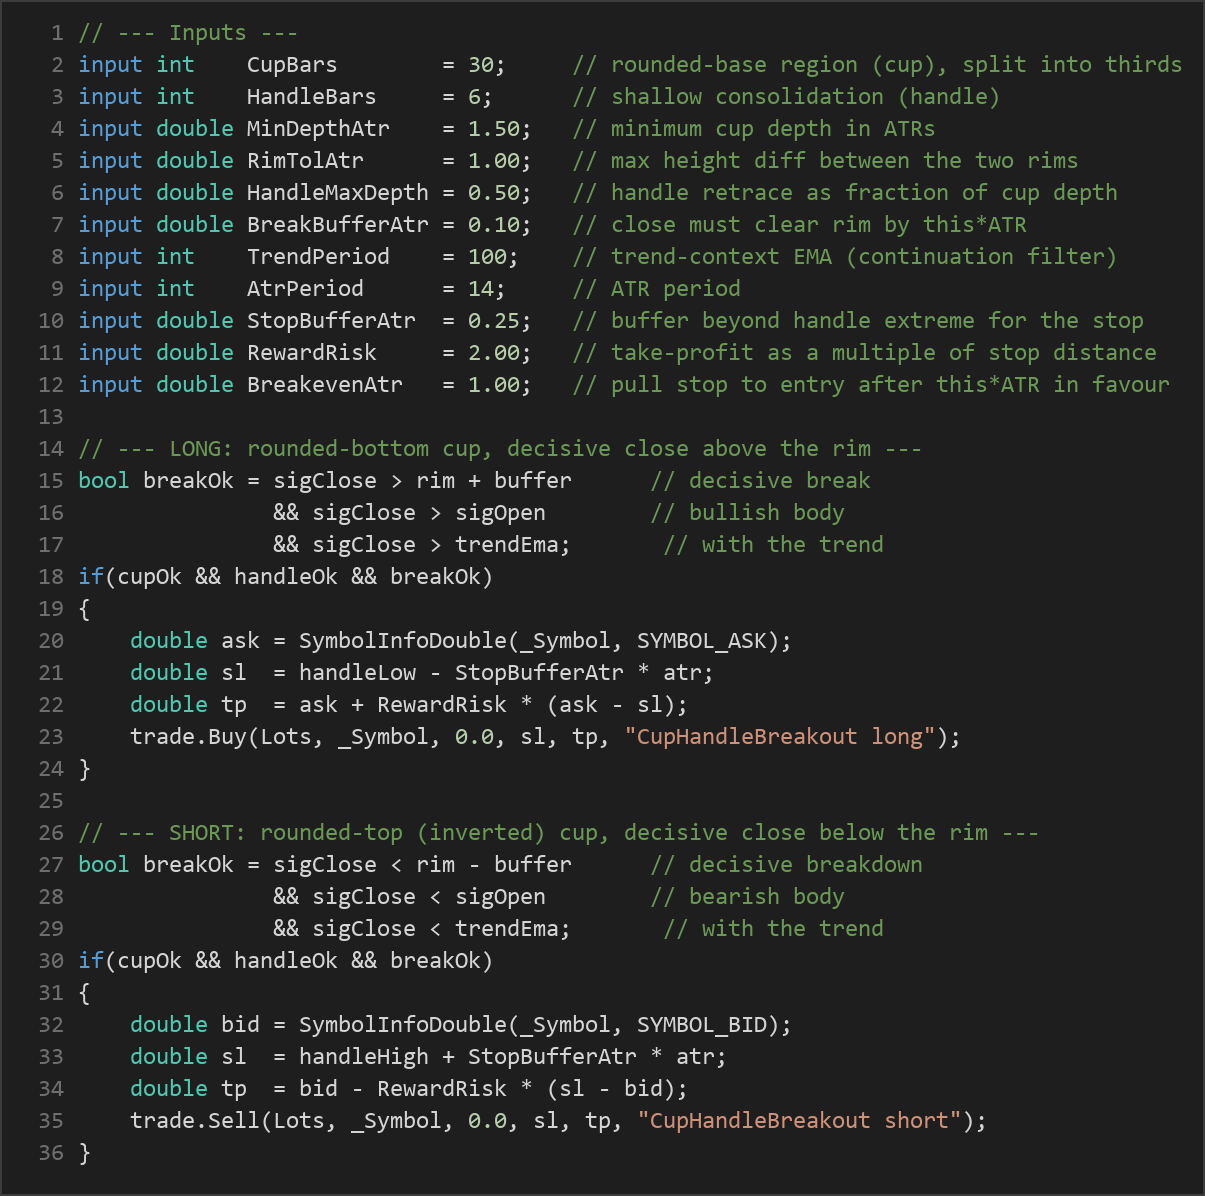
- Structural stop-loss. The stop is placed just past the handle extreme —
StopBufferAtr× ATR below the handle low for a long (above the handle high for a short). Because a valid handle hugs the rim, this invalidation level sits only a short distance from entry, keeping each risk small and bounded. - Reward:risk take-profit. The take-profit is set at
RewardRiskmultiples of that (tight) stop distance, producing an asymmetric payoff structure. - Failed-breakout fast exit. If a later bar closes back inside the rim, the breakout is treated as failed and the trade is closed immediately — usually well before the structural stop is reached.
- Breakeven ratchet. Once price runs
BreakevenAtr× ATR in the trade's favour, the stop is pulled to the entry price, so a trade that has moved well into profit is protected from turning into a loss.
Only one position is held at a time, and the logic is fully symmetric between long and short setups.
Strategy Parameters
| Parameter | Default | Min | Max | Description |
|---|---|---|---|---|
| CupBars | 30 | 12 | 60 | Length of the rounded-base region (the cup), split internally into three equal thirds. |
| HandleBars | 6 | 3 | 15 | Length of the shallow consolidation that hugs the rim (the handle). |
| MinDepthAtr | 1.50 | 0.50 | 5.00 | Minimum cup depth in ATRs; rejects flat "cups" that are really noise. |
| RimTolAtr | 1.00 | 0.25 | 3.00 | Maximum height difference between the two rims, in ATRs (rim symmetry / level base). |
| HandleMaxDepth | 0.50 | 0.20 | 0.80 | Maximum fraction of the cup depth the handle may retrace (a shallow handle). |
| BreakBufferAtr | 0.10 | 0.00 | 1.00 | Decisive-break margin; the breakout close must clear the rim by this × ATR. |
| TrendPeriod | 100 | 20 | 250 | Trend-context EMA period; breaks are taken only with the trend (continuation filter). |
| AtrPeriod | 14 | 7 | 28 | Averaging period for the ATR volatility measure. |
| StopBufferAtr | 0.25 | 0.00 | 1.50 | Extra ATR buffer placed beyond the handle extreme for the structural stop. |
| RewardRisk | 2.00 | 0.50 | 6.00 | Take-profit as a multiple of the (tight) stop distance. |
| BreakevenAtr | 1.00 | 0.00 | 3.00 | Pull the stop to breakeven after price runs this × ATR in favour. |
| Lots | 0.10 | 0.01 | 1.00 | Order volume (position size in lots). |
| Magic | 7314 | 0 | 9,999,999 | Magic number used to identify this EA's trades. |
Recommended Chart Settings
The Cup Handle Breakout was designed to run on a single primary timeframe and suits a liquid FX major or an index. Practical timeframes for observing the pattern are M15 to H4 — long enough for a cup to form with real structure, short enough to generate a reasonable number of setups for study. The strategy is timeframe-agnostic by design, so the symbol and period are chosen at backtest time.
Because the cup depth, rim tolerance, break buffer, and stop distance are all scaled by ATR, the strategy adapts automatically to different volatility environments. Even so, results will vary considerably across symbols, sessions, and market regimes. Always test any configuration on your chosen instrument and timeframe before drawing conclusions.
How to Install on MetaTrader 5
- Download the .ex5 file from the link below
- Copy it to your MT5
MQL5\Expertsfolder - Restart MetaTrader 5 or refresh the Navigator panel
- Drag the EA onto a chart matching the recommended symbol and timeframe
- Configure the input parameters and enable Algo Trading
What to Consider Before Using This EA
Strengths of this approach. The cup-and-handle is a widely studied, intuitive pattern, and encoding it into strict rules removes the subjectivity of drawing curves by hand. The structural stop just below the handle is a genuine strength: because a valid handle is shallow and hugs the rim, the invalidation level is close to entry, which keeps individual losses small and well-defined. Layering a trend filter, a failed-breakout exit, and a breakeven ratchet on top of that gives the strategy several independent ways to limit damage on a trade that does not work.
Known limitations. Breakout strategies are, by nature, vulnerable to false breaks — price clears the rim, triggers entry, then reverses. The buffer, the first-close requirement, and the failed-breakout exit are all attempts to filter these, but no filter eliminates them. In choppy, range-bound conditions the strategy may take a series of small losses as breakouts fail to follow through. Because it demands a fairly specific geometric shape, valid setups can also be infrequent, which means fewer trades and a longer path to a statistically meaningful sample.
Where it may underperform. Very quiet, low-volatility markets can struggle to produce cups that clear the MinDepthAtr threshold, while violent, gapping conditions can invalidate the neat rim symmetry the pattern relies on. The trend filter helps keep trades aligned with the broader move, but a sharply reversing market can whipsaw both long and short setups. Treat this EA as a framework for studying breakout behaviour rather than a finished, all-weather system.
Risk Management Tips
Sound risk management matters more than any single entry pattern. Consider these general principles as you study this strategy:
- Size positions conservatively. A common educational guideline is to risk no more than 1–2% of account equity per trade. Set the
Lotsvalue so that the distance to the structural stop represents only a small fraction of your balance. - Use a demo account first. Run the EA on a demo or simulation account until you understand how it behaves across different symbols, sessions, and volatility regimes.
- Understand drawdown. Even a strategy with tight, well-placed stops will experience losing streaks. Study the depth and duration of historical drawdowns so a run of losers does not surprise you into abandoning your plan.
- Respect leverage. Leverage magnifies both gains and losses. Keep it modest, especially while learning.
- Review and adjust. Markets evolve. Periodically re-examine whether the parameters and instrument you have chosen still match current conditions, and never assume past behaviour will repeat.
Risk Warning
Trading foreign exchange, CFDs, and other leveraged financial instruments involves substantial risk of loss and is not suitable for all investors. The strategies and tools discussed on this page are provided for educational purposes only and do not constitute financial advice, investment recommendations, or solicitation to trade. Always consult a qualified financial adviser before making trading decisions. Past backtest performance is not indicative of future results.
Downloads
- Expert Advisor: CupHandleBreakout.ex5 (48 downloads)
- Source Code: CupHandleBreakout.mq5 (49 downloads)
- Documentation: CupHandleBreakout.pdf (54 downloads)