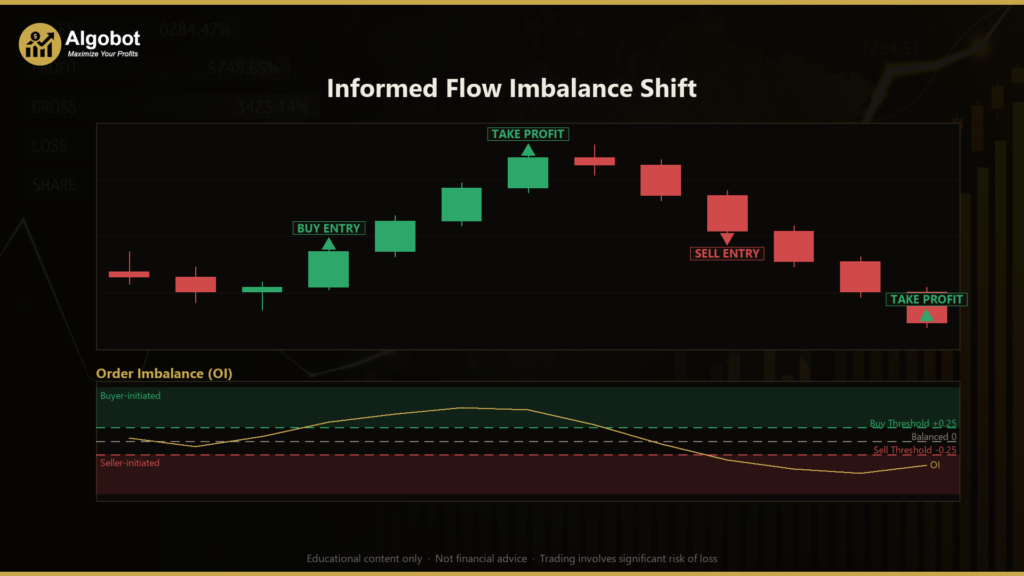
Disclaimer: This article is for educational and informational purposes only. It does not constitute financial or investment advice. Trading forex and CFDs carries significant risk of loss. Past performance of any strategy — including backtests — does not guarantee future results. Never trade with money you cannot afford to lose.
What Is This Strategy?
The Informed Flow Imbalance Shift is a market-microstructure, order-flow strategy built on Bulk Volume Classification (BVC) — the same volume-splitting technique that powers the well-known VPIN ("Volume-Synchronized Probability of Informed Trading") flow-toxicity research by Easley, López de Prado, and O'Hara. Rather than using a traditional oscillator like RSI or MACD, this Expert Advisor (EA) tries to read who is driving each bar's volume — buyers or sellers — and trades in the direction of that classified order flow when it decisively tips one way.
Most simple volume tools use a crude rule: an up-bar counts as buying volume and a down-bar counts as selling volume. Bulk Volume Classification is more nuanced. It divides each bar's volume probabilistically between buyers and sellers using the standard-normal CDF (cumulative distribution function, denoted Φ) of the bar's standardized price change. A tiny move on heavy volume is treated as roughly balanced two-sided trade; a large move on the same volume is classified as almost entirely one-sided. Summing these signed, volume-weighted classifications over a rolling window produces an order-imbalance oscillator bounded between −1 and +1.
This strategy is designed for traders who want to study order-flow concepts and volatility-normalized signal construction on a liquid instrument. It is a trend-following / flow-following system best suited to those learning how microstructure ideas translate into a mechanical, rule-based EA. It is an analytical learning tool — not a shortcut — and it works on whatever timeframe is selected at backtest time.
How It Works
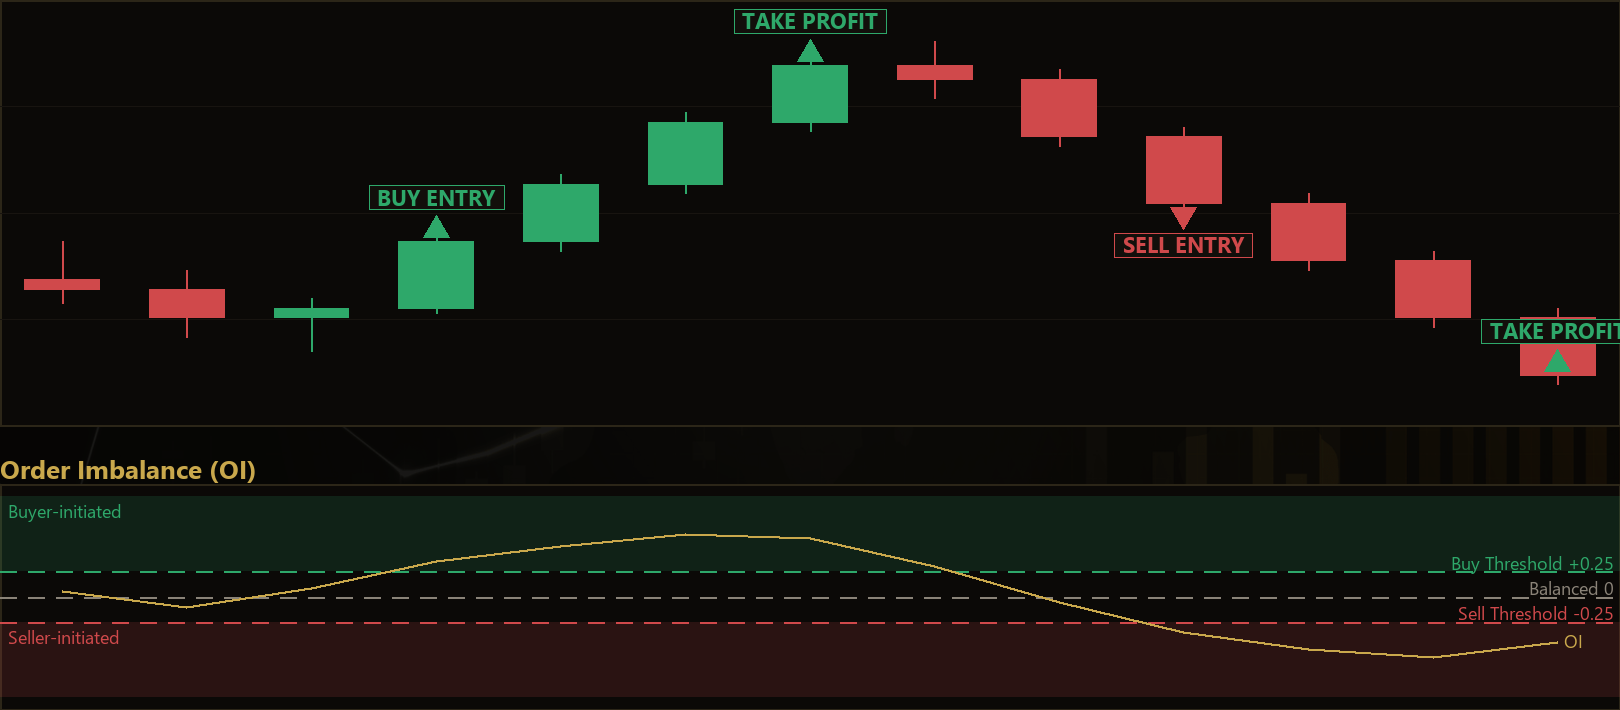
The core of the strategy is the order-imbalance oscillator, often written as OI. On every newly-closed bar the EA recomputes it and looks for a fresh shift across a threshold. Here is the logic in plain English:
- Classify each bar's volume. For each bar the EA measures the close-to-close price change (dP), then standardizes it by dividing by sigma — the rolling standard deviation of price changes over a longer window. This standardized value (z) is passed through the normal CDF Φ(z) to estimate the fraction of that bar's volume that was buyer-initiated. Sellers get the remainder.
- Build the oscillator. Over the last
FlowPeriodbars, the EA sums the signed, volume-weighted classification and divides by total volume:OI = Σ [ V × (2·Φ(z) − 1) ] / Σ V. A reading near +1 means the window's volume was overwhelmingly buyer-initiated (accumulation); near −1 means seller-initiated (distribution); near 0 means two-sided. - Wait for a fresh threshold cross. The strategy does not fade imbalance and does not act on every wiggle. It waits for the bar on which classified flow first tips decisively one-sided.
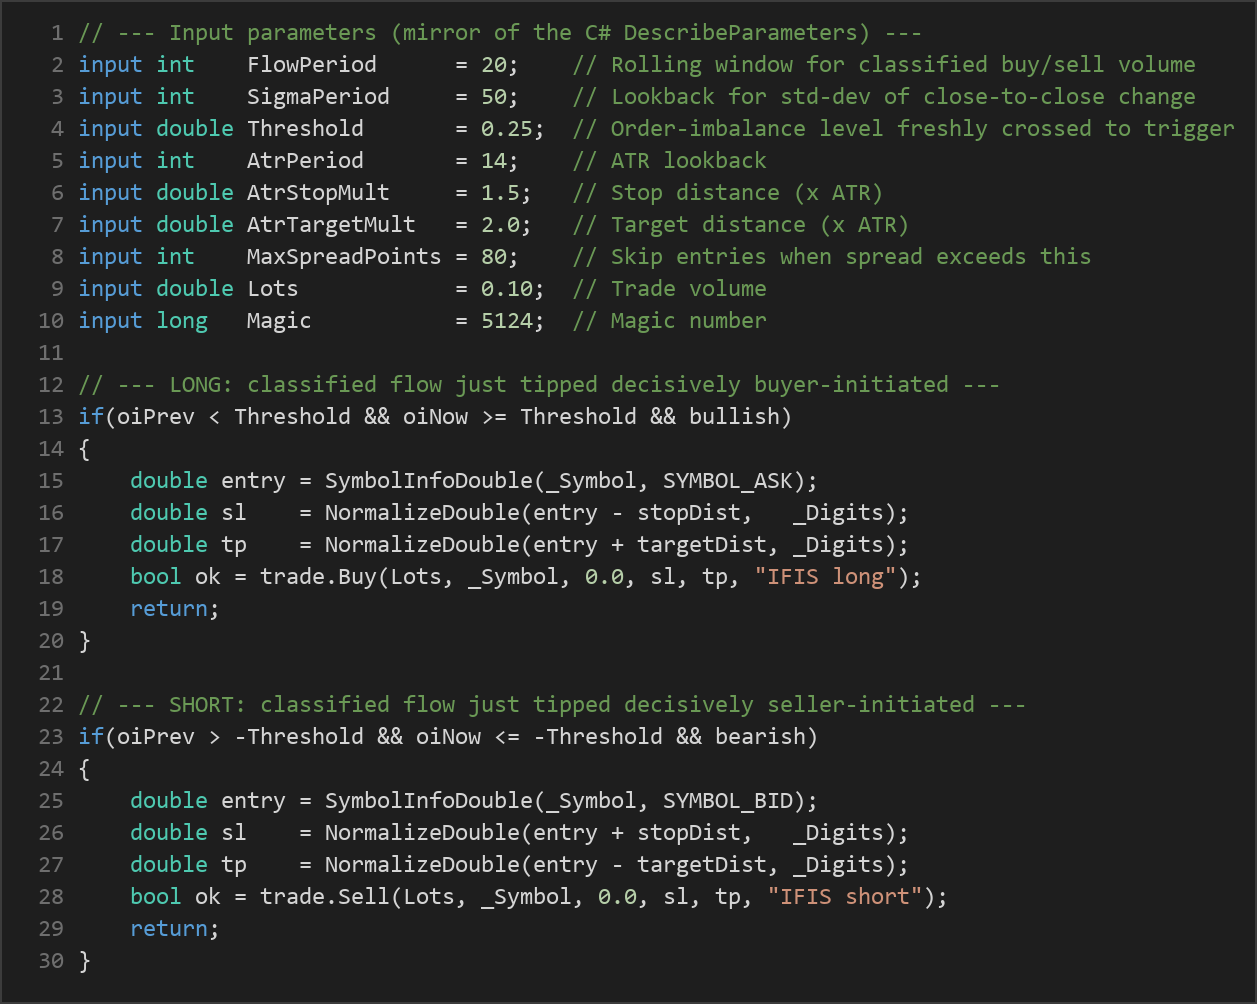
- Long entry — the strategy signals a buy when: OI crosses up through +
Threshold(it was below the threshold on the prior bar) and the signal bar closes bullish (close above open). Price is starting to follow the buy flow. - Short entry — the strategy signals a sell when: OI crosses down through −
Threshold(it was above the negative threshold on the prior bar) and the signal bar closes bearish (close below open). - Stop-loss logic. Stops are volatility-adaptive. On entry the EA places the stop at
AtrStopMult × ATRaway from the entry price — below entry for longs, above entry for shorts — using the Average True Range (ATR) of the signal bar. - Take-profit logic. The target is placed at
AtrTargetMult × ATRfrom entry, in the direction of the trade. With the defaults (1.5× stop, 2.0× target) this creates a roughly 1:1.33 risk-to-reward geometry that scales automatically with current volatility. - Trade management. Only one position per magic number is allowed at a time; the ATR stop and ATR target manage every exit. A spread filter blocks new entries when the current spread is wider than
MaxSpreadPoints, helping avoid costly fills during thin or volatile conditions.
Everything in the design self-scales: the volume classification is normalized by rolling volatility (sigma), the imbalance is normalized by total volume, and the stop and target are ATR multiples. This means the same parameter set adapts as market volatility expands or contracts.
Strategy Parameters
| Parameter | Default | Min | Max | Description |
|---|---|---|---|---|
| FlowPeriod | 20 | 8 | 60 | Rolling window (in bars) over which classified buy/sell volume is summed to build the order-imbalance oscillator. |
| SigmaPeriod | 50 | 20 | 150 | Lookback for the standard deviation of close-to-close change used to standardize each bar (sigma). |
| Threshold | 0.25 | 0.05 | 0.60 | The order-imbalance level (0–1) the oscillator must freshly cross to trigger a trade. Higher = more selective. |
| AtrPeriod | 14 | 5 | 30 | Lookback period for the ATR used to size stops and targets. |
| AtrStopMult | 1.5 | 0.5 | 4.0 | Stop-loss distance as a multiple of ATR. |
| AtrTargetMult | 2.0 | 0.5 | 6.0 | Take-profit distance as a multiple of ATR. |
| MaxSpreadPoints | 80 | 5 | 300 | Skip new entries when the current spread (in points) is wider than this value. |
| Lots | 0.10 | 0.01 | 1.0 | Trade volume (lot size) per position. |
| Magic | 5124 | 0 | 9,999,999 | Unique identifier so the EA manages only its own positions. |
Recommended Chart Settings
This strategy was designed with a liquid instrument in mind — a major FX pair, a metal, or an index such as EURUSD, XAUUSD, or US500 — on an intraday timeframe of roughly M5 to M30, where tick volume serves as a reasonable proxy for genuine order flow. The EA uses only the chart's primary timeframe, so it runs on whatever timeframe you attach it to at backtest or trade time.
Because the whole approach depends on tick volume as an order-flow proxy, instruments with rich, well-distributed tick activity tend to suit it better than thin or illiquid symbols. As always, results will vary across different market conditions, brokers, and volatility regimes. Test thoroughly on historical data and a demo account before drawing any conclusions.
How to Install on MetaTrader 5
- Download the .ex5 file from the link below.
- Copy it to your MT5
MQL5\Expertsfolder. - Restart MetaTrader 5 or refresh the Navigator panel.
- Drag the EA onto a chart matching the recommended symbol and timeframe.
- Configure the input parameters and enable Algo Trading.
What to Consider Before Using This EA
Strengths of this approach. The Bulk Volume Classification method is a genuinely thoughtful upgrade over naive up-bar/down-bar volume splitting, and it rests on peer-reviewed microstructure research. Because the classification is volatility-normalized and the imbalance is volume-normalized, the oscillator is comparable across market regimes. The "fresh cross" requirement means the EA waits for a decisive shift rather than reacting to noise, and ATR-based stops and targets keep risk proportional to current volatility. The spread filter is a practical touch that helps avoid entering when trading costs are elevated.
Known limitations. Tick volume in MetaTrader 5 is not true exchange volume — it counts price updates, not traded contracts. On decentralized FX, it is only a proxy, and its reliability varies by broker and feed. The BVC classification inherits any distortion in that proxy. Like most trend- and flow-following systems, this strategy can struggle in choppy, range-bound markets where imbalance flickers across the threshold without follow-through, producing whipsaw entries. A fixed 1:1.33 stop-to-target geometry may also cut winners short in strongly trending conditions or hold losers too long in fast reversals.
Where it may underperform. Expect weaker behavior during low-liquidity sessions, around major news releases when spreads blow out (though the filter helps), and in prolonged sideways consolidation. No single parameter set is optimal for all symbols or all market phases, so treat the defaults as a starting point for study, not a finished configuration.
Risk Management Tips
Sound risk management matters more than any single indicator. Consider these general principles as you study this EA:
- Risk a small, fixed fraction per trade. Many educational sources suggest risking no more than 1–2% of account equity on any single position. Size your lots so that the ATR-based stop distance corresponds to that fraction.
- Use a demo account first. Run the strategy on a demo or backtest for an extended period before considering any live capital, so you understand its behavior across different conditions.
- Understand drawdown. Every strategy experiences losing streaks. Know the maximum historical drawdown you are willing to tolerate and how it maps to your account size.
- Mind position sizing and correlation. Avoid stacking multiple correlated positions that effectively multiply your exposure to the same underlying move.
- Keep costs in view. Spread, commission, and slippage all erode results, especially on shorter timeframes — the built-in spread filter helps, but it is not a substitute for choosing an appropriate instrument and session.
Approach this EA as a way to learn how order-flow and volatility-normalized signals behave, not as a hands-off solution. Ongoing monitoring, testing, and disciplined risk control remain essential.
Risk Warning
Trading foreign exchange, CFDs, and other leveraged financial instruments involves substantial risk of loss and is not suitable for all investors. The strategies and tools discussed on this page are provided for educational purposes only and do not constitute financial advice, investment recommendations, or solicitation to trade. Always consult a qualified financial adviser before making trading decisions. Past backtest performance is not indicative of future results.
Downloads
- Expert Advisor: InformedFlowImbalanceShift.ex5 (32 downloads)
- Source Code: InformedFlowImbalanceShift.mq5 (33 downloads)
- Documentation: InformedFlowImbalanceShift.pdf (37 downloads)