Disclaimer: This article is for educational and informational purposes only. It does not constitute financial or investment advice. Trading forex and CFDs carries significant risk of loss. Past performance of any strategy — including backtests — does not guarantee future results. Never trade with money you cannot afford to lose.
What Is This Strategy?
The Velocity Exhaustion Reversal is a mean-reversion "snapback" expert advisor (EA) that combines an Exponential Moving Average (EMA) — a trend-following average that weights recent prices more heavily — with the Average True Range (ATR), a volatility gauge that measures how far price typically travels in a given period. Rather than chasing momentum, this strategy is a counter-trend or "fade" system: it looks for moments when price has been shoved too far from its mean too fast, on the assumption that such one-sided pushes tend to run out of fuel and revert.
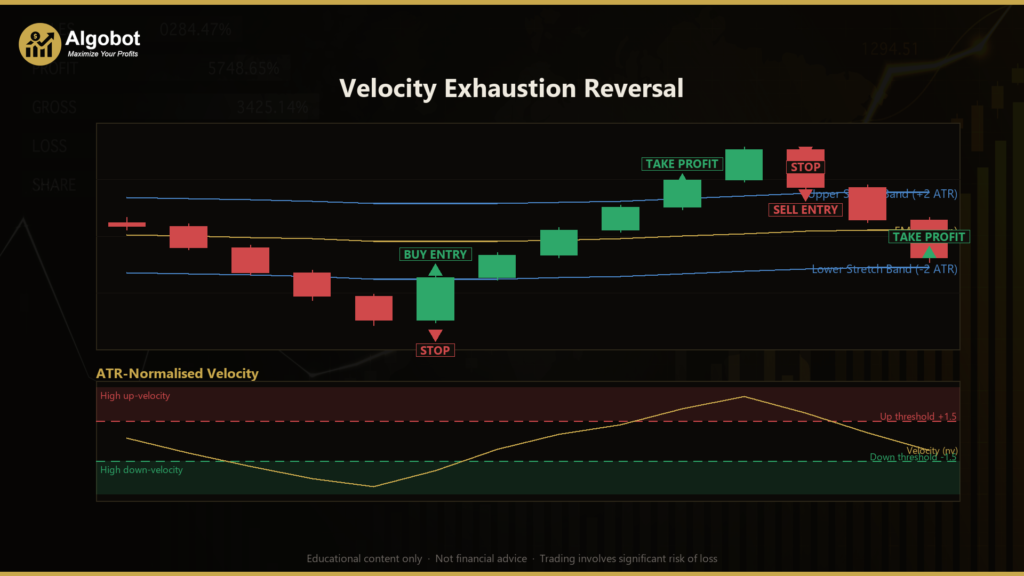
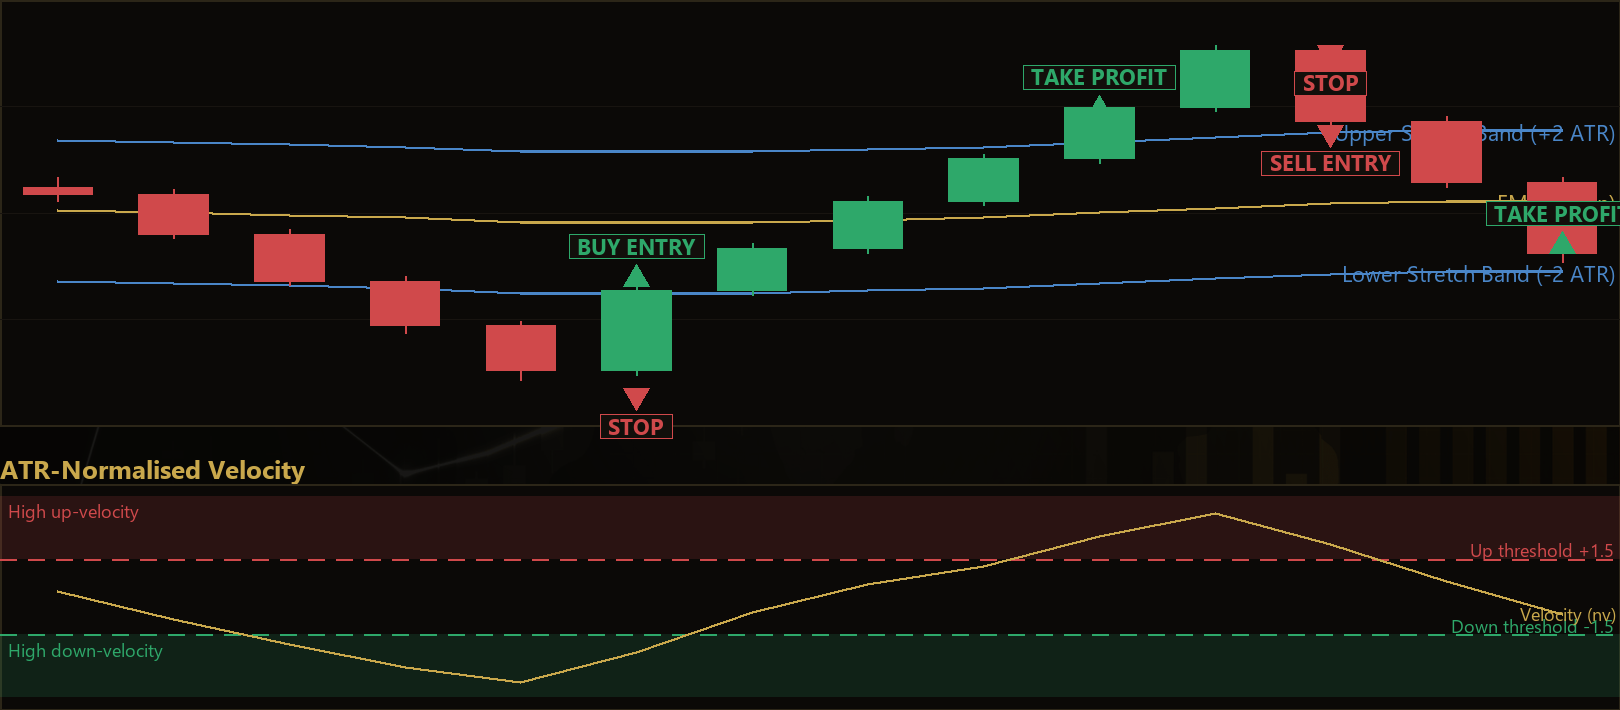
The core idea rests on two forms of "exhaustion." The first is spatial exhaustion — how stretched price is away from the EMA, measured in ATR units. The second is temporal exhaustion — how violent the most recent impulse was, expressed as an ATR-normalised velocity. When both readings hit an extreme and the newest closed candle prints a reclaim bar against the impulse (a sign that the aggressive side is decelerating), the strategy signals a trade back toward the mean. Both conditions must be true at once, which is what separates this approach from naïve "buy the dip" systems.
As a learning tool, the Velocity Exhaustion Reversal is well suited to traders who want to study mean reversion, volatility normalisation, and multi-condition confirmation logic. It is a single-timeframe system with distinct long and short rules, making it a clear case study in how a fade strategy attempts to time deceleration rather than guess a top or bottom outright. It is best understood as an analytical framework, not a shortcut — the value here is in learning why each condition exists.
How It Works
The strategy operates only on freshly closed bars, so signals do not repaint intrabar. On each new bar it recomputes the EMA, the ATR, the velocity of the recent impulse, and the swing extremes over a lookback window. It then evaluates two mirror-image setups.
Long setup — fading an exhausted downward thrust:
- Spatial stretch: Price must be stretched below the mean by at least
StretchAtrATR units (the signed deviationdevAtris ≤ −StretchAtr). - Temporal velocity: The recent impulse, normalised by ATR, must be sharply negative — a violent down-move (
nv≤ −VelThreshold). - Reclaim confirmation: The newest closed bar must be bullish (close above its open) and close above the prior bar's high — evidence that sellers are decelerating and buyers are stepping back in.
- When all three align, the strategy signals a buy at the current Ask price.
Short setup — fading an exhausted upward thrust:
- Spatial stretch: Price must be stretched above the mean by at least
StretchAtrATR units (devAtr≥StretchAtr). - Temporal velocity: The ATR-normalised impulse must be sharply positive (
nv≥VelThreshold). - Reclaim confirmation: The newest closed bar must be bearish (close below its open) and close below the prior bar's low — evidence that buyers are losing control.
- When all three align, the strategy signals a sell at the current Bid price.
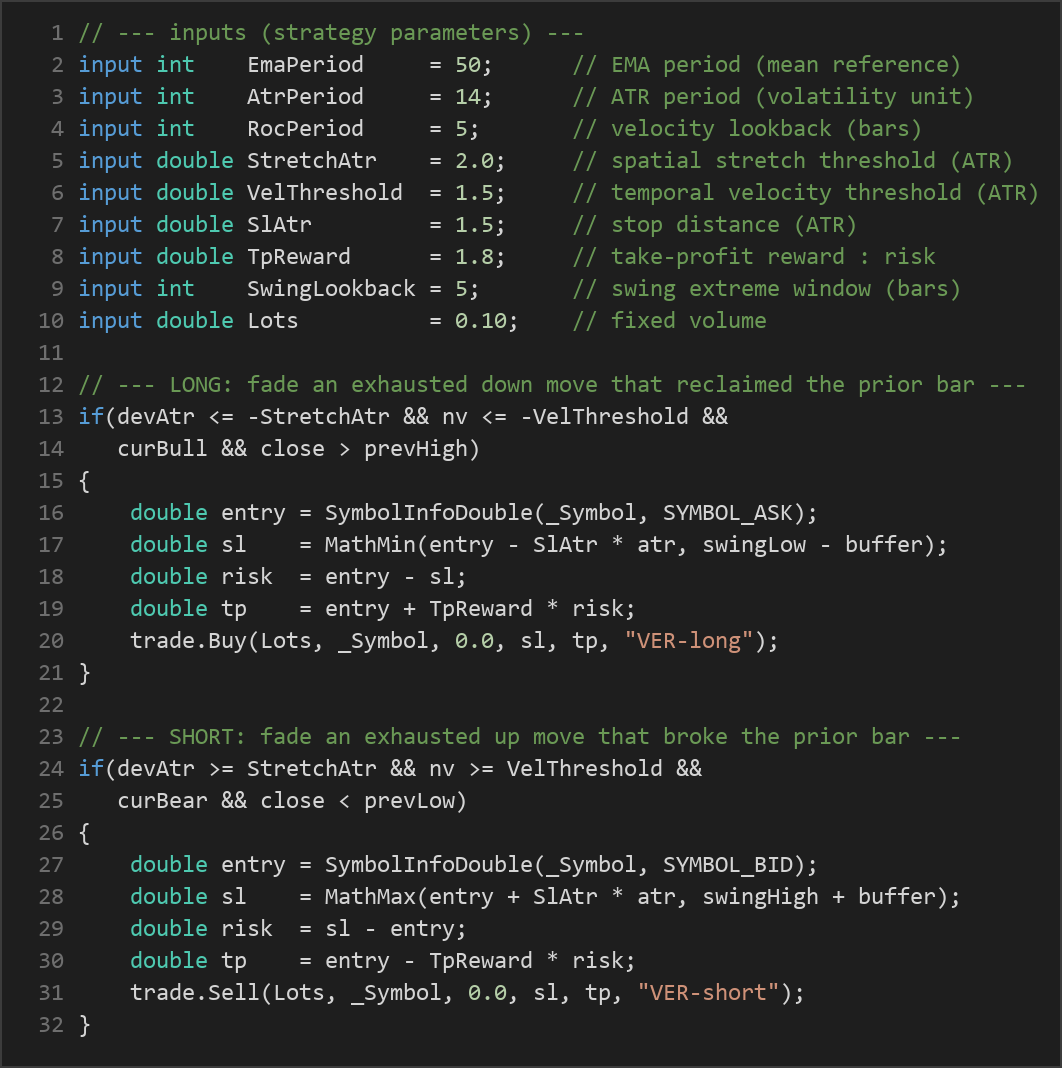
Stop-loss logic: For a long, the stop is placed at the lower of two anchors — either a fixed distance of SlAtr ATR units below entry, or just beyond the recent swing low (with a small 0.10 × ATR buffer). Shorts mirror this using the swing high. This means the stop respects both a volatility-based distance and recent structure, whichever is more protective.
Take-profit logic: Risk is defined as the distance between entry and stop. The take-profit is then placed at TpReward multiples of that risk, giving a fixed reward-to-risk ratio. For example, with the default TpReward of 1.8, the target sits 1.8 times as far from entry as the stop.
Position management: The strategy holds only one position at a time per its magic-number tag, so it will not stack multiple trades on the same signal. Every access uses the primary chart timeframe only.
Strategy Parameters
| Parameter | Default | Min | Max | Description |
|---|---|---|---|---|
| EmaPeriod | 50 | 20 | 200 | Period of the EMA used as the mean reference that price is measured against. |
| AtrPeriod | 14 | 7 | 30 | Period of the ATR that defines the volatility unit for stretch and velocity. |
| RocPeriod | 5 | 2 | 15 | Lookback (in bars) for measuring the recent impulse velocity. |
| StretchAtr | 2.0 | 1.0 | 4.0 | Minimum spatial stretch from the EMA, in ATR units, to qualify as exhausted. |
| VelThreshold | 1.5 | 0.5 | 4.0 | Minimum ATR-normalised velocity of the impulse required to trigger a fade. |
| SlAtr | 1.5 | 0.5 | 4.0 | Stop-loss distance from entry, expressed in ATR units. |
| TpReward | 1.8 | 0.8 | 4.0 | Take-profit reward-to-risk multiple applied to the measured risk. |
| SwingLookback | 5 | 3 | 20 | Number of bars used to find the swing high/low for the protective stop anchor. |
| Lots | 0.10 | 0.01 | 1.0 | Fixed trade volume in lots. |
Recommended Chart Settings
The Velocity Exhaustion Reversal was designed as a single-timeframe system, so all of its logic reads from the chart it is attached to. Mean-reversion fades tend to be studied most often on liquid instruments such as major forex pairs (for example EUR/USD or GBP/USD) on intraday timeframes like the M15 or H1, where ATR-based stretch and velocity readings are meaningful and spreads are relatively contained. Because the strategy normalises everything by ATR, it can adapt across instruments, but the default parameters were tuned around these conditions.
Keep in mind that results will vary significantly across different market conditions, symbols, and timeframes. What behaves well in a ranging, choppy market may behave very differently in a strong trend. Always test any configuration on the specific symbol and timeframe you intend to study before drawing conclusions.
How to Install on MetaTrader 5
- Download the
.ex5file from the link below - Copy it to your MT5
MQL5\Expertsfolder - Restart MetaTrader 5 or refresh the Navigator panel
- Drag the EA onto a chart matching the recommended symbol and timeframe
- Configure the input parameters and enable Algo Trading
What to Consider Before Using This EA
Every trading approach carries trade-offs, and an honest assessment helps you use this one as a genuine learning tool.
Strengths of this approach:
- Dual confirmation. Requiring both spatial stretch and temporal velocity — plus a reclaim candle — filters out many weak signals that a single-condition fade would take.
- Volatility-aware. Because stretch, velocity, and the stop are all measured in ATR units, the logic self-adjusts to changing volatility rather than using fixed pip distances.
- Structure-aware stops. Anchoring the stop to the more protective of an ATR distance or the recent swing extreme respects both volatility and price structure.
- Defined risk and reward. A fixed reward-to-risk ratio makes the strategy's expectancy easy to study and compare across settings.
Known limitations:
- Counter-trend risk. Fading a strong move is inherently risky. In a powerful, sustained trend, an "exhausted" reading can simply keep getting more exhausted, and reversals may not materialise.
- Reclaim candles can fail. A single reclaim bar is an early signal of deceleration, not a confirmed reversal. Some setups will reclaim and then continue in the original direction.
- Single position, single timeframe. The strategy takes one trade at a time and reads only one timeframe, so it may miss context that a higher-timeframe filter could provide.
- Parameter sensitivity. Thresholds like
StretchAtrandVelThresholdstrongly shape how often signals appear. Too loose and you get noise; too strict and you get very few trades.
Historically, mean-reversion systems tend to perform best in ranging or mean-reverting markets and may underperform during trending or news-driven expansions. Understanding when the underlying assumption holds is as important as the code itself.
Risk Management Tips
Sound risk management matters more than any single entry rule. As a general educational framework:
- Size positions deliberately. Many traders limit risk to no more than 1–2% of account equity per trade. The fixed
Lotsinput does not automatically scale to your balance, so adjust it to match your own risk tolerance. - Use a demo account first. Study how the strategy behaves on a demo account across many market conditions before considering any live use.
- Understand drawdown. Even a well-constructed strategy will experience losing streaks. Know the maximum drawdown you are willing to tolerate before you begin.
- Account for costs. Spreads, commissions, and slippage all affect a fade strategy that trades at market. Factor these into any evaluation.
- Avoid over-optimisation. Tuning parameters until a backtest looks perfect often produces results that do not hold up on new data. Favour robust settings over fragile ones.
Risk Warning
Trading foreign exchange, CFDs, and other leveraged financial instruments involves substantial risk of loss and is not suitable for all investors. The strategies and tools discussed on this page are provided for educational purposes only and do not constitute financial advice, investment recommendations, or solicitation to trade. Always consult a qualified financial adviser before making trading decisions. Past backtest performance is not indicative of future results.
Downloads
- Expert Advisor: VelocityExhaustionReversal.ex5 (64 downloads)
- Source Code: VelocityExhaustionReversal.mq5 (45 downloads)
- Documentation: VelocityExhaustionReversal.pdf (65 downloads)