Disclaimer: This article is for educational and informational purposes only. It does not constitute financial or investment advice. Trading forex and CFDs carries significant risk of loss. Past performance of any strategy — including backtests — does not guarantee future results. Never trade with money you cannot afford to lose.
What Is This Strategy?
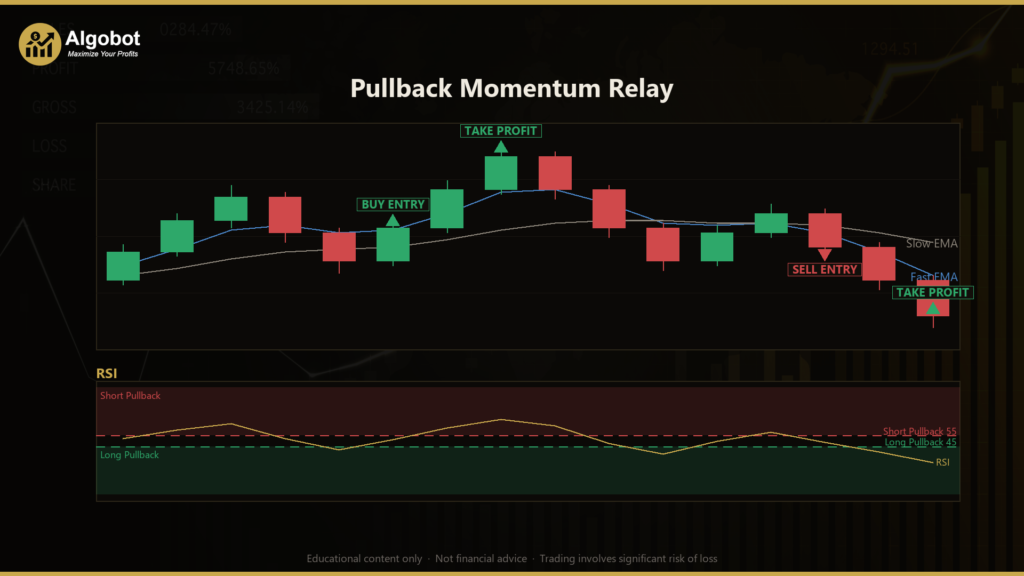
The Pullback Momentum Relay is a trend-following, pullback-continuation Expert Advisor (EA) for MetaTrader 5 that combines two Exponential Moving Averages (EMAs — averages that weight recent prices more heavily), a Relative Strength Index (RSI — a momentum oscillator scaled from 0 to 100), and the Average True Range (ATR — a measure of typical price movement, or volatility). Rather than trying to call tops and bottoms, it is designed to wait for a trend that is already in motion, let price pause for a "breather," and then re-join the dominant direction the moment momentum is handed — or "relayed" — back to the side that was in control.
The strategy is built for trending market conditions, particularly on liquid instruments where trends tend to persist for a stretch of bars rather than reverse tick by tick. It deliberately sits out sideways, range-bound markets, where continuation systems tend to struggle. The core idea is "triple confirmation": a trend regime filter, a trend slope filter, and a momentum relay trigger must all agree before a single trade is considered. This layered approach is intended to keep the strategy out of the choppy, directionless conditions where many single-signal systems tend to accumulate small losses.
As a learning tool, the Pullback Momentum Relay is well suited to traders who want to study how multiple orthogonal filters can be combined into one coherent rule set. It illustrates trend identification, momentum timing, volatility-scaled risk, and equity-aware position sizing in a single, readable framework. This article analyzes how those pieces fit together — it is a strategy walkthrough, not a profit opportunity.
How It Works
The strategy evaluates its rules once per newly-closed bar, so signals are confirmed on completed candles rather than on flickering intrabar prices. Before any entry, three conditions must line up in the same direction.
- Trend regime (which way you are allowed to trade): The fast EMA is compared to the slow EMA. When the fast EMA sits above the slow EMA, the strategy considers the market an "up-regime" and only looks for long trades; when the fast EMA is below the slow EMA, it is a "down-regime" and only shorts are considered.
- Trend slope (is the trend actually going somewhere?): The slow EMA's current value is compared to where it was
SlopeLookbackbars ago. For a long, the slow EMA must now be higher than it was then (a genuinely rising baseline); for a short, it must be lower. A flat slow EMA signals a drifting market, and no trade is taken. This slope requirement acts as the primary filter against choppy conditions. - Momentum relay (RSI recovers through a pullback level): In an up-regime, the strategy waits for RSI to cool down to or below the
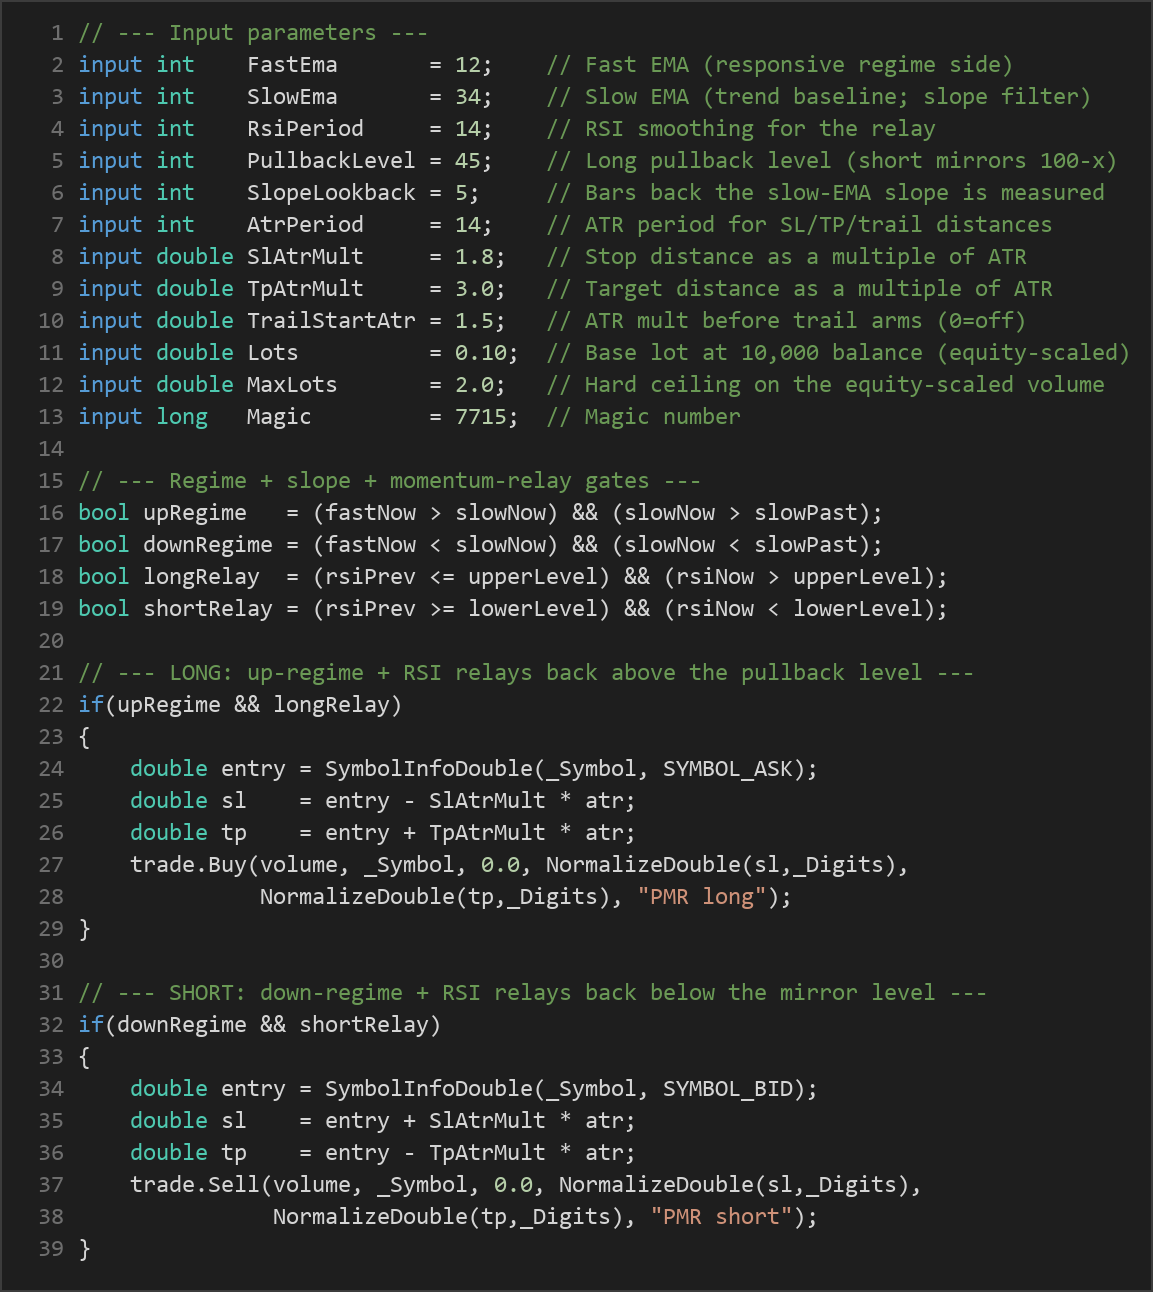
PullbackLevel(the pullback), and then, on the freshly-closed bar, to push back above it — momentum being relayed back to the buyers. The short side mirrors this exactly around the symmetric level (100 −PullbackLevel): RSI must rise to or above that level and then cross back below it.
Because that RSI cross is a one-shot event on a single closed bar, entries are naturally rationed — the strategy does not repeatedly fire on the same setup.
Entry logic in plain English:
- The strategy signals a long when the market is in an up-regime, the slow EMA is rising, and RSI has just crossed back up through the pullback level.
- The strategy signals a short when the market is in a down-regime, the slow EMA is falling, and RSI has just crossed back down through the symmetric level.
Stop-loss and take-profit logic: All risk distances are derived from ATR, so they self-scale to each symbol and timeframe. On entry, the stop-loss is placed SlAtrMult × ATR away from the entry price, and the take-profit is placed TpAtrMult × ATR away. Keeping the take-profit multiple larger than the stop multiple is intended to give a reward-to-risk ratio above 1.
Trailing stop: Once a trade moves TrailStartAtr × ATR in your favor, an ATR-based trailing stop arms. From that point, the stop is only ever tightened toward price — never loosened — which is designed to lock in open gains and reduce the tail risk on trades that stall out.
Position sizing: Volume is calculated as Lots × (Balance / 10000), then clamped between 0.01 and MaxLots. This lets exposure compound gently as the account grows and automatically de-risk during a drawdown, rather than betting a fixed size regardless of account health. Only one position per Magic number is ever open at a time, so exposure stays bounded.
Strategy Parameters
| Parameter | Default | Min | Max | Description |
|---|---|---|---|---|
| FastEma | 12 | 5 | 40 | Period of the fast EMA — the responsive side of the trend-regime filter. |
| SlowEma | 34 | 20 | 120 | Period of the slow EMA — the trend baseline whose slope acts as the chop filter. |
| RsiPeriod | 14 | 7 | 28 | Smoothing period of the RSI used for the momentum-relay trigger. |
| PullbackLevel | 45 | 30 | 49 | Long pullback level: RSI must cool to at or below this, then cross back above it. Shorts mirror around (100 − this). |
| SlopeLookback | 5 | 2 | 25 | Number of bars back over which the slow-EMA slope is measured. |
| AtrPeriod | 14 | 7 | 28 | ATR period used for stop, target, and trailing distances. |
| SlAtrMult | 1.8 | 0.8 | 4.0 | Stop-loss distance as a multiple of ATR. |
| TpAtrMult | 3.0 | 1.0 | 6.0 | Take-profit distance as a multiple of ATR (kept above SlAtrMult for a reward-to-risk ratio above 1). |
| TrailStartAtr | 1.5 | 0.0 | 5.0 | Favorable ATR multiples of movement before the trailing stop arms (0 = trailing off). |
| Lots | 0.10 | 0.01 | 1.00 | Base lot size at a 10,000-unit balance, scaled by equity. |
| MaxLots | 2.0 | 0.10 | 20.0 | Hard ceiling on the equity-scaled volume. |
| Magic | 7715 | 0 | 9,999,999 | Magic number that identifies and isolates this EA's trades. |
Recommended Chart Settings
The Pullback Momentum Relay was designed with a liquid, trending FX major or metal in mind — for example GBPUSD or XAUUSD (gold) — on the M15 to H1 timeframes, traded in a trend-following style. These instruments and timeframes tend to produce the kind of sustained directional moves and orderly pullbacks the strategy is built around. As always, results will vary across different symbols, brokers, spreads, and market conditions, and a setting that historically suited one instrument may behave very differently on another. Treat the defaults as a starting point for study rather than a fixed recommendation.
How to Install on MetaTrader 5
- Download the
.ex5file from the link below - Copy it to your MT5
MQL5\Expertsfolder - Restart MetaTrader 5 or refresh the Navigator panel
- Drag the EA onto a chart matching the recommended symbol and timeframe
- Configure the input parameters and enable Algo Trading
What to Consider Before Using This EA
The main strength of this approach is its layered confirmation. By requiring trend regime, trend slope, and a momentum relay to all agree, the strategy is designed to avoid acting on any single, isolated signal. The ATR-based stops and targets adapt to changing volatility, and the once-in-profit trailing stop attempts to protect open gains — all of which are sensible risk concepts to study.
However, every design carries trade-offs, and it is important to be honest about them. Pullback-continuation systems are, by nature, dependent on trends actually continuing. In sharply reversing markets, or during choppy, low-volatility ranges, the slope and RSI filters may either keep you out entirely (missing moves) or produce entries just as the trend fails. Moving averages and RSI are both lagging or reactive tools — they describe what price has already done, not what it will do next. The strategy may also underperform around major news events, at session opens with erratic spreads, or on instruments that grind sideways for long stretches. No filter combination removes losing trades; it only aims to shift the balance of outcomes, and that shift is never guaranteed to persist out-of-sample.
Risk Management Tips
Sound risk management matters far more than any single parameter setting. Consider these general principles as part of your education:
- Size positions conservatively. Many educational sources suggest risking no more than 1–2% of account equity on any single trade, so that a string of losses does not threaten the account.
- Test on a demo account first. Run the EA on a demo or simulated environment for an extended period before considering any live use, so you can observe its behavior across different conditions.
- Understand drawdown. Even a well-designed strategy will experience losing streaks. Study the historical drawdown and ask whether you could tolerate it emotionally and financially.
- Account for costs. Spreads, commissions, slippage, and swap fees all erode results and vary by broker.
- Never over-leverage. Larger lot sizes amplify losses just as much as gains. Keep exposure within limits you have decided in advance.
Used thoughtfully, the Pullback Momentum Relay can help you learn how trend filters, momentum timing, and volatility-based risk fit together — which is its real value as a study tool.
Risk Warning
Trading foreign exchange, CFDs, and other leveraged financial instruments involves substantial risk of loss and is not suitable for all investors. The strategies and tools discussed on this page are provided for educational purposes only and do not constitute financial advice, investment recommendations, or solicitation to trade. Always consult a qualified financial adviser before making trading decisions. Past backtest performance is not indicative of future results.
Downloads
- Expert Advisor: PullbackMomentumRelay.ex5 (59 downloads)
- Source Code: PullbackMomentumRelay.mq5 (59 downloads)
- Documentation: PullbackMomentumRelay.pdf (59 downloads)