Disclaimer: This article is for educational and informational purposes only. It does not constitute financial or investment advice. Trading forex and CFDs carries significant risk of loss. Past performance of any strategy — including backtests — does not guarantee future results. Never trade with money you cannot afford to lose.
What Is This Strategy?
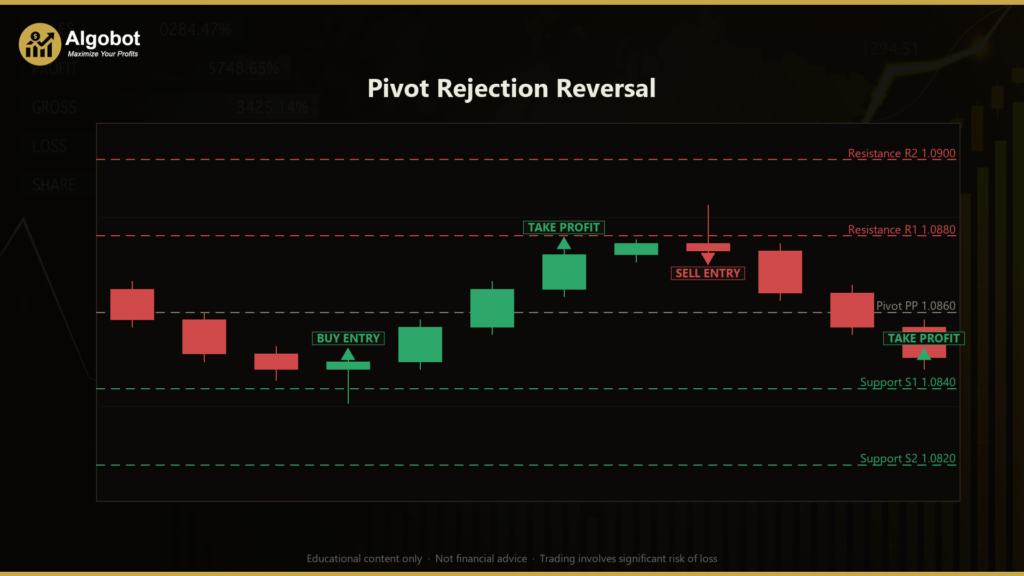
The Pivot Rejection Reversal is a mean-reversion strategy that combines classic Pivot Points (a set of horizontal support and resistance levels derived from a session's high, low, and close) with a candlestick rejection pattern, often called a pin bar (a candle with a long wick and small body that signals price was pushed back from an extreme). Rather than chasing momentum, it is a countertrend, or fade, approach: it waits for price to over-extend into a pivot level and then reverse, aiming to catch the move back toward equilibrium.
The strategy is designed for ranging or oscillating market conditions, where price repeatedly probes support and resistance without establishing a strong sustained trend. In these environments, pivot levels tend to act as natural turning points, and a rejection candle can indicate that buyers or sellers have stepped in to defend a level. It is timeframe-agnostic — the pivot "session" simply scales to whichever timeframe you apply it to — and is generally suited to liquid instruments such as FX majors (for example GBPUSD or EURUSD) or gold (XAUUSD) on intraday charts.
As a learning tool, this strategy is well suited to traders who want to study how support/resistance confluence, candlestick anatomy, and volatility-based stops fit together in a single rule set. It is presented here as a strategy analysis, not a profit opportunity. The goal is to understand why each condition exists and how the components interact — knowledge you can carry into your own discretionary or systematic research.
How It Works
The Pivot Rejection Reversal builds a fresh set of pivot levels on a rolling basis and then hunts for rejection candles at those levels. Here is the logic, step by step:
- Building the pivot session. The strategy accumulates the running high, low, and close over a fixed number of completed bars (set by
PivotPeriod). Once that many bars have printed, it freezes a classic floor-pivot set: the central Pivot Point (PP), the first and second resistances (R1, R2), and the first and second supports (S1, S2). It then immediately starts building the next session, so levels refresh continuously. - Acting once per completed bar. The strategy evaluates signals only when a bar closes, using the just-closed candle. This avoids reacting to unfinished, still-moving price action.
- Long (support rejection) signal. The strategy signals a long when the closed candle is bullish (closes above its open), has a dominant lower wick — the lower wick is at least
WickRatioof the candle's total range — and the candle probed a support pivot (S1, or the deeper S2) but closed back above it. In plain terms: price dipped into support, was rejected, and reclaimed the level with buying pressure. - Short (resistance rejection) signal. The strategy signals a short when the closed candle is bearish (closes below its open), has a dominant upper wick (at least
WickRatioof the range), and the candle poked into a resistance pivot (R1, or the higher R2) but closed back below it. Price stretched into resistance, sellers rejected it, and the candle closed under the level. - One position at a time. The strategy holds only a single open position per symbol (tracked by its magic number). If a trade is already open, no new signal is taken — this keeps risk contained and the rules clean.
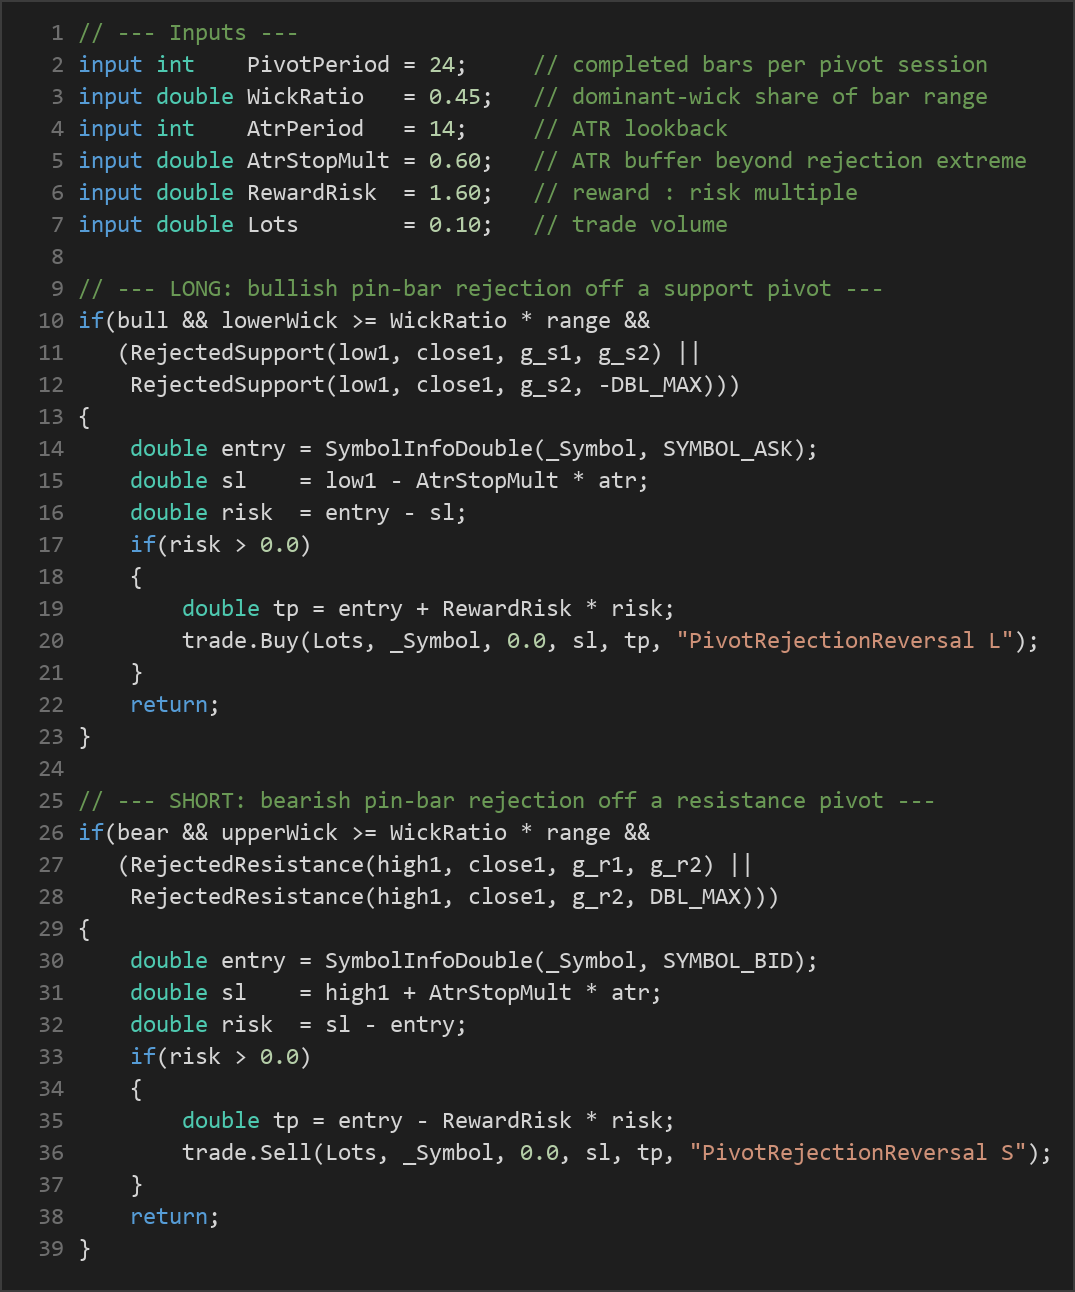
- Stop-loss logic. For a long, the stop is placed just below the rejection candle's low, buffered by a fraction of the Average True Range (ATR, a measure of recent volatility) set by
AtrStopMult. For a short, the stop sits just above the candle's high with the same ATR buffer. This places the stop beyond the rejection extreme, giving the level room to hold while still defining risk. - Take-profit logic. The distance from entry to stop defines the risk. The target is placed at a fixed multiple of that risk, set by
RewardRisk(for example, 1.6× risk). Because the target scales with the stop, every trade carries a defined reward-to-risk ratio. - Risk defined on every trade. If the calculated risk is not positive (an edge case), the trade is skipped. Each entry ships with both a stop-loss and a take-profit attached from the outset.
Strategy Parameters
| Parameter | Default | Min | Max | Description |
|---|---|---|---|---|
| PivotPeriod | 24 | 8 | 96 | Number of completed bars in each pivot "session." Larger values produce wider, slower-refreshing levels; smaller values react to shorter swings. |
| WickRatio | 0.45 | 0.25 | 0.70 | Minimum share of the candle's total range that the dominant wick must occupy for the rejection to qualify. Higher values demand a more pronounced pin bar. |
| AtrPeriod | 14 | 7 | 28 | Lookback length for the ATR volatility measure used to buffer the stop-loss. |
| AtrStopMult | 0.60 | 0.20 | 1.50 | ATR multiple added beyond the rejection extreme when placing the stop. Larger values give the trade more breathing room but widen risk. |
| RewardRisk | 1.60 | 1.00 | 3.00 | Reward-to-risk multiple. The take-profit distance equals this number times the stop distance. |
| Lots | 0.10 | 0.01 | 1.00 | Fixed trade volume in lots. Should be sized to your account and risk tolerance. |
Recommended Chart Settings
This strategy was designed with liquid FX majors such as GBPUSD or EURUSD, and gold (XAUUSD), on intraday timeframes in mind. Because it is timeframe-agnostic, the pivot session scales to whatever chart you apply it to — a 24-bar PivotPeriod spans a very different amount of real time on an M15 chart than on an H1 chart, so consider how the level-refresh rhythm matches the instrument's typical intraday swings.
As a starting point for study, many traders test mean-reversion pivot logic on M15 to H1 charts of the instruments above. Remember that these are suggestions for analysis, not settings tuned to any particular account or broker. Results will vary considerably across different market conditions, spreads, and volatility regimes, so treat any configuration as a hypothesis to be examined rather than a fixed recommendation.
How to Install on MetaTrader 5
- Download the .ex5 file from the link below.
- Copy it to your MT5
MQL5\Expertsfolder. - Restart MetaTrader 5 or refresh the Navigator panel.
- Drag the EA onto a chart matching the recommended symbol and timeframe.
- Configure the input parameters and enable Algo Trading.
What to Consider Before Using This EA
Every strategy carries trade-offs. A balanced view of the Pivot Rejection Reversal helps you use it as an honest learning tool.
Strengths of the approach. The logic is transparent and rule-based, which makes it excellent for study — you can see exactly why each trade fires. It uses confluence: a signal requires both a meaningful pivot level and a rejection candle, filtering out weaker setups. Risk is defined on every trade with an ATR-buffered stop and a fixed reward-to-risk target, so there is no open-ended exposure. Holding one position at a time keeps the rule set simple and risk contained.
Known limitations. Mean-reversion strategies are, by design, vulnerable to strong trends and breakouts. When price breaks decisively through a pivot rather than rejecting it, a fade entry can be caught on the wrong side. Pin-bar patterns are also somewhat subjective to quantify; the WickRatio filter helps, but no single number perfectly captures every rejection. Because pivot levels here refresh on a rolling bar count rather than on calendar sessions, their placement depends heavily on the chosen PivotPeriod and timeframe.
Where it may underperform. Trending markets, high-impact news events, and periods of expanding volatility can all produce clean breaks through support/resistance that overwhelm a countertrend entry. Wide spreads on illiquid pairs or during off-hours can also erode a strategy whose targets are measured in modest multiples of a volatility-based stop. Studying the strategy across varied conditions — quiet ranges, trending phases, and news spikes — will teach you far more than testing a single favorable stretch.
Risk Management Tips
Sound risk management matters more than any single entry signal. Consider these general principles as part of your education:
- Position sizing. Set your lot size based on the money you are willing to risk on a trade, not on a fixed default. A common guideline is to risk no more than 1–2% of account equity per trade.
- Respect your stop. The strategy attaches a stop to every position for a reason. Avoid the temptation to widen or remove stops when a trade moves against you.
- Practice on a demo account first. Run the strategy on a demo or simulated account until you understand its behavior across different market conditions before considering any live use.
- Understand drawdown. Every strategy experiences losing streaks. Study the historical drawdown so you know what a normal rough patch looks like and can stay disciplined through it.
- Diversify and avoid over-leverage. Concentrating risk in one instrument or using excessive leverage can amplify losses quickly. Leverage magnifies both directions.
- Keep a trading journal. Recording why each trade was taken and how it resolved turns every result — win or loss — into a learning opportunity.
Risk Warning
Trading foreign exchange, CFDs, and other leveraged financial instruments involves substantial risk of loss and is not suitable for all investors. The strategies and tools discussed on this page are provided for educational purposes only and do not constitute financial advice, investment recommendations, or solicitation to trade. Always consult a qualified financial adviser before making trading decisions. Past backtest performance is not indicative of future results.
Downloads
- Expert Advisor: PivotRejectionReversal.ex5 (4 downloads)
- Source Code: PivotRejectionReversal.mq5 (4 downloads)
- Documentation: PivotRejectionReversal.pdf (4 downloads)