Disclaimer: This article is for educational and informational purposes only. It does not constitute financial or investment advice. Trading forex and CFDs carries significant risk of loss. Past performance of any strategy — including backtests — does not guarantee future results. Never trade with money you cannot afford to lose.
What Is This Strategy?
The Pivot Zone Rejection Hedge is a pure price-action expert advisor (EA) for MetaTrader 5 that combines floor pivot points, support and resistance rejection candles, and a managed hedge into a single rules-based system. Unlike most automated strategies, it uses no technical indicators at all — there is no moving average, RSI, ATR, or Bollinger Band anywhere in its logic. Instead, every decision is derived directly from raw candle highs, lows, opens, and closes, and from classic floor-pivot levels that desks have watched for decades.
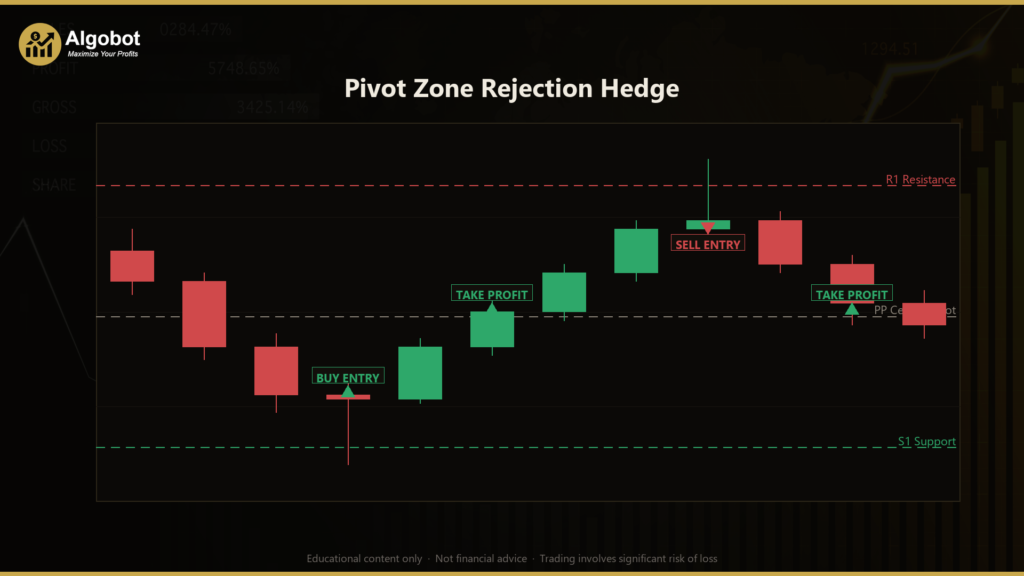
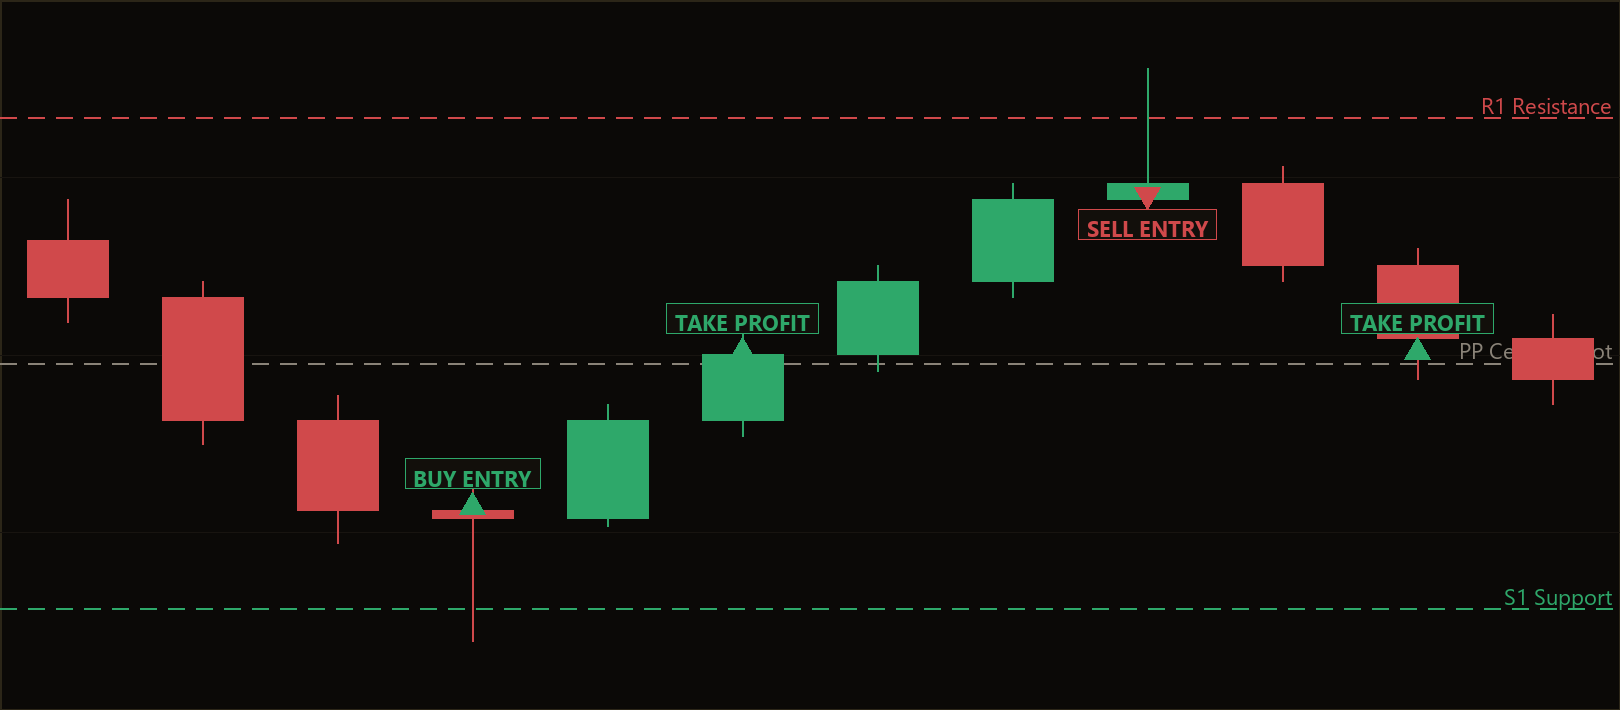
Floor pivots are reference price levels calculated from a recent range. The central pivot (PP) is the average of the high, low, and most recent close; the first resistance (R1) and first support (S1) are projected above and below it. Because so many intraday traders watch these levels, price tends to react there — it either rejects the level (a wick probes it and price snaps back, which the strategy fades as a reversal) or it fails the level (price closes through and the breakout runs). The signature idea here is that when a faded level instead fails, the EA stops fighting the move and deploys an opposite hedge leg to ride the breakout the other way.
This makes the Pivot Zone Rejection Hedge most useful as a learning tool for traders who want to study how pivot-based mean reversion, candlestick rejection patterns, and basket-level money management interact. It is designed for liquid, range-respecting markets and is best understood as a strategy analysis exercise rather than a turnkey solution. If you are studying how discretionary price-action concepts can be encoded into mechanical rules, this EA is a clear, well-commented example.
How It Works
The strategy recomputes its pivot levels once on every freshly closed bar and only opens a new trade when it is completely flat. Here is the full lifecycle in plain English.
Calculating the levels
- Over the last
PivotLookbackclosed bars, the strategy finds the highest high (H), the lowest low (L), and the most recent close (C). - It computes PP = (H + L + C) / 3, R1 = 2·PP − L, and S1 = 2·PP − H.
- The pivot range (R1 − S1, which equals H − L) is used to size every buffer, so distances scale automatically to any symbol or timeframe without hard-coded pip values.
Entry conditions (the strategy only enters when flat)
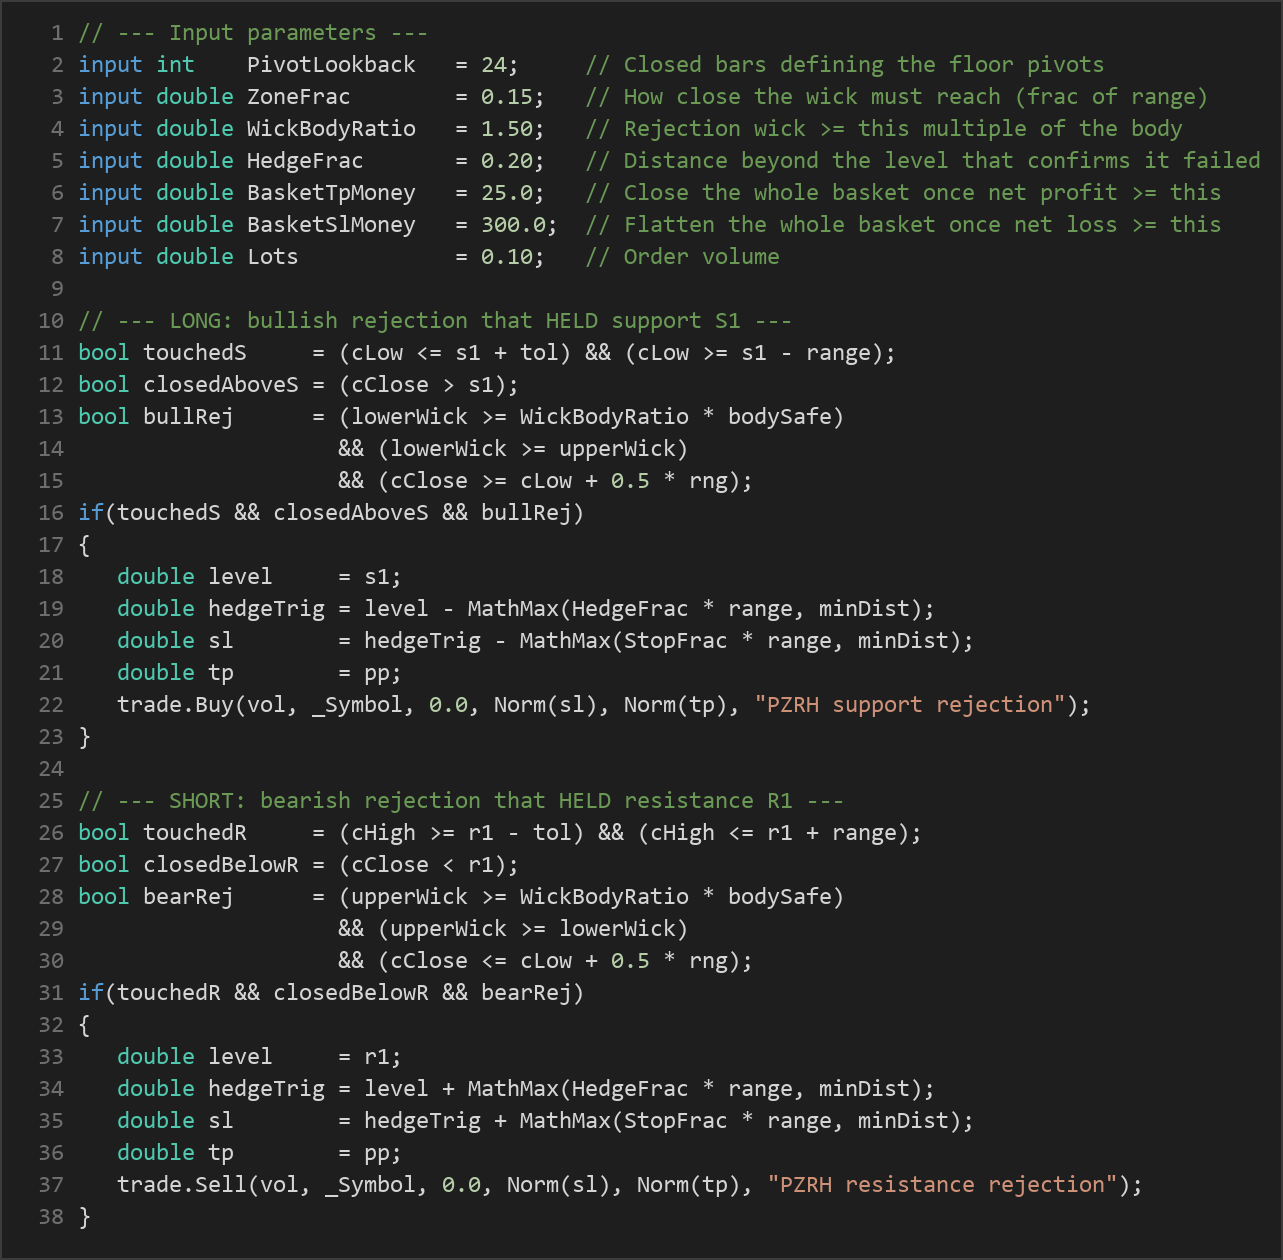
- Long signal: the just-closed candle dips into the S1 support zone (its low reaches within a tolerance band of S1), closes back above S1, and forms a bullish rejection candle — a dominant lower wick that is at least
WickBodyRatiotimes the candle body, with the close in the upper half of the bar. This signals that sellers were rejected at support. - Short signal: the mirror image — the candle pokes into the R1 resistance zone, closes back below R1, and forms a bearish rejection candle with a dominant upper wick and a close in the lower half. This signals that buyers were rejected at resistance.
- A spread filter (
MaxSpreadPoints) can skip entries when trading costs are temporarily wide.
Base take-profit and stop-loss
- The base take-profit targets the central pivot PP, expressing the mean-reversion thesis that price drifts back toward the middle of the range.
- The base stop-loss is placed a structural pad beyond the hedge trigger, so the hedge always engages first if the level starts to fail.
The hedge mechanic (the signature feature)
- While the single base leg is open, if price travels
HedgeFracof a range beyond the rejected level, the level is deemed to have failed. - The strategy then opens an opposite market leg — now holding both directions in a genuine locked hedge. The new leg is intended to ride the breakout while offsetting the losing base leg.
- If price instead reclaims the level, that reclaim distance (governed by
ReclaimFrac) marks the hedge as wrong and sits as its stop.
Basket money management (the dominant exit)
- Once any exposure is held, net floating profit and loss across all legs is monitored on every tick.
- If net floating P/L rises to
BasketTpMoney, the entire basket is closed, banking the combined result. - If net floating P/L falls to −
BasketSlMoney, everything is flattened — a hard ceiling on hedge risk, since the worst case for a locked hedge is a strong one-way trend.
Strategy Parameters
| Parameter | Default | Min | Max | Description |
|---|---|---|---|---|
| PivotLookback | 24 | 5 | 150 | Number of closed bars whose high/low/close define the floor pivots. |
| ZoneFrac | 0.15 | 0.02 | 0.60 | How close to a pivot the candle's wick must reach, as a fraction of the pivot range. |
| WickBodyRatio | 1.50 | 0.50 | 5.00 | Minimum size of the rejection wick relative to the candle body. |
| HedgeFrac | 0.20 | 0.05 | 1.00 | Distance beyond the rejected level (fraction of range) that confirms the level failed and triggers the hedge. |
| StopFrac | 0.30 | 0.05 | 2.00 | Extra base stop-loss pad placed beyond the hedge trigger, as a fraction of the range. |
| RewardFrac | 0.80 | 0.20 | 4.00 | Minimum reward distance for the base take-profit, as a fraction of the range. |
| ReclaimFrac | 0.30 | 0.05 | 1.50 | Invalidation pad — if price reclaims the level by this amount, the hedge is treated as wrong. |
| BasketTpMoney | 25.0 | 5.0 | 2000.0 | Net floating profit (account currency) at which the whole basket is closed. |
| BasketSlMoney | 300.0 | 50.0 | 100000.0 | Net floating loss (account currency) at which the whole basket is flattened. |
| MaxSpreadPoints | 50 | 0 | 500 | Skip new entries while spread (in points) exceeds this value (0 disables the filter). |
| Lots | 0.10 | 0.01 | 1.00 | Order volume for each leg. |
| Magic | 7420 | 0 | 9,999,999 | Magic number used to identify this EA's positions. |
Recommended Chart Settings
The Pivot Zone Rejection Hedge was designed for liquid, range-respecting markets — FX majors such as EUR/USD or AUD/USD, or XAU/USD (gold) — on the M15, M30, or H1 timeframes. These are the conditions where pivot rejections and false breakouts tend to alternate, which is the habitat the logic is built around.
Because every distance is scaled from the pivot range rather than fixed pip values, the EA will run on whatever symbol and timeframe you attach it to. That flexibility does not guarantee suitability, however: results will vary considerably across instruments, sessions, and volatility regimes. Always test on the exact symbol and timeframe you intend to study before drawing any conclusions.
How to Install on MetaTrader 5
- Download the
.ex5file from the link below. - Copy it to your MT5
MQL5\Expertsfolder. - Restart MetaTrader 5 or refresh the Navigator panel.
- Drag the EA onto a chart matching the recommended symbol and timeframe.
- Configure the input parameters and enable Algo Trading.
What to Consider Before Using This EA
Strengths of the approach. The logic is transparent and self-contained — with no indicators, there is nothing to repaint or lag, and the pivot math is easy to audit. Scaling every buffer to the pivot range is an elegant way to avoid pip hard-coding, and the basket-level exit gives the system a single, clear definition of "done" for each cycle. As a study in encoding discretionary price-action ideas mechanically, it is genuinely instructive.
Known limitations. Hedging is the part that deserves the most scrutiny. A locked hedge does not eliminate risk — it freezes a loss in place and converts the problem into a timing question. The system's stated failure mode is a strong, sustained one-way trend after the hedge locks: in that scenario both legs can move against the basket faster than the breakout leg recovers, and the BasketSlMoney ceiling is what ultimately caps the damage. That ceiling (default 300 units of account currency against a 25-unit profit target) implies an asymmetric risk-to-reward profile that you should understand fully before committing any capital.
Where it may underperform. Pivot rejection thrives on chop and clean ranges. In trending or news-driven markets, levels fail more often than they hold, the hedge engages more frequently, and the strategy spends more time managing locked baskets than collecting clean reversions. Low-liquidity sessions and wide spreads also erode the thin mean-reversion edge, which is precisely why the spread filter exists. None of this makes the approach invalid — it simply means market context matters a great deal, and the parameters historically need tuning per instrument.
Risk Management Tips
Sound risk management matters more than any single parameter setting. Keep these general principles in mind:
- Use a demo account first. Study the EA's behavior on a demo for an extended period before considering any live use, paying special attention to how often and how the hedge engages.
- Size positions conservatively. A common educational guideline is to risk no more than 1–2% of account equity on any single idea. With a basket-style system, treat the full
BasketSlMoneyfigure as your real per-cycle risk and size accordingly. - Understand drawdown. A strategy can endure long sequences of losing or scratched cycles. Know the maximum drawdown you are willing to tolerate before you begin, and stop if it is reached.
- Mind the asymmetry. Confirm that the relationship between
BasketTpMoneyandBasketSlMoneymatches your personal risk tolerance, not just the defaults. - Account for costs. Spreads, swaps, and slippage all reduce a thin mean-reversion edge; factor them into any evaluation.
Treat this EA as a framework for learning how pivots, rejection candles, and hedged money management fit together — not as a substitute for disciplined risk control and your own independent judgment.
Risk Warning
Trading foreign exchange, CFDs, and other leveraged financial instruments involves substantial risk of loss and is not suitable for all investors. The strategies and tools discussed on this page are provided for educational purposes only and do not constitute financial advice, investment recommendations, or solicitation to trade. Always consult a qualified financial adviser before making trading decisions. Past backtest performance is not indicative of future results.
Downloads
- Expert Advisor: PivotZoneRejectionHedge.ex5 (65 downloads)
- Source Code: PivotZoneRejectionHedge.mq5 (61 downloads)
- Documentation: PivotZoneRejectionHedge.pdf (80 downloads)