Disclaimer: This article is for educational and informational purposes only. It does not constitute financial or investment advice. Trading forex and CFDs carries significant risk of loss. Past performance of any strategy — including backtests — does not guarantee future results. Never trade with money you cannot afford to lose.
What Is This Strategy?
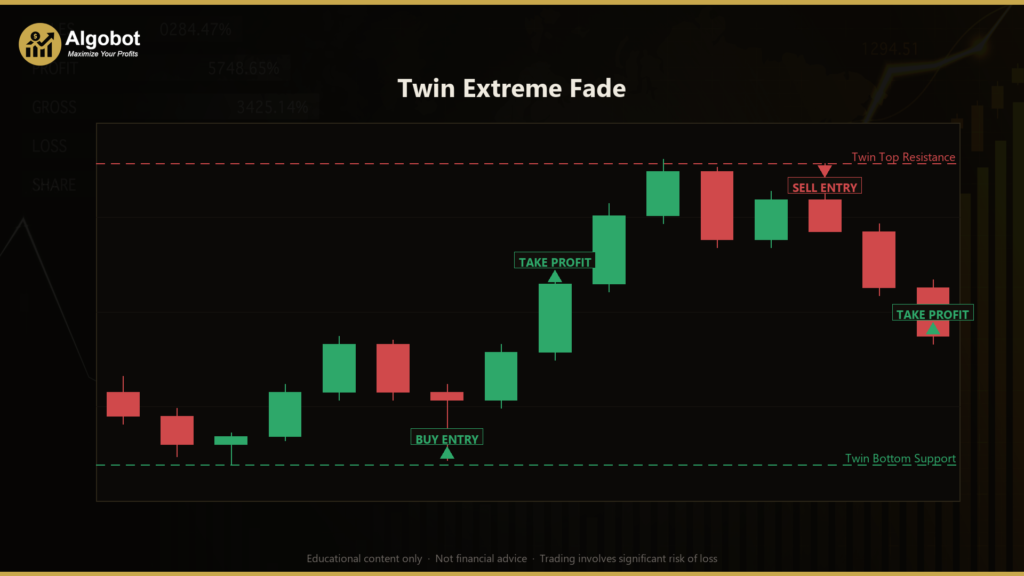
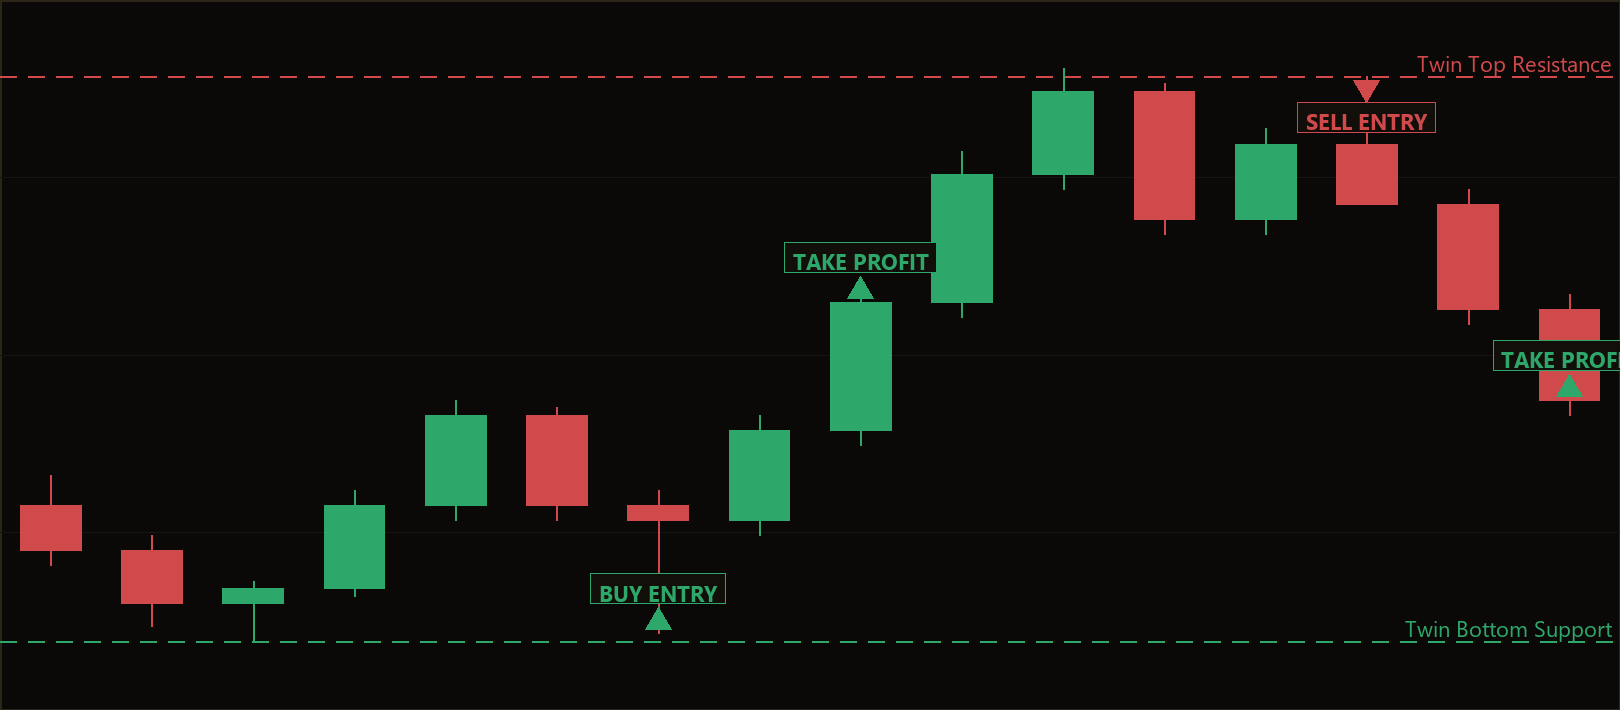
Twin Extreme Fade is a pure price-action double-top / double-bottom rejection scalping strategy built for MetaTrader 5. The "indicator" here is the candlestick chart itself — there are no moving averages, no RSI, no ATR, and no oscillators of any kind. Instead, the strategy reads raw candle highs, lows, and closes to recognise the classic "twin extreme" pattern: a market that reaches a level, pulls back, and then returns to that same level a second time only to fail. In technical-analysis terms, a failed second touch of a prior swing high is a double top, and a failed second touch of a prior swing low is a double bottom.
The thinking behind the pattern is straightforward order-flow logic. A price level that has already been rejected once represents proven supply (at a high) or demand (at a low). When price returns and stalls there a second time, it suggests the buying or selling pressure that created the first extreme is spent, while late breakout traders who pushed into the level get trapped. As their stop-loss orders trigger, they can fuel a quick snap-back — which is exactly the kind of fast move a scalper looks to capture. The strategy is therefore a counter-trend, mean-reversion scalping approach rather than a trend-following one.
This makes Twin Extreme Fade a useful learning tool for traders who want to study how reversal patterns can be defined objectively in code, without relying on lagging indicators. It is designed for tight-spread, fast-moving symbols on lower timeframes, and it is best treated as a framework for understanding price-action mechanics — not as a shortcut to results.
How It Works
The strategy evaluates the market once per newly closed candle. On each closed bar it checks a sequence of conditions before it will signal a trade. All distance thresholds are scaled to the average bar range (the mean of High − Low across the lookback window), so the system self-adapts to each instrument's volatility with no per-symbol point math.
Entry conditions — short (twin top / double top):
- The strategy scans the lookback window for the first extreme — the highest high — and requires it to sit at least
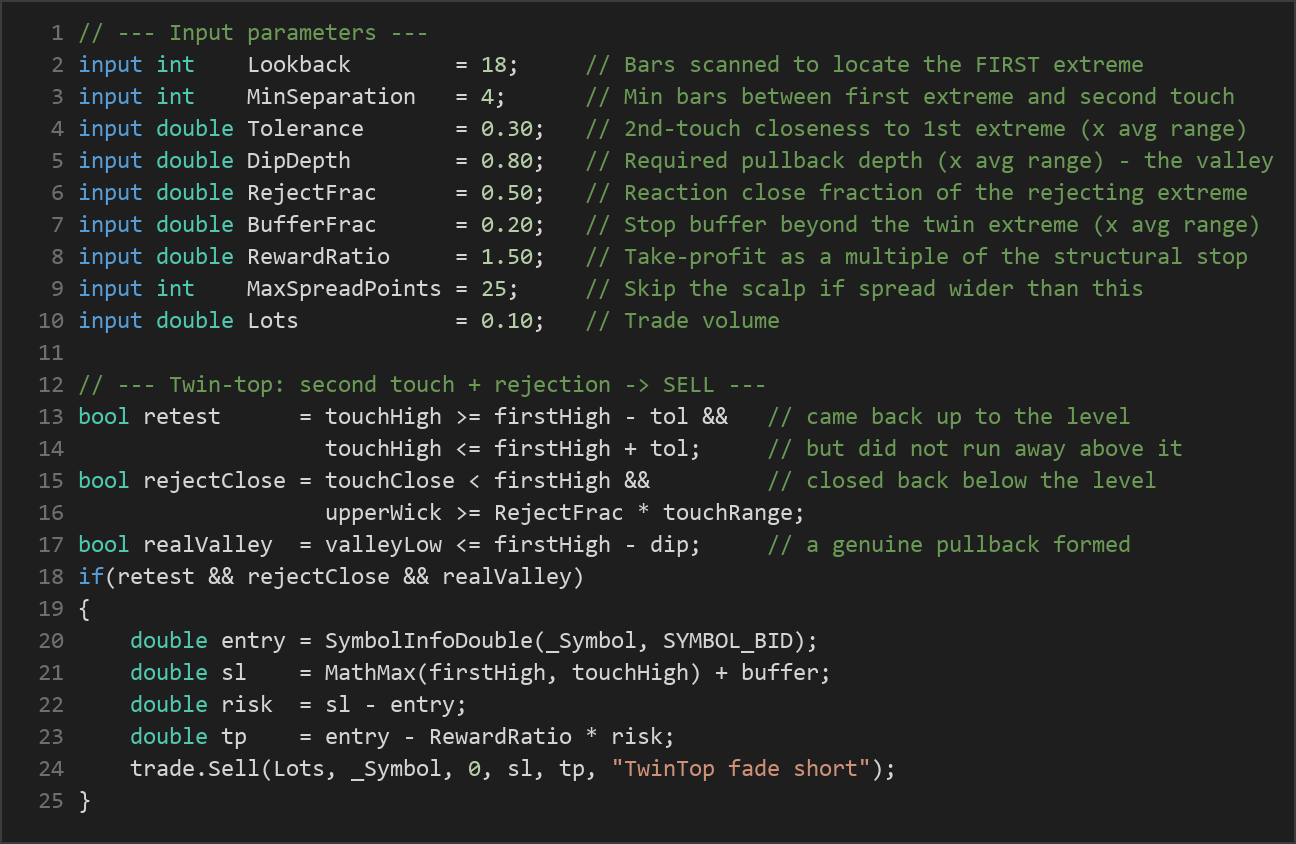
MinSeparationbars back, so the two touches are distinct swings rather than one event. - A real valley must exist between the two peaks: price must have pulled back by at least
DipDepth × average bar range, forming the "M" shape that distinguishes a genuine double top from flat chop. - The just-closed candle (the second touch) must return to within
Tolerance × average bar rangeof the first high without decisively breaking above it. - That candle must show a rejection close — it closes back below the level, and the upper wick is at least
RejectFracof the candle's total range, signalling a reaction off the high. - When all three conditions align, the strategy signals a SELL.
Entry conditions — long (twin bottom / double bottom):
- This is the exact mirror image. The strategy finds the lowest low, requires a genuine rally (
peakHigh ≥ firstLow + DipDepth × range) between the two troughs, and waits for the second touch to return to the low and close back above it with a lower wick of at leastRejectFracof the candle range. When confirmed, the strategy signals a BUY.
Exit logic — stop-loss:
- For shorts, the stop is placed just beyond the twin top (the higher of the first high and the touch candle's high) plus a
BufferFrac × average bar rangebuffer. For longs it sits just below the twin bottom. The stop is therefore structural — it rests at the exact price that would invalidate the double-top / double-bottom idea.
Exit logic — take-profit:
- The take-profit is set as a fixed multiple of the stop distance, controlled by
RewardRatio(default 1.5). With a 1.5 reward-to-risk ratio, the profit target sits 1.5 times further from entry than the stop.
Trade filters:
- Only one position at a time is allowed per magic number — the strategy lets the structural stop or target close the trade before looking for the next.
- A spread gate skips the setup whenever the current spread is wider than
MaxSpreadPoints, keeping the scalp realistic on fast timeframes.
Strategy Parameters
| Parameter | Default | Min | Max | Description |
|---|---|---|---|---|
| Lookback | 18 | 8 | 60 | Number of bars scanned to locate the first extreme (the prior swing high or low). |
| MinSeparation | 4 | 2 | 20 | Minimum bars between the first extreme and the second touch, ensuring two distinct swings. |
| Tolerance | 0.30 | 0.05 | 1.00 | How close (× average bar range) the second touch must come to the first extreme. |
| DipDepth | 0.80 | 0.20 | 3.00 | Required pullback depth between the two touches (× average bar range) — the valley. |
| RejectFrac | 0.50 | 0.30 | 0.90 | Reaction-close fraction: how far into its own range the candle must close away from the rejecting extreme. |
| BufferFrac | 0.20 | 0.00 | 1.50 | Stop-loss buffer placed beyond the twin extreme (× average bar range). |
| RewardRatio | 1.50 | 0.60 | 4.00 | Take-profit distance as a multiple of the structural stop distance. |
| MaxSpreadPoints | 25 | 1 | 200 | Skip the setup if the current spread (in points) is wider than this value. |
| Lots | 0.10 | 0.01 | 1.00 | Trade volume in lots. |
| Magic | 7314 | 0 | 9,999,999 | Magic number used to identify and isolate this EA's positions. |
Recommended Chart Settings
Twin Extreme Fade was designed for tight-spread, fast-moving symbols such as EUR/USD or XAU/USD (gold) on the M5 or M15 timeframe. These conditions give the average-bar-range scaling enough volatility to work with while keeping spread costs proportionate to the scalp's target. The logic will run on any liquid symbol or timeframe, but because the pattern depends on clean swing structure, very illiquid instruments or extremely low timeframes may produce noisier signals. Remember that results will vary considerably across different market conditions, sessions, and brokers, so any settings should be studied on a demo account before they are trusted.
How to Install on MetaTrader 5
- Download the .ex5 file from the link below.
- Copy it to your MT5
MQL5\Expertsfolder. - Restart MetaTrader 5 or refresh the Navigator panel.
- Drag the EA onto a chart matching the recommended symbol and timeframe.
- Configure the input parameters and enable Algo Trading.
What to Consider Before Using This EA
The main strength of Twin Extreme Fade is its objectivity and structure. By demanding three independent confirmations — a distinct prior extreme, a genuine intervening valley, and a reaction close on the second touch — it filters out the single-candle pins and flat shelves that fool simpler reversal rules. Its stops are anchored to real chart structure rather than an arbitrary point value, and the average-range scaling means the same settings adapt across instruments of different volatility. For a student of price action, this is a clean illustration of how a discretionary pattern can be made fully mechanical.
The honest limitation is that double-top and double-bottom patterns are counter-trend by nature. In a strong, persistent trend, a level can be touched a second time and then break clean through, handing the fade trade a loss as the breakout runs. Mean-reversion scalping historically performs best in ranging or balanced markets and tends to struggle during high-momentum, news-driven moves. The fixed reward-to-risk target also means that even a high proportion of winning trades will not necessarily produce a positive expectancy if the losers are larger or more frequent than the parameters assume. As with any pattern-based system, it may underperform when volatility regimes shift, when spreads widen during news, or when the chosen symbol simply is not respecting the levels it once did.
Treat this EA as a research and learning instrument. Forward-test it on a demo account across different sessions and symbols, and observe when it works and when it does not, before drawing any conclusions.
Risk Management Tips
Sound risk management matters far more than any single entry signal. Consider these general principles:
- Position sizing: Size each trade so that a stop-out costs only a small, pre-defined slice of your account. A common educational guideline is to risk no more than 1–2% of account equity per trade.
- Use a demo account first: Run the EA on a demo or paper account until you understand its behaviour, frequency, and drawdown profile in live-like conditions.
- Understand drawdown: Even a well-built strategy will have losing streaks. Know the historical maximum drawdown you are prepared to tolerate, and stop trading if it is exceeded.
- Account for costs: Spread, commission, and slippage all erode a scalp's small target. The spread gate helps, but real-world execution may still differ from a backtest.
- Avoid over-leverage: Leverage magnifies both gains and losses. Keep effective leverage conservative, especially on volatile instruments like gold.
- Diversify and review: Do not rely on one strategy or symbol, and review performance periodically against changing market conditions.
Risk Warning
Trading foreign exchange, CFDs, and other leveraged financial instruments involves substantial risk of loss and is not suitable for all investors. The strategies and tools discussed on this page are provided for educational purposes only and do not constitute financial advice, investment recommendations, or solicitation to trade. Always consult a qualified financial adviser before making trading decisions. Past backtest performance is not indicative of future results.
Downloads
- Expert Advisor: TwinExtremeFade.ex5 (48 downloads)
- Source Code: TwinExtremeFade.mq5 (44 downloads)
- Documentation: TwinExtremeFade.pdf (55 downloads)