Disclaimer: This article is for educational and informational purposes only. It does not constitute financial or investment advice. Trading forex and CFDs carries significant risk of loss. Past performance of any strategy — including backtests — does not guarantee future results. Never trade with money you cannot afford to lose.
What Is This Strategy?
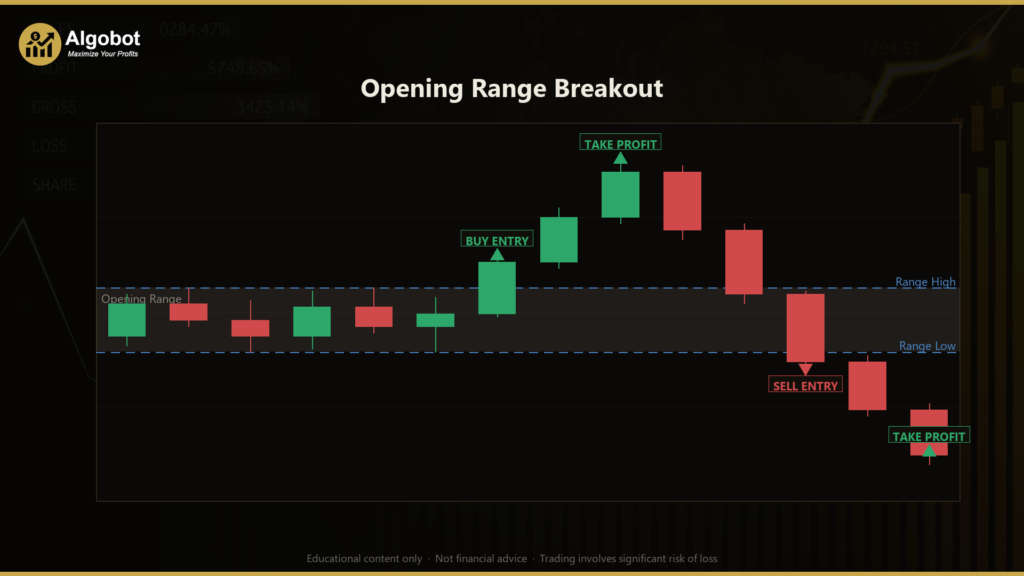
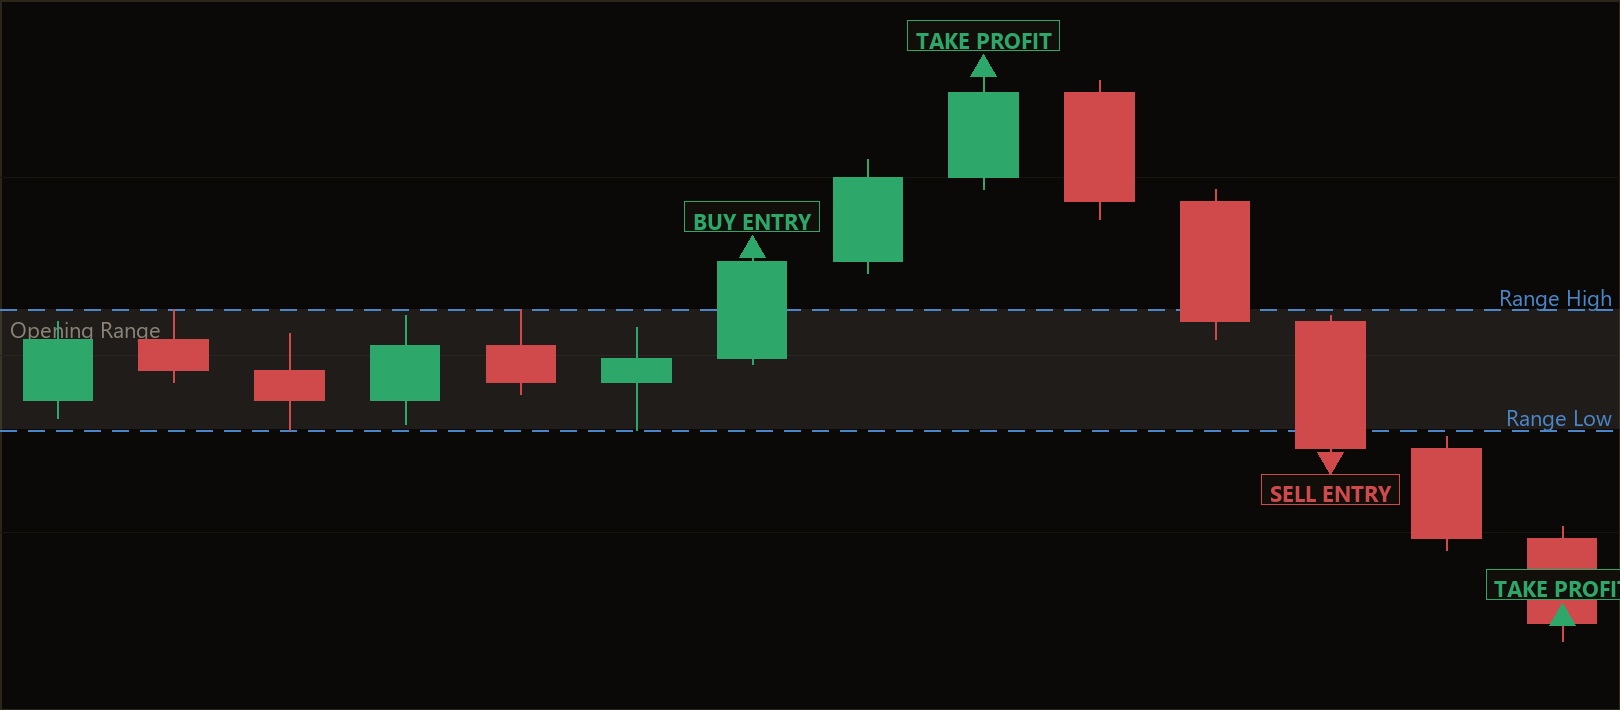
The Opening Range Breakout strategy is a pure price-action, indicator-free breakout system built around one of the oldest and most widely studied concepts in intraday trading: the opening range. An opening range is simply the high and low established during the first portion of a trading session. Many traders watch this zone because it captures where the session's initial balance between buyers and sellers — supply and demand — gets discovered before the rest of the day's participants arrive. The Opening Range Breakout approach waits for price to decisively leave that zone and then trades in the direction of the move.
Because it uses no moving averages, oscillators, or other indicators, this strategy is best understood as a study in breakout trading and market structure. It measures the high and low of the first few bars of each new day, draws an invisible "box" around them, and then watches for a confirmed bar close beyond the box. The logic is intuitive: once one side wins the early auction, momentum often carries price further in that direction. Stops and targets are not pulled from indicators — they are measured moves derived entirely from the width of the opening range itself.
As a learning tool, the Opening Range Breakout is well suited to traders who want to understand how session structure, confirmation, and volatility-based risk placement fit together. It is designed for intraday foreign exchange (forex) trading — the original development context was GBPUSD on the M15 (15-minute) timeframe — but the concepts of range-building and breakout confirmation are transferable across many instruments. This article frames the strategy as an analysis of a trading idea, not as a profit opportunity.
How It Works
The strategy operates in two distinct phases each trading day. It works on confirmed (fully closed) bars only, which helps avoid acting on incomplete price information that can reverse before a candle finishes.
Phase 1 — Building the opening range:
- At the start of each new trading day (detected automatically from the bar timestamps), the strategy resets its state and begins a fresh opening range.
- It records the highest high and lowest low of the first
RangeBarsbars of the day. Together these form the opening-range "box." - Once that fixed number of bars has closed and a valid range exists (high above low), the range is locked in and the strategy moves to Phase 2.
Phase 2 — Trading the breakout:
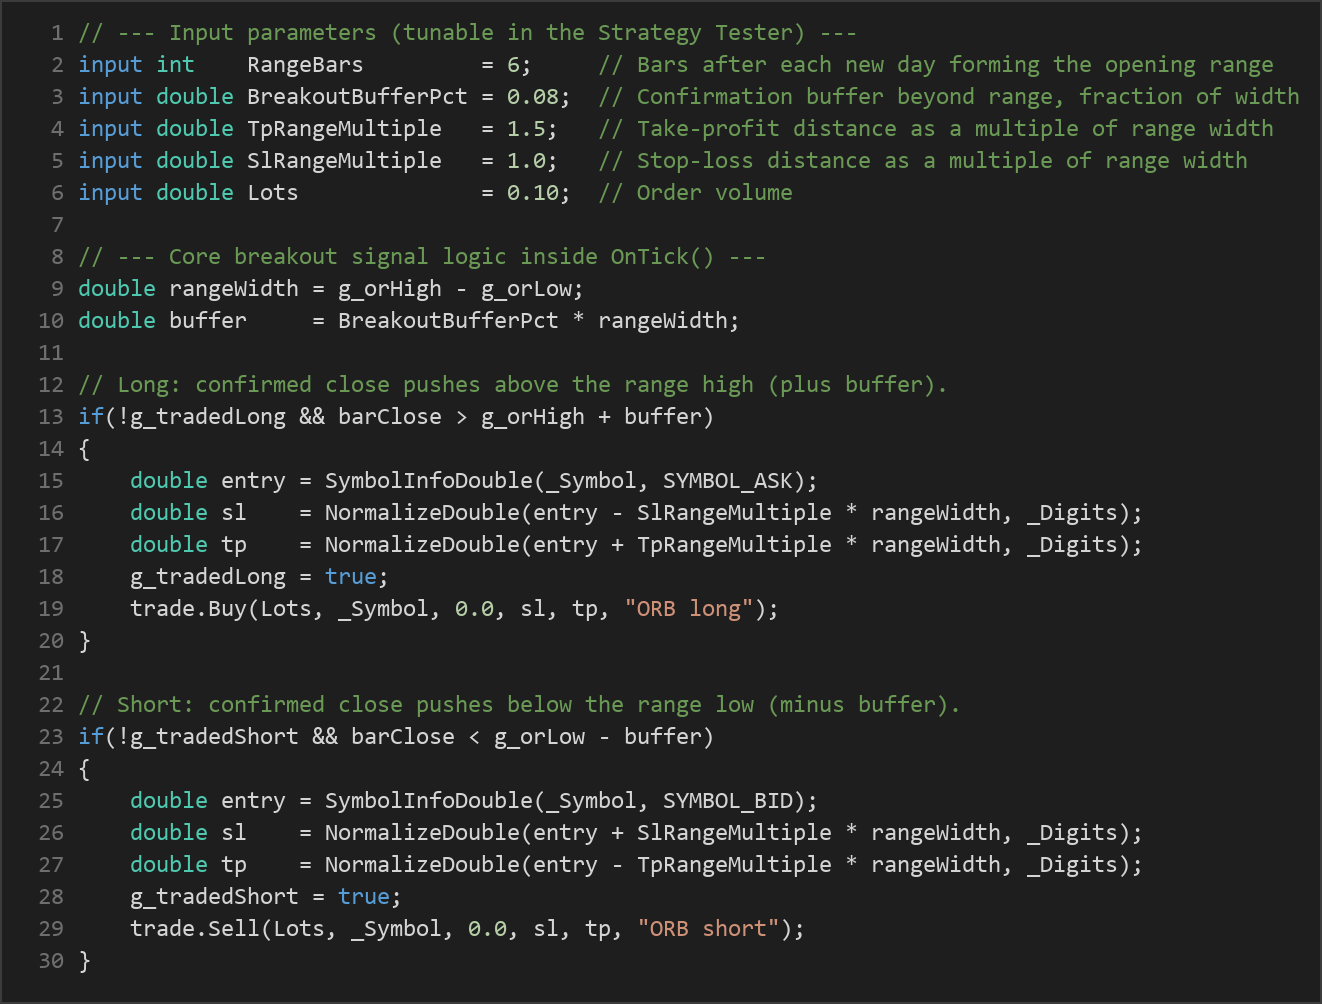
- The strategy calculates the range width (opening-range high minus opening-range low) and a small buffer equal to a fraction of that width. The buffer is a filter that requires price to clear the box by a meaningful margin rather than by a single tick.
- Long entry signal: when a bar closes above the opening-range high plus the buffer, the strategy signals a long (buy) trade in the direction of the upside break.
- Short entry signal: when a bar closes below the opening-range low minus the buffer, the strategy signals a short (sell) trade in the direction of the downside break.
- Take-profit logic: the target is placed a multiple of the range width away from entry (
TpRangeMultiple). A wider opening range therefore produces a proportionally wider target — a "measured move." - Stop-loss logic: the protective stop is placed a multiple of the range width on the opposite side of entry (
SlRangeMultiple), again scaling automatically with the day's volatility.
Trade management rules:
- Only one long attempt and one short attempt are permitted per day, which prevents the strategy from repeatedly chasing the same level after a failed break.
- Only one position at a time from this strategy's Magic number is held, so a new signal is ignored while a trade is already open.
- Each new calendar day resets the range and the long/short attempt flags, and the cycle begins again.
Throughout, every claim is a signal, not a promise. The strategy signals a breakout; it does not predict that the breakout will succeed.
Strategy Parameters
| Parameter | Default | Min | Max | Description |
|---|---|---|---|---|
| RangeBars | 6 | 2 | 24 | Number of bars after each new day that form the opening-range box. More bars build a wider, slower-forming range. |
| BreakoutBufferPct | 0.08 | 0.0 | 0.5 | Confirmation buffer beyond the range, expressed as a fraction of the range width. Larger values demand a stronger break before entry. |
| TpRangeMultiple | 1.5 | 0.5 | 4.0 | Take-profit distance as a multiple of the range width (the measured-move target). |
| SlRangeMultiple | 1.0 | 0.3 | 2.0 | Stop-loss distance as a multiple of the range width. |
| Lots | 0.10 | 0.01 | 1.0 | Order volume (position size) in lots for each trade. |
The take-profit and stop-loss multiples together define the strategy's reward-to-risk ratio. With the defaults (TP 1.5× and SL 1.0× the range), each trade risks one range width to seek one and a half — a structure many traders study when learning about asymmetric risk placement.
Recommended Chart Settings
This strategy was designed and intended for intraday forex trading, with GBPUSD on the M15 (15-minute) timeframe as the original reference market. The opening-range concept depends on having a meaningful early-session window followed by enough remaining hours for a breakout to develop, which makes liquid intraday FX pairs a natural fit.
That said, the strategy will run on whatever symbol and timeframe you attach it to. Behavior can change considerably across instruments, sessions, and volatility regimes. A 15-minute range on a calm, ranging day looks nothing like one on a high-impact news day, and results will vary across different market conditions. Treat any alternative symbol or timeframe as a fresh study rather than an assumption that the defaults will transfer.
How to Install on MetaTrader 5
- Download the .ex5 file from the link below.
- Copy it to your MT5
MQL5\Expertsfolder. - Restart MetaTrader 5 or refresh the Navigator panel.
- Drag the EA onto a chart matching the recommended symbol and timeframe.
- Configure the input parameters and enable Algo Trading.
If you prefer to inspect or modify the logic yourself, the OpeningRangeBreakout.mq5 source can be compiled in MetaEditor, and the OpeningRangeBreakout.pdf reference summarizes the parameters.
What to Consider Before Using This EA
A balanced, honest assessment matters more than enthusiasm. Here is what to weigh.
Strengths of the approach:
- Simplicity and transparency. With no indicators, there is little to curve-fit and nothing hidden. Every decision traces back to the opening-range high, low, and width.
- Volatility-adaptive risk. Because stops and targets scale with the range width, position risk automatically widens on volatile days and tightens on quiet ones, instead of using a fixed distance that ignores conditions.
- Confirmation discipline. Trading only on confirmed bar closes plus a buffer helps filter out some of the minor "stop-run" pokes through a level that immediately reverse.
Known limitations:
- False breakouts. The single biggest weakness of any breakout system is the failed break — price closes beyond the box, triggers an entry, then reverses back inside. No buffer eliminates this entirely.
- Range-bound, choppy markets. On days with no follow-through, the strategy may enter on a break that fades. Breakout logic historically performs best when a genuine trend or expansion follows the range; it tends to underperform in tight, directionless conditions.
- One-shot-per-side rigidity. Allowing only one long and one short attempt per day is protective, but it also means a strong second move after an early false break will be missed.
- Session and symbol sensitivity. The "right" number of range bars depends heavily on the instrument and timeframe. Defaults tuned for GBPUSD M15 may behave very differently elsewhere.
This is a strategy to understand and test, not a finished product to deploy blindly. Its value as a learning tool lies in how clearly it exposes the trade-offs of breakout trading.
Risk Management Tips
Sound risk management is what separates disciplined study from gambling. Whatever strategy you explore, keep these general principles in mind:
- Use a demo account first. Run the EA on a demo or simulated account until you fully understand its behavior across many days and conditions before considering any live use.
- Risk only a small fraction per trade. A common educational guideline is to risk no more than 1–2% of account equity on any single trade. Because this strategy sizes risk from the range width, check that your
Lotssetting keeps the per-trade loss within that limit on the days with the widest ranges. - Understand drawdown. Every strategy experiences losing streaks. Study the maximum sequence of consecutive losses you can tolerate emotionally and financially before committing capital.
- Mind position sizing. Match lot size to account size and stop distance — not to how confident a setup feels.
- Account for costs. Spread, slippage, and commission all erode breakout systems, which often enter at fast-moving moments. Factor realistic costs into any testing.
- Keep records. Journaling each trade and reviewing it is one of the most reliable ways to learn what a strategy does and does not do well.
Risk Warning
Trading foreign exchange, CFDs, and other leveraged financial instruments involves substantial risk of loss and is not suitable for all investors. The strategies and tools discussed on this page are provided for educational purposes only and do not constitute financial advice, investment recommendations, or solicitation to trade. Always consult a qualified financial adviser before making trading decisions. Past backtest performance is not indicative of future results.
Downloads
- Expert Advisor: OpeningRangeBreakout.ex5 (41 downloads)
- Source Code: OpeningRangeBreakout.mq5 (42 downloads)
- Documentation: OpeningRangeBreakout.pdf (50 downloads)